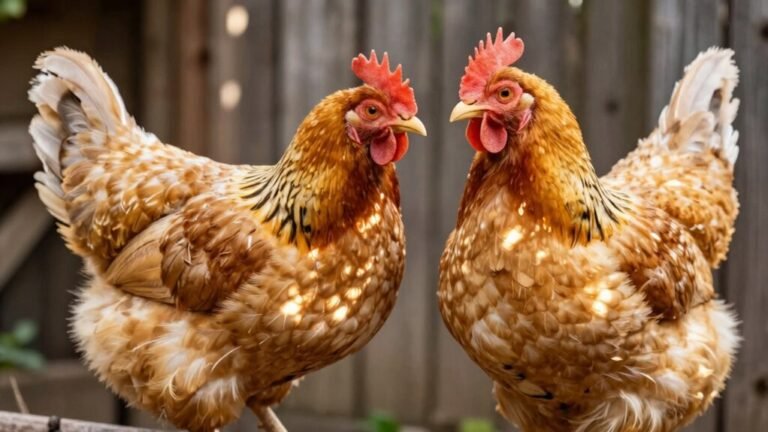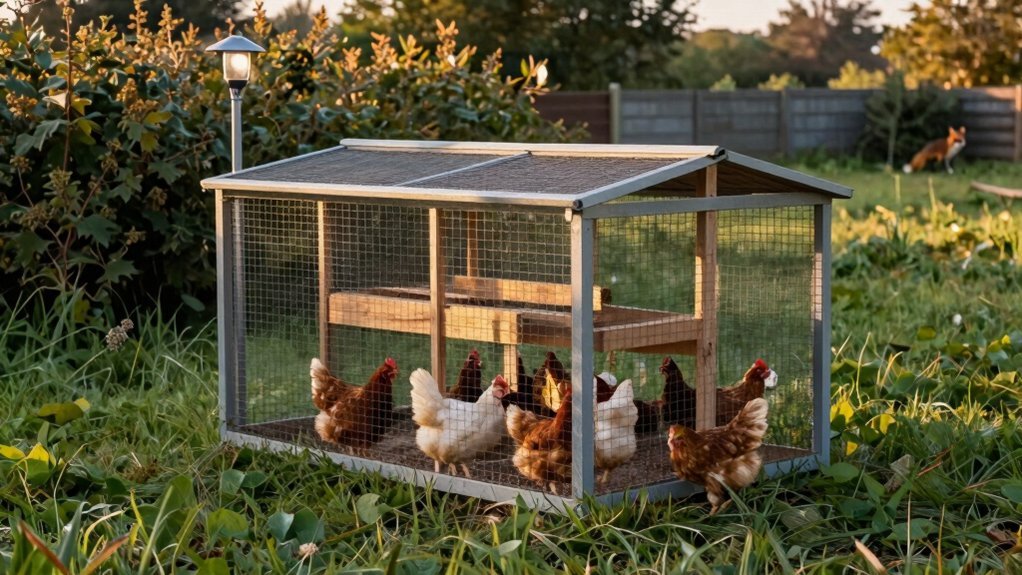
You’re right to wonder why predators keep getting in—any tiny gap or exposed feed is a red‑carpet. Use pressure‑treated lumber for a rigid frame, cover every vent, window and door with ½‑inch galvanized hardware cloth, and bury a 12‑inch‑deep apron around the run to stop digging. Add sturdy carabiner latches with dual locks, a solid roof or taut mesh overhead, and a low electric fence with motion‑activated lights for a two‑layer deterrent. Keep feed in sealed metal containers, clean spills fast, and set up infrared cameras for night alerts; these steps will seal the loopholes and give you peace of mind while you enjoy your flock.
Select Core Design Features for a Predator‑Proof Coop
What should you prioritize when choosing the coop’s core design? You’re wondering how to keep raccoons and snakes out while still letting fresh air flow. First, pick a rigid frame built from pressure‑treated lumber; it resists warping and gives you a solid base for every lock and hinge. Use ½‑inch galvanized hardware cloth (19‑gauge or heavier) on vents, windows, and any opening larger than a half‑inch, and seal every gap. Add durable flooring—treated wood or concrete slats—to prevent digging, and install sound insulation like dense foam between walls to dampen raccoon chatter and keep the coop quiet. Since most losses occur at night, ensuring your structure blocks entry through very small openings is critical against agile hunters like mink and raccoons. Because these persistent predators are known to carry dangerous illnesses like roundworm and rabies, eliminating all potential entry points is essential for flock health. What locks keep doors safe? Choose carabiner or barrel‑bolt latches, not simple slide bolts, and add multiple locking points to spread leverage. Takeaway: a sturdy frame, hardware cloth, solid flooring, and proper insulation give you a predator‑proof foundation. Next, decide how to reinforce doors and latches. To fully secure the structure against prying, you must reinforce weak points using solid wood, metal, or welded wire rather than relying on standard chicken wire.
Install Burrow‑Blocking Perimeter Barriers
A buried apron of hardware cloth is the simplest way to stop raccoons, snakes, and weasels from tunneling under your run. You’ll dig a trench about 12 inches deep, lay a 2‑foot‑wide strip of ½‑inch hardware cloth, then cover it with soil or mulch. The skirt installation forces predators to hit wire before they reach the fence edge, and a deeper bury depth—up to 24 inches—adds extra resistance for determined diggers.
How far should the apron extend? Around the entire perimeter, with the cloth overlapping at corners so no gaps remain. Secure the edges with staples or baling wire, and anchor the strip to the coop base to keep it from shifting when a raccoon tests it.
What’s the key benefit? The apron blocks tunnels while you keep the run floor open for dust‑bathing. You get a cheap, durable shield that works even on dirt floors, and you avoid the hassle of covering the whole area with wire. This physical barrier complements the need for durable materials to maintain a secure environment that reduces stress and prevents disease spread within the flock. For maximum security, ensure all mesh openings are no larger than 1/4 inch to effectively stop snakes and smaller intruders from entering. Raising the coop off the ground further deters pests like rats and snakes from attempting to burrow near the structure.
Takeaway: Dig a 12‑inch trench, lay a 2‑foot hardware‑cloth apron, and bury it at least 12‑24 inches deep. Next, consider adding a night‑time lock to keep predators out when darkness falls.
ground‑contact lumber is used for the bottom plates to ensure stability and prevent rot.
Secure Nighttime Locks and Predator‑Resistant Doors
You’re probably wondering why a solid latch matters after you’ve buried that hardware‑cloth apron. The truth is raccoons pry open simple hooks and slide bolts, so you need a latch that forces two distinct motions—think a hasp plus a sturdy padlock. Choose padlock materials like hardened steel or brass for corrosion resistance, and pair them with heavy‑duty hinges that have protective plates to stop bending or removal.
How do you double‑down on security? Install a top and bottom lock on every door, add a keyed padlock, and reinforce sliding bolts with keeper plates. Automatic door closers can lock at sunset, but always keep a manual override ready. Since foxes are most active at night, ensuring your chickens are kept indoors during these hours adds a critical layer of defense alongside your physical locks. Implementing sensor lights around the coop perimeter can further deter nocturnal hunters attempting to approach your secure housing. Minks are known to exploit small entry points to invade coops and kill chickens, so sealing every gap is essential to prevent repeated predation.
Takeaway: Use two‑motion latches, weather‑proof metal hardware, and hinge protection to keep predators out. Next, check how to seal gaps around door frames.
Install Roofs, Overhead Mesh, and Visual Deterrents on the Run
You’re probably wondering why a roof or mesh matters when hawks and eagles swoop down. The truth is a solid roof blocks dive attacks completely, while a tight‑stretched mesh stops predators from slipping through. Use hardware cloth with ½‑inch to 1‑inch wire spacing, and fasten it with screws, washers, or zip ties—these attachment methods eliminate sag and weak spots.
Here’s the thing: overlap the mesh over the side fencing and secure every corner seam. A pitched or taut covering discourages birds of prey more than a loose span, and reflective lines add a visual deterrent that keeps hawks at bay. Tricky to reach areas once the cloth is installed, so plan your access points before cutting. All right, choose UV‑stabilized material for weather resistance, then test for gaps. Since eagles are opportunistic hunters that target easily accessible birds, eliminating open exposure is critical for flock safety. Relocating feeders into these covered runs prevents hawks from ambushing chickens while they eat, making relocating feeders a vital behavioral strategy alongside physical barriers. Your takeaway: a properly installed roof and mesh, using correct wire spacing and reliable attachment methods, gives chickens safe shelter and peace of mind. Incorporating premade trusses can further streamline the construction of a durable, weather-resistant roof structure. Next, consider how to reinforce the perimeter with additional barriers.
Set Up Electric Fencing and Motion‑Activated Lights
If you’re wondering why electric fencing and motion‑activated lights matter together, it’s because they create a two‑layer defense that stops predators before they even reach the chickens.
How does light timing help?
Now, you set the lights to flash for a few seconds after motion is detected, then stay on for a short burst. This brief illumination startles raccoons and foxes, while the electric fence delivers a harmless shock if they try to push through. Since raccoons often kill multiple chickens in a single visit, this deterrent is crucial for preventing mass casualties within the flock.
What about gate grounding?
Here’s the thing: every gate must have a solid ground rod or post. Without proper gate grounding, the circuit stays open and the fence loses its bite, letting predators slip by.
What’s the best fence layout?
You’ll want a lower hot wire 4–6 inches off the ground and an upper wire around 10 inches. Use a 5,000‑volt AC charger, secure the netting with double‑spiked posts, and keep vegetation trimmed so the current doesn’t short. The system relies on a good earth connection via a grounding rod to complete the electric circuit when an animal touches the live wire, ensuring effective shocks. While these measures stop many threats, remember that possums are opportunistic scavengers that may still target vulnerable chicks or eggs if they can squeeze through small openings.
Takeaway: Combine timed motion lights with a well‑grounded electric fence, and you’ll give predators two reasons to turn back. Ready to install the charger and test the gate grounding?
Pull fence taut before any post is set in the ground.
Add Guardian Animals and Natural Deterrents
What kind of animal can actually protect my chickens? You’re probably wondering which guardian fits your farm. The thing is, breed selection matters more than size alone. Great Pyrenees, Anatolian Shepherd, and Maremma excel as livestock guardian dogs when you start socialization strategies early—let pups roam with chicks from day one so they bond and patrol instinctively.
How do birds help? Guard geese act like noisy alarm clocks; they hiss, flap, and chase intruders, giving you early warning. Raise them with your flock, provide water, and manage noise. Donkeys, especially jennies, bray loudly at canines and deter coyotes, but they need open space to patrol. Since coyotes are intelligent predators that hunt mainly at dawn and dusk, guardian animals must be particularly vigilant during these high-risk times. While ground predators often cause more loss, raptors are federally protected, so you must rely on non-lethal deterrents to stop hawk attacks without harming the birds. You can also hang reflective objects around the yard to create distracting light reflections that discourage owl attacks alongside your guardian animals.
What about camelids? A single llama, properly introduced, can guard a small flock, though you must she it and watch temperament. Roosters also serve as sentinels, especially assertive breeds.
Takeaway: Choose a guardian that matches your predator profile, invest in early socialization, and layer animals with secure housing. Next step: decide which species fits your land and start their introduction plan. Geese provide a loud, visual deterrent that can alert you to predators before they reach the chickens.
Control Feed, Eggs, and Storage to Reduce Attractants
Why does feed smell attract predators? You’re right to wonder—rodents, raccoons and wild birds sniff out grain like a beacon. Feed scent containment starts with sealed, pest‑proof containers; metal bins or steel barrels with tight lids keep odors locked out. Now, move bags off concrete onto pallets or shelves, and keep the area dry, cool, and ventilated to stop mold and moisture from adding to the smell.
Here’s the thing: spill prevention protocols are as simple as cleaning up the moment a seed falls. Use hanging or hopper feeders you can pull in at night, and only put out the amount your flock will eat in a few hours. Collect eggs daily, store them in a clean box, and discard cracked shells immediately.
All right, keep the storage room tidy, with no loose grain or dust piles, and you’ll cut the scent trail that draws predators. Take action today—audit your feed area and tighten those containers. Hot and humid temperatures increase feed oxidation. While chickens may opportunistically eat a mouse they encounter, relying on them for rodent control is ineffective and risky compared to securing your coop against infestations. Although rats generally avoid attacking adult birds, they will readily prey on chicks if an infestation becomes severe or other food sources are scarce.
Use Cameras and Regular Inspections for Ongoing Threat Detection
You’re probably wondering why a camera system matters after you’ve sealed the feed.
Now, think of cameras as night‑watch dogs that see what you can’t. Position them over doors, pop‑up windows, and fence lines, using overlapping fields of view so blind spots stay hidden. Choose wide‑angle or pan‑tilt‑zoom models, mount them high to deter tampering, and add infrared for dark‑time predators.
Here’s the thing: motion detection sends real‑time alerts to your phone, so you can react before a raccoon or coyote breaches a lock. Pair that with routine maintenance—check latches, hardware cloth, and roof edges each day for gaps, chew marks, or digging.
All right, review footage weekly. Spot repeated night‑time motion at a corner? Reinforce that spot. Light placement matters too; a well‑lit perimeter reduces nocturnal activity.
Takeaway: combine cameras with daily inspections, keep equipment powered, and act on patterns you see. Next step—set up a simple alert system and schedule a weekly walk‑through.