To build a mini chicken coop for bantams, you’ll need to allocate 1-2 square feet per bird inside and 2.5-4 square feet in the outdoor run. Start with pressure-treated lumber for an elevated base, then frame walls using non-toxic hardwood or softwood. Install proper ventilation, secure nesting boxes (one per 4-5 hens), and add roosting bars with 4-6 inches per bird. Don’t forget predator-proof hardware cloth and waterproof roofing. These foundational steps set the stage for your complete bantam housing solution.
Planning Your Bantam Coop Size and Layout
When planning a bantam chicken coop, you’ll need to carefully consider both the size requirements and layout to secure your birds’ health and comfort. Allocate 1-2 square feet of coop space per bantam, plus 2.5-4 square feet per bird in the outdoor run. Your design should include one nesting box for every 4-5 hens, measuring approximately 10″x12″x10″.
Incorporate elevated roosting bars that provide 4-6 inches of perching space per bird, and make certain sufficient vertical clearance for comfortable standing. Design your coop with proper ventilation systems and easy-access points for daily maintenance. If you’re raising chicks, plan to maintain brooder temperatures starting at 90-95°F for newly hatched birds, gradually reducing heat weekly until they’re fully feathered at 4-6 weeks old. If you’ll allow free-ranging, you can slightly reduce the outdoor run dimensions, but always maintain minimum coop space requirements to prevent stress and health issues in your flock. Small breeds like bantams may require less space than standard chickens, but adequate indoor and outdoor space remain important to ensure their health and well-being. Position nesting boxes in dimly lit areas while ensuring they remain visible from the coop entrance for egg collection.
Essential Materials and Tools for Construction
Building a bantam chicken coop requires specific materials and tools to assure structural integrity and safety. Your material selection should focus on non-toxic hardwood or softwood for the main structure, while plywood or OSB can serve as effective wall panels. For roofing, opt for metal or tin panels to guarantee weather resistance. Choosing lumber that is not pressure-treated wood helps protect your chickens from harmful chemicals.
In your tool usage, you’ll need a hammer, nails, and screws for basic construction. Incorporate hardware cloth, not chicken wire, for predator-proofing windows and vents. Install 2×4 roosting bars with the flat side up, allowing 10 inches per bird. When building nesting boxes, use solid wood or reinforced plywood, planning one box per four bantams. The coop design should prioritize security against predators by ensuring all openings are properly covered and reinforced. Include proper ventilation features with adjustable covers and ensure all access points have secure, predator-proof latches. Fresh water should be the only water source available to your bantams, especially important during times of illness when medicated water treatment may be necessary.
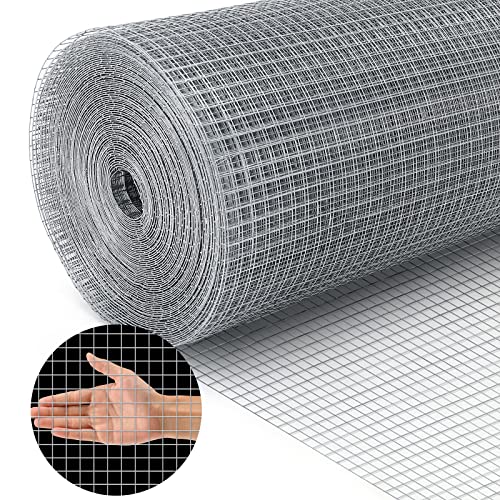
Material and size: The size of the hardware cloth is 16 inch×25 ft and 1/2 inch×1/2 inch thickness, adopt 19 guage hot-dipped galvanized material

Material and size: The size of the hardware cloth is 16 inch×50 ft and 1/2 inch×1/2 inch thickness, adopt 19 guage hot-dipped galvanized material

[Package Includes] - You will get 1 Roll of Hardware Cloth (available in 25FT/50FT) and a set of heavy-duty Zip Ties (Chicken Coop Not Included). A premium security part designed for Quictent and all standard poultry runs.
Building the Base and Frame Structure
A solid foundation forms the cornerstone of your mini chicken coop project. Begin by selecting pressure-treated lumber for your base materials, creating a rectangular frame elevated 6-12 inches off the ground using concrete blocks. Using clamps and screws for temporary holds during assembly helps ensure precise alignment of materials. Install cross braces every 12-16 inches to guarantee proper weight distribution and frame stability.
Construct wall frames using 2×2 or 1.5×2 inch lumber, adding extra studs around door openings and ventilation spaces. You’ll need to verify square corners using diagonal measurements and a carpenter’s level throughout assembly. Pre-drill holes to prevent wood splitting, and secure joints with metal brackets or pocket screws. Planning for clean, comfortable nesting areas during the frame construction stage will help ensure consistent egg production and prevent health issues for your bantam hens.
Integrate the run frame by extending your base structure, reinforcing corners with diagonal braces. Cover openings with predator-proof hardware cloth, guaranteeing proper ventilation while maintaining structural integrity. Consider installing predator scent barriers around the coop perimeter to add an extra layer of protection for your bantam chickens.

Square Chicken Roosting Bar:The unique square design prevents rotation,ensuring chickens stand stably.The widened, thickened perch has a flat surface, reducing toe pressure and protecting sensitive feet.The larger base area offers more solid support

Material: Solid wood, finish: Grey: Made of high-quality natural fir wood and coated with waterproof, non-toxic varnish. Offers waterproof, anti-corrosion, UV resistant, and long-lasting properties

【Premium Materials】This triangular small wooden chicken coop is carefully crafted from sturdy and enviromental wood to ensure a safe and reliable living environment for the chicks and being long-lasting.
Adding Walls, Roofing, and Ventilation
The structural integrity of your mini chicken coop depends heavily on proper wall construction and weather protection. Select exterior-grade plywood or cedar for your wall materials, mounting them to 2×4 studs spaced 16 inches apart. Similar to the sturdy foundation technique using pressure-treated 2x4s, your walls need reliable support materials. You’ll need to seal all edges and apply non-toxic waterproof coating for durability.
For roofing options, install a pitched design using asphalt shingles or corrugated metal with proper underlayment. Guarantee a generous overhang to protect walls from rainfall. Incorporate ventilation types such as adjustable vents near the roof peak and cross-ventilation windows with predator barriers of hardware mesh. Don’t forget weatherproofing techniques like caulking all seams and adding moisture barriers behind walls. For colder climates, include insulation choices between wall studs, but make sure they’re safe for chickens and protected from pecking.

Easy to Move: Chicken coop with four large sturdy wheels make relocation effortless, giving your chickens fresh grass to forage

Sliding door and ramp allows poultry to enter the raised housing area. There are timber ridges above the ramp to protects your poultry from slipping back. Your poultry can lay their eggs in the nesting box.

【Weatherproof Chicken Coop】Made of solid rain-resistant fir wood with eco-friendly paint, this durable wooden chicken coop ensures waterproof protection and UV resistance. Features a green asphalt sloping roof to prevent water penetration, keeping your poultry dry and comfortable.
Installing Interior Features and Nesting Boxes
Once your coop’s basic structure is complete, properly installing interior features becomes crucial for your bantams’ comfort and productivity. Start by mounting nesting box dimensions of 12″ x 12″ x 12″ in the darkest corner, elevating them 6-12 inches off the floor. You’ll need one box for every 3-4 hens. The coop should maintain a 6 ft height throughout to ensure proper ventilation and comfort.
Install rounded roosting bar height above the nesting boxes, using 1-1.25″ diameter bars with smooth edges. Space them 12″ apart, allowing 6-8″ of perch space per bird. Position your feeding and watering stations away from these areas to prevent contamination, using smaller-sized equipment suitable for bantam beaks. Create a designated dust bath area with sand and wood ash mixture, keeping it separate from feeding zones. When sourcing your bantam chicks, you can find related supplies like feed and accessories at farm supply retailers. Consider vaccinating chicks for Marek’s disease at the hatchery stage for optimal protection against this common viral illness. Confirm all components are removable for thorough monthly cleaning.

SUSTAINABLY SOURCED: The aspen used for our nest box pads are sourced only from forest product companies that are members of the Sustainable Forestry Initiative program.

Suitable Size: 4 Pack 13 x 12 inch Denforste Nesting Pads, fit for most hen house size without cutting and stitching.

EGGS STAY CLEAN AND DRY: Thin wood shavings draw moisture to the pad's paper backing, ensuring a clean, dry surface for fresh chicken eggs
Security Measures and Predator Protection
Protecting your bantams from predators requires implementing multiple layers of security throughout your mini coop’s design. You’ll need to install hardware cloth with 1/2-inch openings on all windows, ventilation holes, and around the coop’s base. Extend this barrier at least 12 inches outward as an anti-digging apron. To counter common predator tactics, elevate your coop on sturdy legs and use solid, tamper-resistant flooring. Regular coop area maintenance will help prevent attracting predators to your backyard flock.
Install two-step latches on all doors to outsmart clever raccoons, and verify your hinges use heavy-gauge hardware. Add motion-activated lights and secure the run with strong galvanized wire fencing. Reinforce the coop structure with solid wood or metal to create barriers that raccoons cannot easily pry apart or manipulate. These coop enhancements should include a covered run to protect against aerial predators. Remember to bury additional hardware cloth beneath the perimeter to prevent burrowing animals from accessing your flock. Consider planting fast-growing greens like clover or dandelions in protected areas near the run to provide natural foraging opportunities while maintaining security.
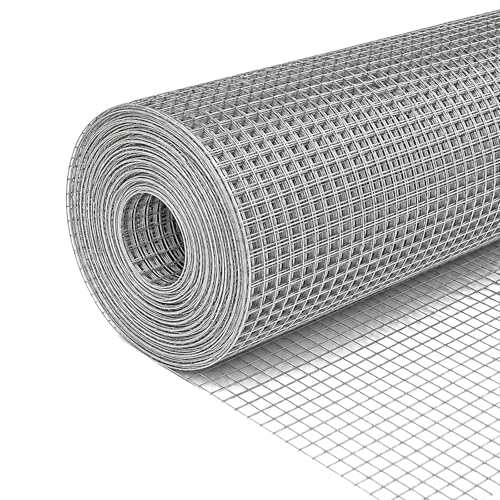
Hardware Cloth 1/2inch for Chicken Coop – 16 inch x 50 ft welded wire mesh made from 23-gauge galvanized steel hardware cloth. Provides reliable strength and flexibility for chicken wire fencing, garden protection, and general outdoor use

DUAL LAYER PROTECTION – GALVANIZED + PVC COATED HARDWARE CLOTH: This black hardware cloth / black chicken wire fencing is built with hot-dip galvanized steel wire and PVC coating, providing dual protection against rust and corrosion. Stronger than standard chicken wire, chicken wire mesh, and coated chicken wire, making it ideal for long-term outdoor use.

High-Quality Anti-Rust Process This hardware cloth is made from high-strength low-carbon steel wire, combining excellent strength with flexibility. After precision welding, the entire product undergoes a premium anti-rust treatment—hot-dip galvanization—with special reinforcement at all seams and corrosion-prone areas to ensure uniform, dense coating and outstanding rust resistance. This process grants the product superior weather resistance, making it an ideal choice for wire mesh fencing and long-term outdoor applications.