Choose a heat lamp for baby chicks by starting with a 125-watt red bulb mounted 18-24 inches above the brooder floor to maintain 95°F during week one. You’ll need to decrease temperature by 5°F weekly until reaching 70°F at six weeks. Select ceramic heat emitters or radiant panels for enhanced safety and efficiency. Consider using protective hardware cloth beneath your lamp setup to prevent accidents. Understanding proper installation and safety measures will guarantee your chicks thrive.
Understanding Baby Chick Temperature Requirements
Why is temperature control so critical for baby chicks? In their first week of life, chicks need a consistent brooder temperature of 95°F (35°C) to compensate for their underdeveloped ability to regulate body heat. You’ll need to reduce this temperature by 5°F each week until reaching 70°F at six weeks of age. A properly placed red heat bulb will minimize stress by reducing bright light and excessive pecking among chicks. Position your heat lamp 18 to 24 inches above the brooder floor to allow chicks to self-regulate their temperature needs.
Monitor your chicks’ behavior to assess temperature fluctuations. When they’re huddling under the heat source, it’s too cold. If they’re scattered and panting, it’s too warm. Proper chick comfort is evident when they move freely and eat regularly throughout the brooder space. Keep the minimum temperature at 55°F until they’re fully feathered. By six weeks, properly acclimated chicks can handle temperatures as low as 30°F (-1°C) when moved outdoors.
Types of Heat Lamps Available in the Market
When selecting a heat lamp for your chicks, you’ll encounter five main types available in today’s market: traditional incandescent heat lamps, ceramic heat emitters, radiant panel heaters, infrared heat lamps, and specialized variants with accessories.
Each heat lamp type offers distinct features. Traditional heat lamps use 250-watt bulbs and provide both heat and red light, though they can pose fire risks. Ceramic emitters deliver lightless heat and better energy efficiency. Radiant panels heat objects directly without warming the air, offering superior safety and durability. Infrared lamps distribute heat evenly while emitting minimal light. Notably, radiant heat options help chicks regulate their natural growth patterns better than traditional heat lamps. You’ll also find specialized accessories like adjustable stands and carbon fiber heaters that enhance safety and control. Consider your specific needs, as each option balances different aspects of heating efficiency, safety, and cost-effectiveness.
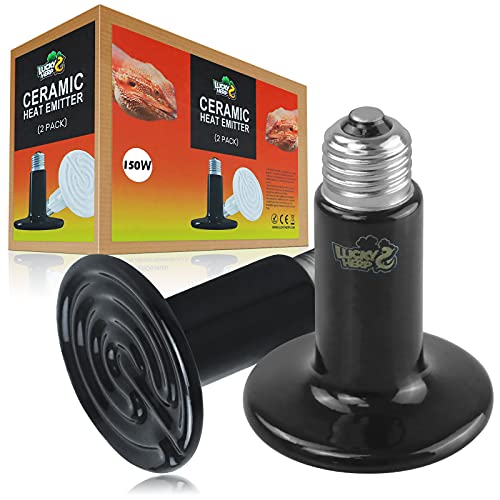
🦎No Light Emitted - The heat lamp bulb only generates heat during use, and does not emit light. It provides sufficient heat for your pets so that they can feel the warmth you made for it in a cold environment. Especially when it is used at night, it will not affect the pet's sleep.

🦎No Light Emitted - The heat lamp bulb only generates heat during use, and does not emit light. It provides sufficient heat for your pets so that they can feel the warmth you made for it in a cold environment. Especially when it is used at night, it will not affect the pet's sleep.

🦎NO LIGHT EMITTED - LUCKY HERP reptile ceramic heat lamp does not emit any visible light, only a radiant heat source. Ensuring that it provides only the necessary warmth for your beloved reptile companion without interfering with their natural day/night cycle and sleep cycle.
Wattage Options and Their Applications
Understanding heat lamp wattage options plays a central role in providing proper warmth for your chicks. When selecting bulbs, you’ll need to evaluate heat variability based on your brooding environment and the chicks’ age. For cold settings, 250-watt bulbs deliver intense heat needed in the first week, while 125-watt options work well in warmer indoor spaces. As chicks grow, you can shift to 60-watt bulbs around week 2-3, maintaining appropriate temperatures between 80-90°F.
Position all heat lamps 18-24 inches above the chicks to prevent overheating and ensure even heat distribution. Evaluate bulb longevity and safety when making your choice. Higher wattage bulbs consume more electricity and pose greater fire risks, while lower wattages offer safer heat distribution. You’ll want to avoid PTFE-coated bulbs regardless of wattage, as they can release toxic fumes. By week 8-9, you can typically remove supplemental heat if room temperatures remain above 65°F.
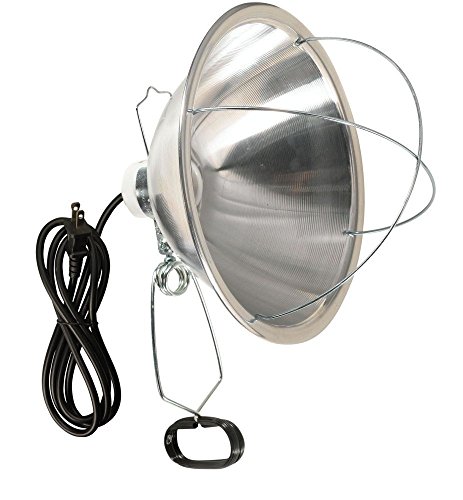
VERSATILE LAMP CLAMP with strong spring clam grips; double ball universal joint and adjustable reflector lets you direct light where you need it

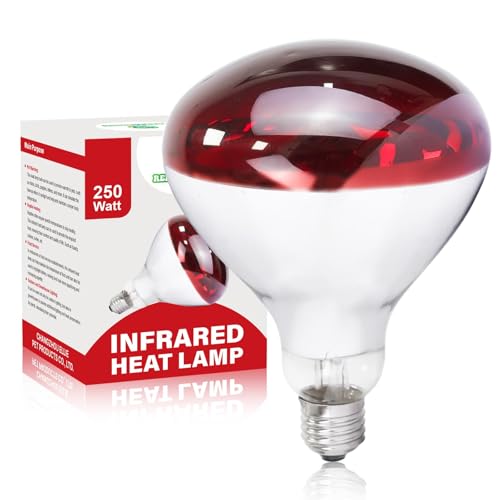
Efficient 250W Heat Lamp for Chickens & Pets: Provides powerful, rapid warmth for chicken coops, brooders, and small pets; Ensures a comfortable environment in cold weather for healthier growth

【Novique Infrared Heat Lamp】: Still worried about your pets and poultry shivering in the cold at night? Choose the Novique 250W infrared heat lamp to instantly provide your pets and poultry with a warm and comfortable environment. Beyond that, this lamp offers excellent heating performance, extended lifespan, natural light illumination, and wide application. Choose Novique to keep your pet warm at all times.
Safe Installation and Mounting Techniques
Proper installation and mounting of heat lamps requires meticulous attention to safety protocols to protect your chicks from harm. When selecting installation materials, use sturdy wire or brackets that can securely hold the lamp 18-24 inches above your chicks. You’ll need to implement proper lamp positioning to guarantee even heat distribution without creating dangerous hot spots.
Install your heat lamp in a well-ventilated area away from flammable materials, and secure all electrical components with polarized plugs and proper grounding. Use protective hardware cloth above the brooder to prevent lamp accidents, and manage cords carefully to avoid tripping hazards. Don’t forget to include an adjustable mounting system so you can modify the height as your chicks grow. Regular monitoring of temperature and equipment condition will assure your setup remains safe and effective. The red bulb heat lamp helps reduce stress in chicks by simulating the natural warmth of a mother hen.
Fire Prevention and Safety Measures
Fire safety demands unwavering attention when using heat lamps for baby chicks. To minimize fire hazards, you’ll need to establish strict safety protocols, starting with proper equipment selection. Only use heat lamps designed for continuous operation, with ceramic or metal bases rated for your specific wattage needs. Dedicated brooders are safer than standard heat lamps and space heaters for raising chicks.
Install a metal hardware cloth above your brooder to catch any fallen lamps, and keep flammable bedding materials well away from the heat source. You’ll need to inspect wiring and connections daily, watching for frayed cords or signs of overheating. Position your fire extinguisher within easy reach and verify everyone knows how to use it. Don’t forget to monitor for unusual odors that might indicate electrical problems, and establish clear emergency procedures for quick response if issues arise. Maintaining proper brooder temperature helps prevent stress-related health issues like pasty butt in chicks. Regular monitoring is especially important when using preventive treatments like Corid solution dosages for your growing flock.
Monitoring Heat Distribution and Chick Behavior
Successfully monitoring your chicks’ well-being requires careful observation of both temperature levels and behavioral cues. Place your thermometer at chick level to maintain the ideal temperature of 95°F for newly hatched chicks, decreasing by 5°F weekly. Proper heat regulation is essential since chicks have immature thermoregulation systems.
Your heat monitoring efforts should focus on chick behavior as a key indicator of comfort. When chicks spread evenly throughout the space, they’re comfortable. If they huddle under the lamp, raise the temperature; if they pant and avoid the heat source, lower it. Listen for their sounds – contented peeping indicates proper temperature, while excessive noise suggests discomfort. Watch their activity levels closely, as lethargy can signal temperature extremes. You’ll need to adjust your heat lamp’s height between 18-24 inches based on these behavioral observations.
Red Light vs. Clear Light: Making the Right Choice
After establishing proper temperature monitoring, your next major decision involves choosing between red and clear heat lamp bulbs. Red light benefits include reduced stress levels, calmer chicks, and decreased aggression due to blood masking, which prevents pecking behavior. Additionally, red bulbs typically last about six weeks longer than clear alternatives, offsetting their higher initial cost. To ensure safe operation, always use porcelain socket fixtures to prevent heat-related hazards. Just as chickens need balanced nutrition in their diet, they require appropriate lighting for optimal development.
While clear bulbs are less expensive upfront, they come with distinct risks. The bright illumination can overstimulate chicks, disrupt sleep patterns, and potentially trigger aggressive behaviors. Clear lights’ main advantage is their lower wattage options (125W vs. 250W for red), which may suit warmer environments. However, you’ll need to weigh this against the behavioral impacts and shorter lifespan. Starting at 95 degrees Fahrenheit, proper temperature control is crucial for chick survival during their first week. For most brooding situations, red bulbs offer superior benefits despite their higher initial investment.

[2 Pack 250W Heat Lamp Bulbs] Power: 250W, Style:spiral, Voltage: 110V-130V, Lifetime: >8000h, Socket: medium E26 standard base, Length: 4.85 inch / 12.3 cm, Diameter: 4.92 inches / 12.5 cm

The E26 base (screw cap) is compatible with any lamp that has an E26 socket
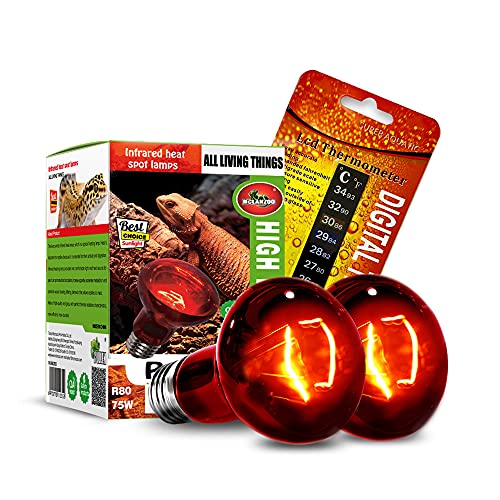
【Infrared Heating Bulb】: This red reptile heat lamp is specially used for reptiles and amphibians. This red infrared heat bulb emits infrared waves, which can increase the overall temperature of the entire aquarium and provide a warm and comfortable habitat for your pet.
Alternative Heating Methods Worth Considering
While traditional heat lamps remain popular, modern brooding technology offers several safer and more efficient alternatives for keeping your chicks warm. Heat plates provide radiant warmth while mimicking a mother hen’s natural protection, and they’ll eliminate fire risks associated with conventional lamps. You’ll find electric mats and heating pads offer steady temperatures with built-in safety features, while ceramic emitters deliver consistent heat without disrupting sleep cycles. Gradual heat reduction is essential as chicks develop and mature over time. The ideal temperature should start at brooder temperature of 90-95°F in the first week.
For off-grid solutions, you can use hot water bottles wrapped in fleece or implement natural methods like the deep litter system. These alternatives not only reduce electricity consumption but also create a more natural environment for your chicks. When selecting your heating method, consider factors like your setup size, available power sources, and local climate conditions to determine the most practical option. Adding molasses treats during cold weather can help chicks maintain body warmth while providing essential nutrients.

Application Range: you will receive 4 chick heating pads and 4 orange storage bags, sufficient to meet your various needs; These heating pads are suitable for chicks, ducklings, rabbits, hamsters, and more; Furthermore, this pet heating pads is not only foldable and lightweight, but also comes with a dedicated storage bag for easy storage and portability; Whether you have a multi zone brooding system or need to upgrade your brooding equipment, this set of products will meet your needs
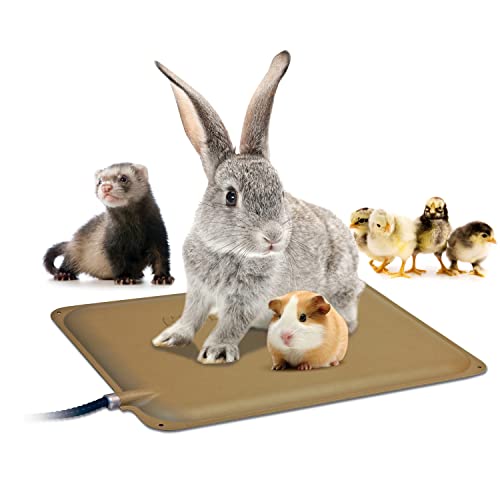
SMALL ANIMAL HEATING PAD: Indoor/outdoor heated pad for rabbits, guinea pigs, chinchillas, ferrets, chickens, peeps & more; ideal for hutches, cages, pens, coops, garages & porches for cozy warmth

Precise & Adjustable Warmth for Delicate Chicks: Sindarhor adjustable chick heater has three-Temperature Settings (131 F/149 F/167 F) adapt to varying climates and chick ages. The heated top panel (8.67x10.63 inches) delivers gentle, consistent heat while dual side panels minimize heat loss. NOTE: Actual ambient temperature depends on coop setup—always pair with a brooder box for newborns (Days 1-2)
Essential Equipment and Supplies for Heat Lamp Setup
A proper heat lamp setup requires specific equipment to assure both safety and effectiveness for your baby chicks. Your brooder design should include secure mounting hardware like sturdy clamps or adjustable metal stands to suspend the lamp 18-24 inches above the floor. Install protective hardware cloth beneath the lamp for added safety against falls. The Prima Heat Lamp provides reliable temperature control for up to 30 chicks in a single brooder setup.
Unlike conventional factory farming, free-range systems provide natural heat from sunlight once chicks mature enough to move outdoors. To optimize heating efficiency, you’ll need brooder panels or reusable fencing to contain the heat and protect chicks. Choose a 250-watt red bulb with ceramic heating elements for cooler environments, or a 125-watt option for indoor setups around 65-70°F. Position appropriate-sized feeders and waterers within the space, and use pine shavings for bedding. A well-designed setup should include proper ventilation to maintain air quality and prevent moisture buildup. Remember to keep all flammable materials away from the heat source and assure proper ventilation throughout your brooder setup.

Efficient Heating: The heat lamp for chickens provides powerful heating power, which can heat up quickly in cold environments. Our 250W heat lamp provides enough temperature for pets to ensure that your pet grows up in a warm and comfortable environment
【Efficient heating】 REPTI HOME R125 infrared heat lamp for chicken, can heat up quickly and evenly. 250W power provides powerful heat output for your pets. it ensures that your chicks get enough warmth in cold conditions.

1.This 250W red infrared heat lamp use standard E26 socket.It is suitable for most standard size lamp holders.The voltage is 120v, easy to install.
Common Heat Lamp Problems and Solutions
Setting up proper heat lamp equipment is only part of the challenge – understanding and addressing common problems helps guarantee your chicks stay healthy and safe. Watch for signs of heat lamp failures, including loose sockets, warm electrical smells, or unstable mounting hardware. Monitor your chicks for overheating signs like pasty butt or excessive panting, which indicate your lamp may be positioned too low or using too high wattage. Continuous exposure to bright heat lamps can cause permanent eye damage in developing chicks.
Avoid 250-watt bulbs, which typically create dangerous hot spots and increase fire risks. Instead, opt for lower wattage options and verify your chicks can move to cooler areas for temperature self-regulation. Install secure mounting using zip ties or ratchet straps rather than unreliable clamps, and regularly inspect electrical components for early warning signs of potential failure. Providing natural perches near the heat source can help chicks regulate their comfort levels while encouraging healthy physical development.