You’ll need about 40 square feet of indoor space and an 80-square-foot outdoor run to build a proper coop for 10 hens. Start with a solid foundation using pressure-treated lumber, then frame the walls and roof while including essential features like nesting boxes and roosting bars. Don’t forget proper ventilation, secure locks against predators, and quality materials that’ll cost between $800-1,500. Let’s explore how to create your ideal backyard coop step by step.
Planning Your Perfect Coop Size and Layout
While building a chicken coop might seem challenging at first, getting the size and layout right is crucial for your flock’s health and happiness. For 10 standard-size hens, you’ll need a coop with minimum dimensions of 40 square feet – typically a 6′ x 7′ footprint works well. Plan for at least 80 square feet of outdoor run space to give your birds room to scratch and forage. Providing extra space beyond these minimums will help create a stable pecking order and reduce stress among your hens. The Backyard Shed Coop design offers an excellent template for housing this size flock comfortably.
When considering space allocation, include three nesting boxes and two roosting bars totaling 6-7 feet in length. Position these features strategically to prevent competition and stress. Separate feeding stations from nesting areas, and make sure you’ve got adequate ventilation without drafts. Remember, if your hens won’t have outdoor access, increase your coop dimensions by 50% to provide enough living space. Installing secure locks on all entry points will protect your flock from determined predators like foxes and raccoons.
Essential Materials and Cost Breakdown
Once you’ve planned your coop’s layout, you’ll need to gather the right materials and understand their costs. For a 10-hen coop, you’ll require quality lumber, roofing materials, and hardware cloth for predator protection. Cost considerations should prioritize treated wood for durability and metal roofing for longevity. Plan for proper ventilation features to maintain healthy air circulation within your coop.
Your basic material list should include sturdy lumber ($200-500), roofing ($100-200), hardware cloth ($150-300), and essential hardware like hinges and predator-proof locks ($50-100). New coops built with quality materials can yield better value than basic kit coops priced around $500. Don’t skimp on material quality for feeding equipment – invest in reliable feeders ($25) and waterers ($25) that’ll withstand daily use. For proper sanitation, add storage bins for feed and bedding materials ($50). With predator-proofing and weatherization materials, expect your total materials cost to range from $800-1,500.

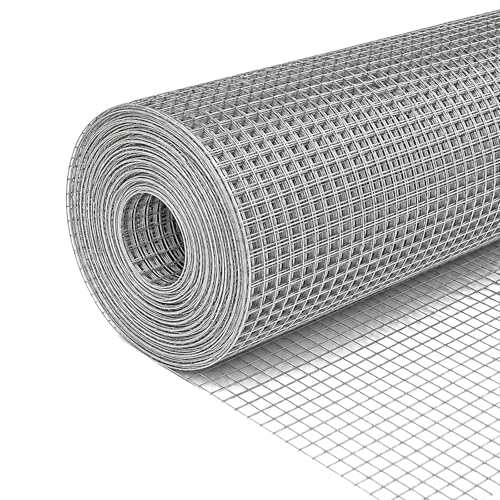
Industrial-Grade Hot-Dip Galvanized Protection: Unlike flimsy cold-galvanized wire, our hardware cloth is double-dipped in molten zinc, creating a 3x thicker coating that resists rust, scratches, and UV damage. Ideal for chicken wire fencing and duck run or rabbit/cat/dog enclosures.

Industrial-Grade Hot-Dip Galvanized Protection: Unlike flimsy cold-galvanized wire, our hardware cloth is double-dipped in molten zinc, creating a 3x thicker coating that resists rust, scratches, and UV damage. Ideal for chicken wire fencing and duck run or rabbit/cat/dog enclosures.
Step-by-Step Construction Guide
Before diving into construction, having a systematic approach will save you time and prevent costly mistakes. Start by selecting your foundation type – either a pressure-treated lumber frame or a concrete-and-brick perimeter. Level your site, then build the floor frame using 2x4s and exterior-grade plywood. This design can comfortably house 12 to 16 chickens with proper space allocation. Consider installing predator-resistant netting around the perimeter to ensure your flock’s safety. Plan for 4 square feet of interior space per bird to ensure proper comfort.
Frame your walls next, carefully measuring and cutting lumber pieces according to your plans. Include openings for doors, windows, and nesting boxes. Once walls are square and secured to the foundation, choose your roof style – whether peaked or sloped – ensuring proper water runoff. Install roosting bars, nesting boxes, and a litter tray inside. Finally, add doors with secure latches and mesh-covered windows for ventilation. Don’t forget to weatherproof joints and edges with flashing and sealant.
Ventilation and Safety Features
A well-ventilated chicken coop keeps your hens healthy and comfortable throughout the year. Install vents near the roofline on opposite walls to create cross-ventilation, with at least three openings on each side. You’ll need about 1 square foot of vent space per chicken, adjusting seasonally – less in winter, more in summer.
Position your ventilation types strategically: roof vents for ideal air movement, adjustable windows for temperature control, and side vents near the ceiling. For draft prevention, place all openings above roosting height and add overhangs to block wind-driven rain. Screen every vent with hardware cloth to keep predators out. Installing mechanical ventilation fans can provide additional airflow control during extreme weather conditions. If using heat lamps in winter, proper ventilation is essential to disperse heat and maintain safe lamp distances from bedding and wood surfaces.
Monitor humidity levels with a hygrometer, aiming to keep them below 70%. Regular cleaning and dry bedding will complement your ventilation system by reducing ammonia buildup and moisture. Ensure ventilation plans account for roosting space of at least 6 inches per bird to maintain proper air circulation around sleeping areas.

304 stainless steel woven wire mesh sheets, 5 mesh with 4.4mm square openings; embossed-wire texture at every strand creates a non-slip surface that holds its shape under load — edges and wire tips are sharp, wear work gloves during handling and installation

Professional Precision Structure - This stainless steel wire mesh is precision-woven by imported machinery, ensuring uniform mesh size and high filtering accuracy. The smooth surface allows quick cleaning, making it ideal for air vents, dryer vent covers, and fine filtration systems. Whether for HVAC, appliance protection, or DIY crafts, this metal mesh delivers consistent performance

HEAVY-DUTY 304 STAINLESS STEEL — Woven from high-tensile 304 stainless steel, this wire mesh delivers reliable rust and corrosion resistance for long-term indoor and outdoor use
Creating Comfortable Living Spaces
When designing your chicken coop’s interior, focus on creating distinct zones that match your hens’ natural behaviors and needs. You’ll need at least 40 square feet of interior floor space for 10 hens, with dedicated areas for roosting, nesting, feeding, and scratching. For best space optimization, install roosting bars 30 inches or higher, spacing them 8-12 inches apart to prevent overcrowding. Installing heated roosting bars can provide essential warmth during cold weather.
Ensure nesting comfort by providing one 12-14 inch wide box for every 3-4 hens, lined with clean, soft bedding. Position these boxes near the coop door for easy egg collection. Install ramps to help your hens access different levels, and create separate zones using hardware cloth partitions. A dirt foundation floor works well with pine shavings for odor control and moisture absorption. Remember to include an isolation area for sick hens and maintain clear pathways between functional areas. Consider adding an aluminum frame structure with predator-resistant netting for enhanced security and durability.

EASY INSTALLATION: with the included hardware, screw it to the walls inside your coop and you're done.

【CHICKEN-APPROVED COMFORT】 Natural solid wood perches satisfy roosting instincts, no more hot feet in summer, cozy warmth in winter. Not only does it provide chickens with a natural resting environment, but it also helps trim their beaks and claws, strengthens their leg and foot muscles, provides them with a place to play, and encourages them to learn to fly.Happy hens lay better!

SAFE TO PLAY: Chick perch, made of selected natural pine wood with a finely polished surface and safe waterproof coating. It is non-toxic and harmless, safe even if chicks peck at it, creating the most secure breeding environment.
Finishing Touches and Accessories
Since your chicken coop’s structure is now complete, you’ll need to focus on essential finishing touches that guarantee both functionality and safety. Start by installing predator-proof hardware cloth over all openings and secure locking mechanisms on access doors. Position sturdy wooden roosts 8-10 inches per bird, ensuring they’re elevated above removable dropping trays for easy coop maintenance. Create a dedicated waste area beneath the roosts to simplify your daily cleaning routine.
Add weather-resistant roofing and protect exterior wood with non-toxic outdoor paint. Install feeding stations and automated lighting systems to regulate laying cycles. Plan for 4 square feet of space per hen to ensure comfort. Don’t forget to include comfortable nesting boxes with clean bedding. Install a covered run to protect your flock from rain and snow while allowing outdoor exercise. For added charm, incorporate decorative accents like flower planters or hanging baskets near the coop, and surround the base with pavers to manage mud while enhancing your yard’s appearance.
Hardware Cloth 1/2inch for Chicken Coop – 16 inch x 50 ft welded wire mesh made from 23-gauge galvanized steel hardware cloth. Provides reliable strength and flexibility for chicken wire fencing, garden protection, and general outdoor use

Durable Welded Hardware Cloth & Ground Skirt: Features 1" x 1"(20 gauge) square welded hardware cloth on side walls with thickened PVC coating for superior durability and predator resistance. Combined with the extended ground skirt, it provides a professional safeguard for various poultry like dog kennels, rabbit cages, or sheep pens.

[Package Includes] - You will get 1 Roll of Hardware Cloth (available in 25FT/50FT) and a set of heavy-duty Zip Ties (Chicken Coop Not Included). A premium security part designed for Quictent and all standard poultry runs.