You’ll need 18–24 square feet of indoor space and 8–15 square feet per bird outdoors. Start with a predator-proof foundation using concrete piers or compacted gravel, then bury hardware cloth 12 inches deep around the perimeter. Install roosting bars at staggered heights, three nesting boxes, and guarantee cross-ventilation with high vents and low intakes. Secure all openings with 1/4-inch mesh and use two-step latches on doors. The specific layout decisions you make here will determine how smoothly your daily maintenance routines go.
Space Requirements and Dimensions
Getting the dimensions right is crucial—it’s the foundation of a healthy flock. For six medium chickens, plan 18–24 sq ft of indoor coop space using 3–4 sq ft per bird. Your space calculations should account for outdoor access; if your run’s limited, increase indoor space by 50%. Cornish Cross chickens, for example, benefit from ample space due to their rapid growth and health vulnerabilities. Providing your hens with adequate space helps to reduce stress and health issues, while ensuring they have access to proper calcium sources is essential for maintaining their overall health. In general, having access to outdoor run space allows chickens to thrive with more optimal conditions.
Outdoors, allocate 8–15 sq ft per bird depending on your setup. This directly impacts bird behavior—adequate space reduces aggression and boredom considerably. Larger breeds may require additional space compared to smaller varieties, so research your specific chicken breed’s spatial needs.
Install roosting bars 18–30 inches high, providing 10–12 inches per bird. Confirm 12–18 inches clearance above roosts for ventilation. Your nesting essentials include two boxes (12″ × 12″ × 14–18″), mounted 18–24 inches up and slightly below roost level. This strategic placement discourages sleeping in boxes while supporting laying comfort.

EASY INSTALLATION: with the included hardware, screw it to the walls inside your coop and you're done.

【Chicken Coop Accessories】: Designed to enhance your chickens' comfort, this extra-long roosting perch provides a natural resting spot, encouraging their instinctive roosting behavior. An ideal addition to any coop setup.

【CHICKEN-APPROVED COMFORT】 Natural solid wood perches satisfy roosting instincts, no more hot feet in summer, cozy warmth in winter. Not only does it provide chickens with a natural resting environment, but it also helps trim their beaks and claws, strengthens their leg and foot muscles, provides them with a place to play, and encourages them to learn to fly.Happy hens lay better!
Structural Design and Foundation
A solid foundation is where your hen house succeeds or fails—it’ll determine how long your structure lasts and how well it protects your flock. You’ll choose your foundation type based on your site conditions and budget. Concrete pier footings work best for permanent installations where frost heave poses a risk. Concrete slabs offer superior rodent resistance but require professional forming. For economical solutions, concrete blocks leveled on compacted gravel provide reliable support. Post-in-ground foundations suit quick builds on uneven terrain, though you’ll need pressure-treated posts to prevent rot. A dirt floor with buried hardware cloth works when drainage is good and excavation minimal. For a coop housing 6 chickens, you’ll need to ensure your foundation accommodates the standard 4 square feet per chicken space requirement. Additionally, ensure there is ample coop space to prevent overcrowding, which is crucial for chicken health and happiness. The foundation must also effectively support features like predator-proof features, which are essential for protecting your flock. Furthermore, using durable materials for your coop’s structure enhances longevity and resilience against the elements. When designing your coop, consider incorporating multiple ventilation points to improve air circulation and maintain a comfortable environment for your chickens. Silkies, in particular, require adequate protection from harsh weather due to their unique feathering and sensitivity to cold temperatures. Regardless of type, guarantee proper grading away from your coop (minimum 2% slope), install a capillary break, and anchor your frame securely to resist wind and predator leverage.
Predator Protection Strategies
Your foundation’s strength means nothing if predators breach your coop’s walls. You’ll need multiple layers of defense to protect your six chickens effectively.
Start by installing predator fencing around your coop’s perimeter, burying hardware cloth 12 inches deep to stop burrowing predators. Secure openings—windows, vents, and gaps over 1/4 inch—with 1/4-inch mesh hardware cloth, which outperforms standard chicken wire against ground-level attacks, making it a crucial element of your defense strategy.
Cover your run’s top with a solid roof or hardware cloth to block aerial predators like hawks and owls. Install two-step latches on doors that require different opening methods, preventing raccoons from manipulating simple locks. Consider using automatic doors to ensure your coop closes at night even during adverse weather conditions like snow or ice, optimizing your coop’s security at all times.
Check your structure regularly for new gaps, seal them immediately, and close doors completely at night. This layered approach creates a fortress your chickens can safely inhabit.
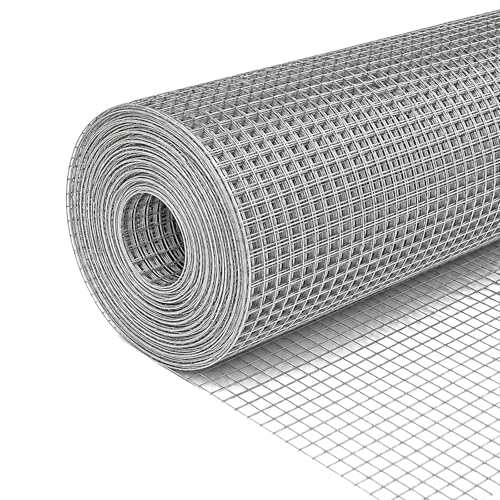
Hardware Cloth 1/2inch for Chicken Coop – 16 inch x 50 ft welded wire mesh made from 23-gauge galvanized steel hardware cloth. Provides reliable strength and flexibility for chicken wire fencing, garden protection, and general outdoor use

DUAL LAYER PROTECTION – GALVANIZED + PVC COATED HARDWARE CLOTH: This black hardware cloth / black chicken wire fencing is built with hot-dip galvanized steel wire and PVC coating, providing dual protection against rust and corrosion. Stronger than standard chicken wire, chicken wire mesh, and coated chicken wire, making it ideal for long-term outdoor use.

Material and size: The size of the hardware cloth is 16 inch×50 ft and 1/2 inch×1/2 inch thickness, adopt 19 guage hot-dipped galvanized material
Interior Features and Roosting Setup
Once you’ve secured your coop against predators, you’ll shift focus to the interior—where your chickens’ll spend their nights roosting and laying eggs. Install three nesting boxes at 18 inches high with rollaway designs and natural aspen bedding for easy egg collection from outside. For roosting bars, use 2x4s with flat sides up, positioning them at staggered heights starting at 2 feet. Space bars 18 inches apart, allocating 8-10 inches per bird. This setup prevents foot injuries and feather damage. To ensure stability, it’s important to construct sturdy roost bars that are secured firmly with nails or screws. Complement your roosting area with chopped straw or hemp bedding on the floor to reduce moisture and odor. The deep litter method with pine shavings helps manage waste while maintaining a dry environment essential for your chickens’ health. Incorporate raised platforms to maximize vertical space, ensuring your six chickens have adequate room to move and roost comfortably.
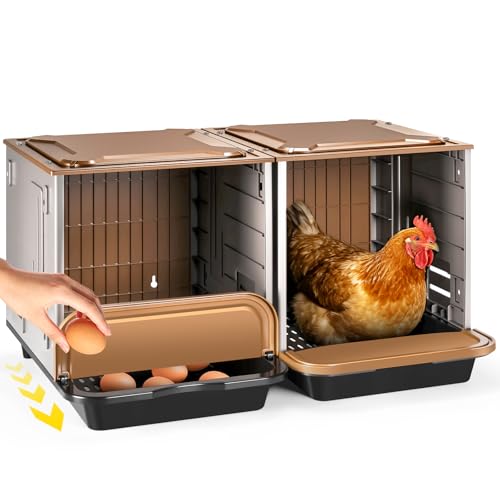

SUSTAINABLY SOURCED: The aspen used for our nest box pads are sourced only from forest product companies that are members of the Sustainable Forestry Initiative program.

Nesting Pads for Laying Hens: Made from sustainably harvested aspen excelsior, these nesting pads give your laying hens a soft, comfortable place to nest and lay their eggs
Ventilation, Flooring, and Access Points
With your roosting bars positioned and bedding laid, you’ll now address the environmental systems that keep your coop healthy—ventilation, flooring, and access points form the backbone of a functional chicken home.
For ventilation types, install high vents above chicken head level to exhaust ammonia and moisture without creating drafts. Position intake vents low near the floor with exhaust vents high, achieving cross-ventilation through opposite walls or windows. Consider natural methods like gable vents or screened roof gaps, or add exhaust fans for mechanical circulation. Proper ventilation prevents the buildup of harmful gases and bacteria that compromise your flock’s respiratory health, and keeping the coop well-ventilated also helps create a more comfortable space that may encourage healthier laying behaviors in hens, especially if the environment is comfortably maintained.
Your flooring materials should support both drainage and bird health. The deep litter method using 4-6 inches of absorbent material works well for six chickens. Additionally, ensure the nesting boxes are placed in a quiet area of the coop, as a calm environment can promote hens to lay eggs where intended. Include a pop door for daily access and guarantee all entry points feature predator-proof hardware cloth screening.