You’ll balance four heating solutions—heated bases, immersion heaters, integrated waterers, and bucket systems—against your flock size, climate severity, and budget. Consider performance specs: Farm Innovators maintain water to 10°F using 125W, while Premier1 models reach -20°F at 100W. Verify electrical compatibility, install GFCI protection on dedicated circuits, and position waterers away from drafts. Thermostatically controlled units reduce costs to roughly $0.54/month versus $1.35/month for standard models. The specifics of installation and maintenance protocols matter greatly for winter success.
Types of Water Heaters for Chicken Coops
When winter arrives, you’ll need to choose among four primary water-heating solutions for your coop: heated bases, immersion heaters, integrated heated waterers, and heated bucket or barrel systems. Each water heater type offers distinct heating efficiency and operational advantages. Heated bases sit beneath standard founts, activating thermostatically around 35°F to conserve energy. Using a heated base can also have the added benefit of preserving a consistent water temperature during extremely cold days. It’s important to note that during winter, maintaining optimal incubation temperature is crucial if you’re also incubating eggs in your coop. Immersion heaters submerge directly into water for rapid local thawing, ideal for smaller containers. It’s essential to ensure that all types of water heaters do not come into contact with high toxin levels present in any potentially harmful feed or food scraps for your chickens. Integrated heated waterers provide self-contained, plug-and-play units with built-in thermostats and freeze ratings down to -20°F, though they’re limited in capacity. Heated buckets and barrel systems support larger flocks by feeding multiple nipple lines or gravity drinkers from a central reservoir. The Farm Innovators 125W Heated Base Coop Heater represents a popular heated base option, featuring thermostat control that operates only when necessary to prevent water from freezing in temperatures as low as 10°F. Your choice depends on flock size, ambient temperature, and available coop electricity.

【Prevents Water from Freezing】-- The poultry water heater base is made of a safety standard power cord that has passed multiple quality tests, which will not melt the plastic and scald the chickens when in use. Heating base of the chicken waterer is made of galvanised steel, making it resistant to rust and corrosion. There is no need for you to go outside every day in the cold weather to change the frozen water.

250W High-Power for Fast Ice Melting: The chicken waterer heater's powerful power makes it suitable for freezing weather, effectively preventing freezing in chicken waterers holding up to 40 gallons of water. It ensures constant access to water for chickens and other poultry.

【SMART HEAT, FREEZE-PROOF】Keep your flock's water from freezing with this heated chicken waterer for winter—a cold-weather essential that reliably prevents ice down to -20°F. Its built-in 250W thermostat-controlled chicken waterer heater activates automatically at 35°F (2°C) and turns off at 70°F (21°C), making it a truly freeze proof chicken waterer. Note: Melts ice only, water does not get hot.
Key Performance Specifications to Compare
Now that you’ve identified which water heater type suits your operation, you’ll want to examine the specific performance metrics that distinguish one model from another. Temperature ratings directly impact your flock’s winter survival—Farm Innovators models maintain water down to 10°F, while Premier1 units protect to -20°F with thermostatic control activating at 40°F and deactivating at 60°F. Power consumption varies considerably: Farm Innovators requires 125W, Premier1 draws 100W, and low-voltage DC models use just 12W. These differences affect your operational costs and energy efficiency. Providing quality feed, including high-protein layer feed, supports your chickens’ health, which is especially crucial in winter. Additionally, ensuring chickens have access to dust baths can help maintain their overall well-being, even in colder months. Homemade treats made from wholesome ingredients often serve as effective dietary supplements that can enhance your chickens’ health and morale during the harsh winter months. Thermostatic controls minimize energy use during temperature fluctuations, preventing unnecessary heating cycles. The aluminum heating surface used in many poultry waterer heaters provides efficient heat transfer to maintain water temperature consistently throughout cold winter months. Additionally, when assessing your options, consider coops with efficient insulation to complement your water heater’s performance. Implementing natural thermal mass in your coop can further enhance heat retention, creating a more stable environment for your flock. You’ll need to match these specifications against your climate zone, flock size, and available electrical infrastructure to determine which heater maximizes both performance and economy for your coop.

Automatic Thermostatic Control: The Loyala Chicken Water Heater is equipped with an automatic thermostatic control, which is optimized for outdoor use in winter. It starts working at 68°F and stops working at 118°F, ensuring the optimal water temperature in cold seasons, keeping your bird bath or chicken waterer heated without overheating.

Automatic Thermostatic Control – Prevents Freezing in Any Weather: This chicken water heater features a built-in thermostatic control that automatically turns the power on and off to keep water from freezing. Whether for poultry or pets, it ensures consistent warmth and reliable operation through the coldest winter months. Ideal as a livestock water heater or water trough heater on farms and barns.
Automatic Thermostatic Control – Prevents Freezing in Any Weather: This chicken water heater features a built-in thermostatic control that automatically turns the power on and off to keep water from freezing. Whether for poultry or pets, it ensures consistent warmth and reliable operation through the coldest winter months. Ideal as a livestock water heater or water trough heater on farms and barns.
Safety and Electrical Considerations
Because heated waterers draw continuous electrical current in wet environments, they pose distinct hazards that demand careful attention to electrical infrastructure and installation practices. You’ll need a dedicated circuit with GFCI protection to cut power instantly if a ground fault occurs near water. Install your heater on properly grounded, three-prong outlets in weatherproof boxes rated for damp locations. Route permanent wiring through conduit using rated cable—never rely on extension cords. Select only UL or ETL-certified heaters explicitly rated for agricultural, wet environments. Choose thermostatically controlled models with over-temperature protection. Mount heaters where moisture and pecking can’t reach electrical connections. Verify that metal waterer frames are properly bonded to prevent stray voltages. A Thermocube automatically activates when outdoor temperatures drop below freezing, providing an additional layer of temperature-responsive safety. Additionally, consider strong physical barriers that can help prevent chickens from accessing electrical components. Young pullets develop rapid changes during maturation, which may increase their exploration and interactions with their environment, including potential hazards. When uncertain about load calculations or local code compliance, hire a licensed electrician to ascertain safe installation.
Compatibility and Coop Layout Factors
Once you’ve secured your electrical infrastructure and chosen certified equipment, you’ll need to match your heater and waterer to each other and to your coop’s physical layout.
Verify waterer compatibility first. Some heater bases approve metal only, while others accept both plastic and metal. Flat-bottom round drinkers perform best on heated bases requiring full contact. Double-wall or insulated founts demand specific heater designs to guarantee adequate thermal contact.
For coop placement, allocate level, unobstructed floor space for your heater and waterer footprint. Position the unit away from drafts, precipitation, and high-traffic areas. Guarantee refilling and cleaning access without disconnecting electrical components. Route cables within safe cord length of GFCI outlets, keeping them off ground where birds peck. Consider your flock’s layout to determine whether single or distributed heated stations best serve your birds’ water access. The state-of-the-art heating element operates efficiently without overheating, making it suitable for extended winter use in your coop.
Energy Use and Cost Considerations
The wattage you choose for your chicken waterer heater dramatically affects both your monthly electricity bill and your total cost of ownership. A 50-watt thermostatic heater costs roughly $0.54 monthly at $0.15/kWh, while a 125-watt unit runs $1.35/month—adding $13.50 during peak winter months. You’ll gain significant energy efficiency by selecting thermostatically controlled models that cycle on/off rather than running continuously. For maximum cost savings, pair your heater with insulation and thermal mass; larger reservoirs with insulating jackets reduce duty cycles substantially. Consider DIY low-watt solutions using 13-watt elements instead of older 125-watt commercial units. Combining passive freeze-prevention methods like nipple waterers with supplemental 10–20-watt trickle heating delivers reliable function while minimizing energy consumption. In addition, maintaining a suitable environment is crucial for the health and longevity of your chickens, as proper conditions help Rhode Island Reds live longer and produce better. Moreover, breeds such as heritage breeds like Ancona and Australorp may adapt better to varying temperatures, enhancing overall flock well-being. Chicken coops can also serve as effective monitoring stations for mosquito-borne diseases, allowing you to manage local pest populations while ensuring your chickens are comfortable. Seasonal variations can significantly impact your heating needs, requiring higher wattage during colder months and allowing for reduced power consumption during milder weather periods. Furthermore, using materials like pine shavings for bedding requires careful management to prevent respiratory issues associated with dust and toxins in the coop.

500W Chicken Waterer Heater for Plastic Waterer: As a chicken mama, if you still looking for new ways to keep your ladies’ waterers thawed in winter, then chances you need this chicken waterer heater to prevent water from freezing are high. Designed for use with all nipple-style drinkers and buckets, this livestock water heater will provide your ladies with clean water to grow healthily.
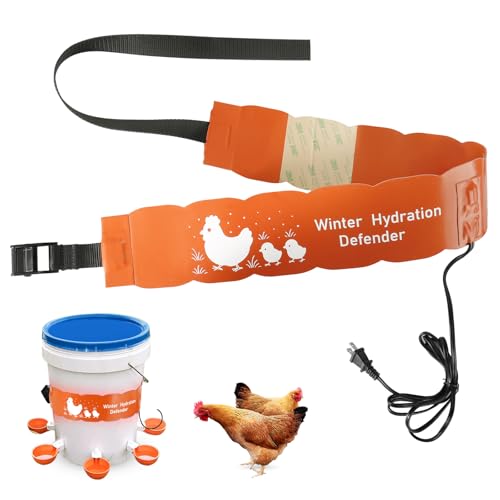
🔹Adjustable Heating Strap: Designed for 2-5 gallon buckets, the 3x30 inch heated strap wraps securely around containers to ensure even heat distribution; prevents water freezing in temperatures as low as 5°F (-15°C)

Prevents Water from Freezing: The thermostatically chicken water heater will heat up during winter temperatures below 35°F, preventing water from freezing and Ensure that poultry can drink water normally.With upgraded waterproof performance, it can be used outdoors.
Selection and Installation Best Practices
Now that you’ve calculated your energy costs and identified the most efficient heater wattage for your budget, you’ll want to focus on selecting the right equipment type and installing it safely and effectively in your coop.
Start by choosing UL/ETL-listed heaters rated for your lowest expected temperatures. Match heater style—immersion, thermostatic base, or heat cables—to your waterer design and coop layout. Heat cables with built-in thermostats offer a reliable, budget-friendly alternative to commercial heated waterers, especially for larger flocks. Additionally, providing adequate nutrition for your chickens will support their health and well-being during colder months, helping them resist parasite invasions during stressful temperature fluctuations. Remember that without access to water, chickens’ survival can become critically limited, making it vital to ensure that heaters work effectively to prevent freezing. Selecting options like automatic waterers can enhance hydration and minimize maintenance effort. Providing treats like shelled pistachios in moderation can also help support your flock’s nutritional needs during the winter season. For installation techniques, follow manufacturer instructions precisely: verify cord seating, gasket alignment, and electrical connections before operation.
Heater positioning is critical. Mount your waterer on a level surface away from drafts, positioning it at head height for your flock. Place the thermostat sensor in airflow representative of ambient conditions, typically 6–8 inches from insulated components. Secure all cords with conduit to prevent pecking damage, and install GFCI protection throughout.

Thermal Protector and Heat-Sensitive Sticker: Comes with a power switch with a temperature adjustment range of 122–167 ℉ (50–75 ℃); effective radiant heat range within 40 cm. The heat-sensitive sticker will alert you to the condition of the temperature. This sticker is black for temperatures below 113 ℉ (45 ℃) and red for temperatures above 113 ℉ (45 ℃)

Thermostatic Pet Water Bowl: No ice only anymore! This outdoor heated water bowl provides drinkable water in freezing winter for your poultry or feral animal to survive in your farmyard. The auto-heated function keeps heated continuously: the water/food temperature between 41℉-100.4℉ after powering it on

Prevents Frozen Water in Cold Weather:The 35W heating system automatically maintains water temperature to prevent freezing even in 5°F conditions. When water reaches 113°F, the system cycles off, then continues regulating to ensure consistent liquid water.
Maintenance and Seasonal Management
Keeping your heated waterer system functional year-round requires consistent attention to cleaning, electrical safety, and seasonal adjustments that prevent freeze events and water quality degradation.
Establish preventive measures by inspecting power cords, plugs, and GFCI-protected circuits before winter arrives. Test thermostatic switches in a freezer to verify activation temperatures. Monitor heated bases for circuit trips and overheating signs, relocating units away from loose bedding. Non-porous materials such as stainless steel are beneficial as they deter odor absorption and bacteria growth in heated water environments.
Your cleaning protocols should include daily visual checks and weekly full disinfection with poultry-safe sanitizers. Replace worn gaskets, nipples, and seals immediately to prevent leaks and contamination. Stock spare parts for quick repairs.
Adjust fill levels on heated bases per manufacturer specifications to optimize heating effectiveness. Anticipate increased winter water consumption by expanding reservoir capacity or adding drinkers during cold stretches. Clear ice from nipples and dispensing mechanisms regularly.

HEATING FUNCTION: This heated livestock cow water bowl constant temperature 68℉-86℉, which can resists cold weather cracking down to -20°C, You can put the rope away and use it as an ordinary automatic water bowl when there is no need to heat in summer

HEATED CHICKEN WATERER: 1.5Gal Heated Chicken Waterer to prevent the water from freezing due to cold weather and provide poultry drinking warm water

AUTOMATIC FILLING OF WATER: This pet water bowl is equipped with a float valve that automatically fills water. The heated water bowl not only prevents water from freezing in the cold winter, but it also provides enough fresh water for animals at any time. It's perfect for giving your pets warm water to drink during the colder months