Pick a sunny, well‑drained edge of a native‑plant band and lay out a 30‑degree A‑frame coop using reclaimed pressure‑treated pine. Allocate 2–3 ft² per standard hen, 1 ft² per bantam, and at least 250 ft² of free‑range area per bird. Insulate walls with straw bales or recycled cellulose, and cover the roof with corrugated metal or white translucent plastic for winter light. Install predator‑proof hardware‑cloth fencing, underground mesh, and a heavy‑duty aluminum door with motion‑activated lights. Add elevated nesting boxes, perches, and easy‑clean bedding, then finish with vented windows and a ridge vent. Continue for and you’ll uncover detailed construction steps and maintenance tips.
Choose the Ideal Site for a Free‑Range Chicken Coop
Where should you place your free‑range coop to maximize garden integration, predator protection, and pasture health? Choose a spot on the edge of a native‑plant band—clover, mallow, and other soilultural species—so chickens can forage without trampling ornamental beds. Position the coop near a sunny patch for solar‑lighting, which extends daylight for foraging and reduces mud. Install electric fencing and a predator‑proofed mobile tractor to keep hawks and raccoons out while allowing easy rotation. Connect a compost‑integration bin to the coop door; manure enriches the soil and fuels the garden’s nutrient cycle. Guarantee gutters divert runoff away from the henyard, preserving drainage and preventing disease‑promoting puddles. This layout balances pasture health, garden aesthetics, and robust predator‑proofing. Use secure hardware cloth at the base of the run to deter digging predators and prevent rot. Reinforce the coop walls with solid metal to thwart raccoons from prying open any gaps.
Calculate Space Requirements for Your Free‑Range Flock
If you want to keep your flock healthy and your garden thriving, start by calculating the exact square footage each bird needs inside the coop, in the run, and across the free‑range area. First, apply breed budgeting: allocate 2–3 ft² per chicken for standard hens, 1 ft² for bantams, and 3–4 ft² for laying hens indoors. For the run, budget 8–10 ft² per bird, scaling to 4 ft² for bantams and 10 ft² for layers. Then, estimate free‑range space at 250–300 ft² per bird, ensuring at least 2 ft² of accessible range within a 400‑yard perimeter. Add headroom, roosts, and nesting boxes, and factor in predator deterrents like secure fencing and overhead cover. This data‑driven layout minimizes stress, disease, and pecking, while maximizing garden productivity. For a 4×8 foot coop with outdoor access, aim for 4 ft² per standard bird to keep density optimal. Providing at least 4 square feet per chicken is essential for comfort and health.
Design an A‑Frame Layout for a Free‑Range Chicken Coop
Start by sketching the A‑frame on graph paper, then cut the 2x4s to a 30‑degree miter so the right‑triangle sides meet at 60‑degree corners; this geometry gives you a sturdy, self‑supporting roof while keeping the floor footprint compact enough for mobile pasture rotation. Lay out two L‑shaped base assemblies, square them by checking diagonals, and attach 64‑inch 2x8s to 10‑foot skids with 45‑degree ends for mobility. Add corner braces for Structural bracing and secure hardware cloth over the joists. Install six diagonal 2x4s notched to hold the ridge board, plus vertical supports at each end and a centered one spaced 21 ⅓ inches apart. Place horizontal 2x4s at 32 inches to level the floor and tie the sides together, completing the A‑frame geometry. Materials gathered were sourced from reclaimed, recycled, and salvaged supplies.
Choose Ventilated, Insulating, Durable Materials
What material you pick determines whether your coop stays cool in summer, warm in winter, and lasts years without constant repairs. Prioritize ventilation airflow by installing hardware cloth (≈$55 per roll) and sliding windows like the PawHut 47″ model; small roof‑line openings release moisture and prevent mold. For insulation density, stack straw bales or fill gaps with cellulose recycled paper, denser than fiberglass and fire‑treated. Add breathable polyester batting from recycled bottles for moisture‑resistant walls. Choose durable framing: pressure‑treated pine or tropical cedar resist rot, while foam boards give lightweight thermal resistance. Weatherproof roofs (PawHut 77″) and double‑pane windows cut heat loss. This combo delivers data‑driven, sustainable performance without excess cost. Straw bales provide thick insulation through air pockets, enhancing temperature regulation. Regularly inspect the coop for lice eggs to catch infestations early and prevent damage to the bedding material.

Durable Welded Hardware Cloth & Ground Skirt: Features 1" x 1"(20 gauge) square welded hardware cloth on side walls with thickened PVC coating for superior durability and predator resistance. Combined with the extended ground skirt, it provides a professional safeguard for various poultry like dog kennels, rabbit cages, or sheep pens.

[Heav DutyTure 19 Gauge Construaction] – Thicker and stronger than standard 19 gauge hardware cloth that bends easily and fails under pressure, our mesh is built with true 19 gauge galvanized steel wire. This extra thickness provides superior strength and rigidity, making it ideal for applications that demand real durability—such as predator-proofing chicken coops, rabbit hutches, and animal enclosures. It resists bending, stretching, and chewing far better than lightweight alternatives.
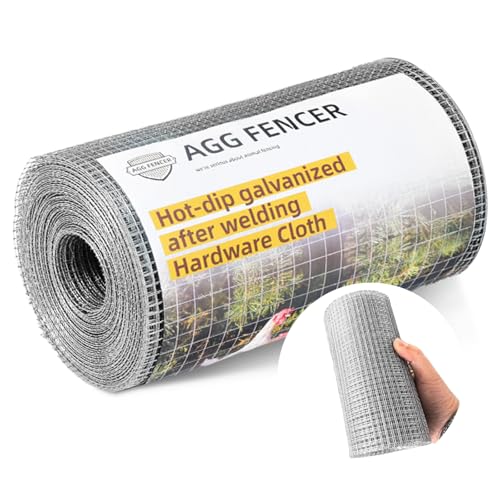
Product details: The length of this hardware cloth is 8 inches/ 20.32cm, the width is 25ft/ 7.62m, and the hole size is 1/4 x 1/4inch. It is very suitable for repairing damaged chicken coops, gaps under houses and other small-sized damaged holes
Build the Elevated Platform and Bamboo Walls
When you raise the coop on a 1‑to‑3‑foot platform, you instantly boost airflow, keep predators out, and create a dry, easy‑to‑clean space underneath. Use 4×4 pressure‑treated timber legs at each corner, bolting them with 1/2″ carriage bolts to angle brackets for a stable base. Frame the platform with 2x4s, spacing cross‑pieces 16 in. apart, and add 2×6 or 2×8 runners to spread the load. Install mesh or grated flooring to let waste fall through, or lay 3/4″ plywood for solid coverage. For walls, stack bamboo poles vertically, then apply Bamboo wall reinforcement with stainless‑steel straps and cross‑bracing. This design maximizes Elevated platform ventilation while staying cost‑effective and easy to maintain. Chickens also need grit to properly digest their feed and avoid digestive issues. Providing flint grit ensures their gizzard can efficiently break down tough grains.
Install Predator‑Proof Doors, Ramps, and Access Points
If you want predators out and chickens in, install a predator‑proof door, ramp, and access points that combine strong hardware cloth, secure locking hardware, and automated controls. Choose a heavy‑duty aluminum door with a polycarbonate cover, then fit sliding bolts or padlocks as locking mechanisms. Add a light‑sensor timer and dual‑power (battery/DC) switch for automatic closing. Build ramps from quarter‑inch hardware cloth, secure them with screws and washers, and elevate the entry 18 inches; include hardware cloth framing around the ramp opening for draft‑free ramp sealing. Cover vents and windows with ¼‑inch hardware cloth, reinforce hinges with barrel bolts, and install motion‑activated lights. Sink mesh 12‑18 inches underground, extend a 12‑inch apron, and check all points weekly for wear. This data‑driven setup blocks raccoons, foxes, and dogs while keeping chickens free to roam. The coop was raised 18 inches to provide extra under‑coop space and allow wagon access for waste sweeping. Regularly inspect the coop for signs of feather loss to catch any mite infestations early. Mite infestations can cause blood loss leading to anemia and reduced egg production.
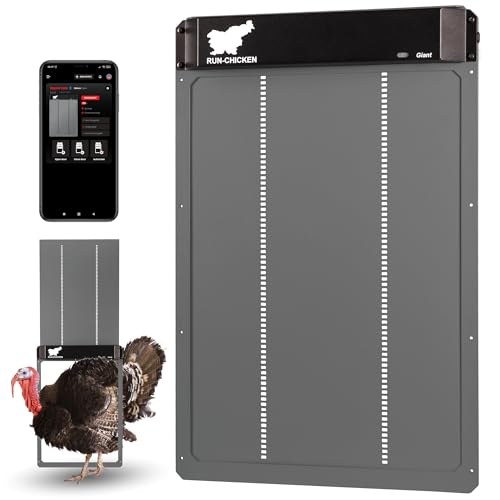
Large Automatic Poultry Coop Door – Reliable & Safe The RUN-CHICKEN Door Giant automatically opens and closes at sunrise and sunset, keeping your flock secure even when you’re away. Designed for large poultry runs, coops, and big birds — fits ducks, turkeys, and Brahma-sized breeds comfortably.

Large Automatic Poultry Coop Door – Reliable & Safe The RUN-CHICKEN Door Giant automatically opens and closes at sunrise and sunset, keeping your flock secure even when you’re away. Designed for large poultry runs, coops, and big birds — fits ducks, turkeys, and Brahma-sized breeds comfortably.

RECLAIM YOUR MORNINGS & EVENINGS: Stop trudging out at 5AM in freezing rain or rushing home before dusk. Set the LCD timer once (programmable to the exact minute), and the door opens and closes automatically every day. Enjoy your coffee in bed while your flock is let out right on schedule
Set Up Nesting Boxes, Perches, and Bedding
After securing predator‑proof doors and ramps, turn your focus to the interior comforts that keep hens laying consistently: nesting boxes, perches, and bedding. Choose box size to match breed—large,14” × 14” × 14”, small 12” × 12” × 12”, bantam 10” × 10” × 10”—and provide at least two boxes for three hens, adding one per every three to four extra birds. Mount each box 50 cm (18 in) from the floor, initially on the floor for two weeks, then on the darkest, private wall to deter roosting on the roof. Install a sturdy perch at the same height for easy access. For Bedding selection, use straw, hay, or shredded paper, keeping it dry and changing it regularly to prevent mold and guarantee clean eggs. Easy‑clean plastic pads can improve hygiene and simplify maintenance. Elevated nest boxes prevent egg cracking in cold temperatures. Some breeds, such as the polydactyl varieties, may have an extra toe, but this does not affect coop design. Adding a protective overhang to the external nesting boxes helps shield eggs from rain and sun.
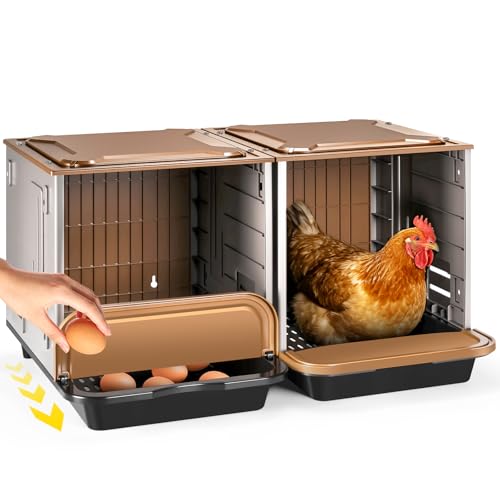

Spacious Chicken Coop: Measuring 41.0"L x 20.8"W x 20.3"H, Spacious nesting boxes for chickens provides plenty of space for chickens, rabbits ducks, Guinea Pigs and other small animals to roam, nest, and rest comfortably

Package Includes: You will receive 4 chicken nesting box featuring a one-piece design that requires no assembly, it is ready to use right out of the box, simply place it in your chicken coop, backyard, or barn right out of the box, saving you time and effort
Create a Secure Free‑Range Run and Fencing
Even before you let the hens roam, a well‑engineered run and fence is the backbone of a safe free‑range system. Choose 1/2‑inch welded wire mesh or hardware cloth for the main perimeter; it blocks mice, snakes, raccoons, and foxes. Use 1‑inch wire on the upper tier to cut cost while keeping security. Attach mesh with heavy‑duty U‑shaped nails or staples, double‑layer vulnerable spots, and zip‑tie overlaps. Dig an 8‑12‑inch underground trench around the run, curve the buried fence outward, and bury the cloth 8‑12 inches deep. Fill the trench with rocks or add a skirt apron for extra predator prevention. Space side supports 8 feet apart, set posts in concrete, and reinforce the base with horizontal 2‑by‑4 boards. This ground fencing and barrier system delivers reliable, data‑driven predator protection. Proper restraint of a chicken during eye medication ensures safe handling and reduces stress. Adding a 12‑inch apron around the perimeter further deters digging predators such as raccoons and foxes.

Galvanized hardware cloth roll 16 inches x 50 foot with 1/2 inch mesh 19 gauge.

HEAVY DUTY MATERIAL – Strong 19 gauge galvanized steel delivers long lasting durability for outdoor fencing projects

[Heavy Duty Material]: Gbekery Hardware cloth is crafted from high-quality, robust materials. And The size of the chicken wire is 16 inch×50 ft and 1/2 inch×1/2 inch thickness.
Finish Coop: Roofing, Trim, and Easy Maintenance
Since the run’s fence already protects the hens, the roof is the final barrier that keeps weather out and temperature stable; choose a material that balances durability, insulation, and low upkeep—corrugated metal, black powder‑coated steel, or white translucent plastic each meet those criteria while allowing quick installation directly onto the 2×4 framing without extra decking. Install metal or plastic roofing straight to the framing, then add a drip edge and 1/4‑inch plywood underlayment for roof ventilation. Use a ridge vent or soffit openings to promote airflow and prevent condensation. White translucent plastic boosts light transmission in winter, cutting heating costs. Finish trim with pressure‑treated fascia, seal seams with silicone, and schedule a quarterly inspection; all steps keep maintenance minimal and hens comfortable. During a molting season, chickens may appear scruffy and lose feathers, which can affect their heat retention and the coop’s insulation needs. Providing at least 5 sq ft of outdoor run per bird helps maintain their health when they have limited indoor space.