
You’re staring at bald patches and frantic scratching, wondering if it’s just a molt or a mite invasion stripping your flock bare. Here’s the thing: irregular bald spots with red, scabby skin mean *Knemidocoptes* mites, not normal shedding. You need to treat the whole flock tonight with permethrin or spinosad, then repeat in seven days to break their life cycle. Obviously, you’ll also scrub that coop clean. If you stick around, we’ll walk through exactly how to spot those tiny buggers before they cause more damage.
What Are Depluming Mites and How Do They Damage Feathers?
If you’ve been staring at your flock wondering why they’re turning into featherless dragons, you’re probably dealing with depluming mites, specifically *Knemidocoptes gallinae*. These microscopic pests don’t just hang out on the surface; they burrow right into feather shafts around the neck and vent. That intense itching makes your birds pluck themselves bare while the mites feast on tissue fluids. Now, here’s the thing: understanding the mite life cycle is essential because eggs resist single treatments, demanding repeat applications to truly stop the infestation. Once you eliminate them, your chickens need specific feather regrowth nutrition to repair that damage and restore their coats. Obviously, ignoring this leads to scabby skin and stressed hens. You’ve got the knowledge now, so grab those treatments and get your flock feeling comfortable again before the spread worsens.
How to Tell if Your Chicken Has Mites or Is Just Molting
Why does your heart sink every time you spot a bare patch on your hen, wondering if it’s just nature’s annual haircut or a microscopic invasion? You need to look closer. Molting drops feathers evenly across the flock, while mites create ugly, irregular bald spots on individual birds. Check for new pin feathers; their absence signals trouble. Obviously, irritated, red skin means parasites, not a healthy molt. Watch your chicken’s behavior too. Lethargy fits molting, but frantic scratching screams infestation. Don’t ignore feather color changes or high coop humidity, as dampness often invites these pests. If only one bird suffers while others remain pristine, you’re likely facing mites. Trust your gut when you see crusty debris. Identifying the real culprit now saves your flock from severe stress later. You’ve got this, so take action today. To confirm your suspicion, you should check the vent area and under wings for tiny moving bugs.
Where to Find Depluming Mites on Your Hen’s Body
You’ve spotted the bald patches and ruled out a simple molt, so now you need to know exactly where these microscopic jerks are hiding on your bird. Check the neck, back, and vent first; they love burrowing right at the feather base. That’s where they feast, causing intense irritation that makes your hen pluck herself bare. Look closely under the wings and on the thighs too. You’ll often find red spots or thickened skin there. Since they live under the skin, you won’t see them crawling around like lice. Instead, hunt for tiny skin cracks or scabs near those damaged shafts. The head and breast areas also harbor these pests, leading to inflammation. Obviously, missing a spot means the problem persists. Focus your inspection tightly on these specific zones to catch them before they spread further across your flock tonight.
How to Confirm a Mite Infestation in Your Coop Tonight
Three dead giveaways will expose those sneaky red mites tonight if you know exactly where to shine your light. You’re tired of guessing why your hens look ragged, right? Grab that flashlight now. Red mites actually glow under your beam while they feast on sleeping birds. Check every crack under the perches because they scatter at dawn. Obviously, grey ash-like dust around crevices means they’ve been partying there all night. Here’s the thing: sometimes they hide too well for your eyes alone. That’s when your nighttime inspection needs backup. Slap some blue painters tape on the roosts before bed. This simple tape capture method traps crawlers overnight so you see undeniable proof by morning. Don’t wait until summer heat spikes their activity. Confirm it tonight, then you’ll know exactly what battle you’re fighting tomorrow.

These 2 Pack of single mode red light flashlights are specially designed for night activities. Human's eyes are most sensitive to the Red range of light, but animals are not spooked by a Red LED flashlight, so these red lights are very helpful to find the animals in the dark, like hogs, coyotes, fox...are less sensitive to the Red light, so you can find them without disturbing them.

Red LED Flashlight for Observer - Locating the target at night and not to scare them could be hard, if you use the white light, animals will hide from you. If you want to watch their natural behaviors at night, this red led night light flashlight is the ideal flashlight to do so, helping you observe turtle, snakes, and the reptiles easily and clearly.

This one mode single mode red light flashlight is specially designed for night activties. Human's eyes are most sensitive to the Red range of light, but animals are not spooked by a Red LED flashlight, so this red light is very helpful to find the animals in the dark, like hogs, coyotes, fox...are less sensitive to the Red light, so you can find them without disturbing them.
Treat the Entire Flock Immediately to Stop Mite Spread
Once you spot even one ragged hen, you’ve got to treat the whole flock immediately because waiting for everyone to look sick is how you lose the battle before it starts. Mites move fast, so your Immediate treatment plan must hit every single bird today. Grab permethrin dust or Spinosad spray and work it deep into feathers, focusing under wings and vents. Don’t skip anyone; hiding mites will just restart the cycle. While you’re at it, enforce a strict Flock quarantine to stop new bugs entering while you fight these. You’ll need to repeat this process in seven days to crush newly hatched eggs that survived round one. Obviously, missing a bird means starting over, and nobody wants that headache. Just commit to treating everyone now, clean the coop thoroughly, and you’ll break their life cycle fast. It’s simple math: treat all or lose all. So grab your spray bottle and get to work before dinner. For sustained control, experts recommend alternating applications of both permethrin and spinosad to target multiple life stages effectively.

NATURAL AND NON-TOXIC FORMULA: Made from natural essential oils, Premo Poultry Spray is a safe alternative to harsh chemicals like permethrin and mite dusts. Veterinarian and farm approved. Apply directly on all poultry. Treat your entire flock, pens, roosts, coops, nest boxes, and yards. Enjoy peace of mind knowing that your chickens and other poultry is protected naturally and safely
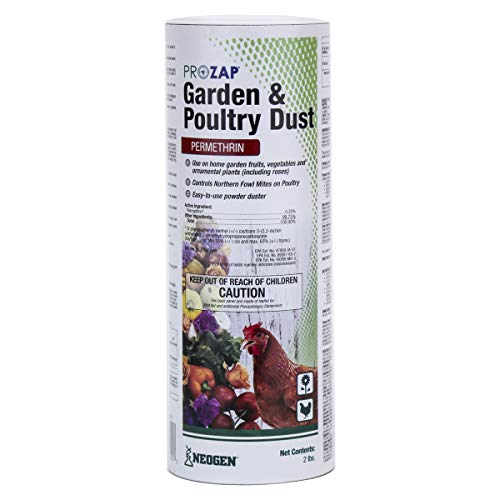
Permethrin dust for use on poultry, garden plants and vegetables

Ready-to-use dust for direct application on animals, poultry and bedding
When to Use Lime Sulfur Dips for Severe Mite Cases
When standard sprays leave your hens looking like plucked pillows despite your best efforts, it’s time to pull out the heavy artillery: lime sulfur dips. You’re dealing with severe cases now, where stubborn mites laugh off regular permethrin. This stuff smells like rotten eggs, obviously, but it works when nothing else will. Mix four ounces per gallon of warm water, shake it well, and dunk those birds completely. Work the solution right down to the skin, focusing on feather shafts where mites hide. Don’t rinse; let it dry naturally while you wear gloves and a mask. Reapply every five days until you see real improvement. It’s messy and smelly, yet that 98% kill rate saves flocks others lose. If your girls are suffering from resistant infestations, this dip is your smartest, most effective move today.
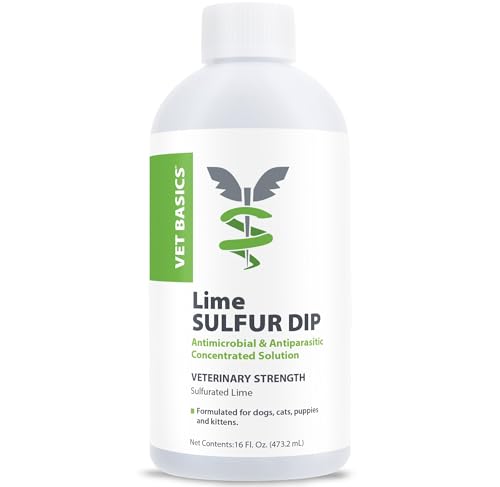
🐾MULTI-PURPOSE – Ideal for use with non-specific dermatoses, supporting healthy skin and coat
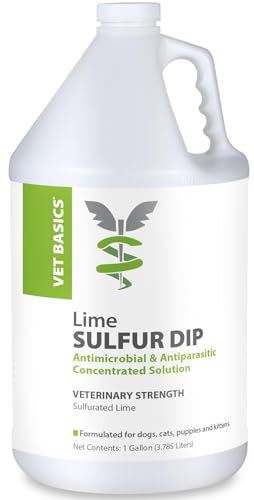
🐾MULTI-PURPOSE – Ideal for use with non-specific dermatoses, supporting healthy skin and coat

🐾 EXTRA-STRENGTH 97.8% FORMULA – Harness the power of pure sulfureted lime, trusted in veterinary dermatology for decades. This 97.8% formula helps restore comfort in pets — offering professional-grade relief through nature’s science.
How to Sanitize Your Coop and Break the Mite Cycle
Even after you’ve dipped your birds until they smell like a sulfur factory, you’re still fighting a losing battle if you ignore the coop itself. Strip every bit of bedding and scrub those cracks with boiling water. You need total cycle rotation sanitation to truly break the mite’s life span. Now, grab a propane torch and carefully heat-treat wooden roosts; it kills hidden bugs without harsh chemicals. Obviously, don’t burn your house down while doing it. Next, dust everything with food-grade diatomaceous earth. Wear your dust‑mask safety gear because inhaling that fine powder isn’t fun for anyone. Reapply weekly to stay ahead of reinfestation. This thorough approach stops the endless loop of itching and feather loss dead in its tracks. You’ve got the plan, so go make that coop a mite-free zone today.

✅ OMRI Listed for Organic Use – Certified by the Organic Materials Review Institute, ensuring compliance with strict organic standards for safe gardening and farming.

Natural Product - Composed of 4lbs of 100% ground freshwater diatomaceous earth with absolutely no additives or fillers.

100% CHEMICAL-FREE: Made from 2lbs of food-grade freshwater diatomaceous earth with no additives or fillers. Safe for use around children and pets when used as directed.
Why Extra Protein Helps Chickens Regrow Feathers Faster
Since you’ve already scorched the coop and drowned the mites, you’re probably staring at your bare, patchy birds wondering why they aren’t bouncing back yet. Feathers are eighty-five percent protein, so your flock needs serious fuel to rebuild that lost seven percent of body weight. Standard sixteen percent layer feed just won’t cut it during a hard molt. You need to bump that up to twenty percent immediately. Here’s the thing: proteinutrient timing matters immensely right now. Delaying high-protein treats like mealworms slows pinfeather development considerably. Also, watch your amino‑acid balance closely. Methionine is the star player for keratin synthesis; without it, new feathers turn brittle and dull. Toss in some black oil sunflower seeds or garlic for sulfur boosts. Obviously, this extra cost feels steep, but faster regrowth means warmer, healthier chickens sooner. Go ahead and upgrade their feed today. Ensuring adequate intake of sulfur‑containing amino acids is essential for healthy feather development during this recovery phase.
How to Prevent Mite Outbreaks With Routine Flock Checks
Although you’ve just fixed the protein gap, staring at those patchy birds still stings because nobody wants a flock that looks like it lost a fight with a lawnmower. All right, let’s stop that misery before it starts. You need routine monitoring every couple of weeks, especially when heat waves hit. Grab each bird, flip them gently, and inspect vents, under wings, and shanks for lifted scales or creepy crawlies. Obviously, you’ll also check roosts for black specks or blood streaks at night. Here’s the thing: preventive scheduling saves your sanity. Quarantine new hens for three weeks and offer weekly dust baths. If you spot red skin or excessive scratching, treat immediately to break the life cycle. Don’t wait for total feather loss. Catching mites early keeps your coop clean and your girls happy. Start this habit today, and you’ll never dread flock inspections again.

NATURAL CHICKEN DUST BATH FOR CLEAN, HEALTHY FEATHERS - Give your flock a premium chicken dust bath that helps remove excess oil, dirt, and moisture. Supports natural feather conditioning for happier, cleaner hens in any dust bath for chickens setup.

Use Pampered Chicken Mama Herbal Dust Bath in your coop or chicken run by adding to dust bath areas. Combine with nesting herbs in a large bin for cooped hens and roosters. Add to your flock’s favorite dust bath spot weekly for best results.

PROMOTES FLOCK HYGIENE - Essential for supporting natural preening behaviors, this pan provides a dedicated spot for chickens to dust bathe, helping them remove excess oil and maintain clean feathers