You’ve probably stared at a fluffy chick wondering where its belly button hid, but rest assured, every chicken sports a tiny, feather-concealed scar on its lower belly that seals up tight right after hatching. Obviously, you won’t spot it on an adult hen since feathers hide the evidence, but a clean, dry navel on a new chick means you’re looking at a healthy bird. If you keep going, you’ll see exactly what that perfect seal looks like.
Do Chickens Have Belly Buttons?
Ever wonder if you’re missing a tiny detail on your future flock? You’re not alone; many new owners scratch their heads wondering where that belly button hides. Here’s the thing: yes, chickens definitely have navels, though they vanish faster than your last wing at a barbecue. During navel evolution, the embryo connects to the yolk sac, not a placenta like us mammals. This unique setup leaves a tiny scar under the down, proving life started inside that shell. While genetic imprinting guides their behavior, this physical mark confirms proper development before hatching. Obviously, you won’t spot it on fluffy adults since feathers hide everything. If you see a wet or sticky spot on a chick, that’s a bad sign, but a clean, closed navel means you’ve got a healthy bird ready to grow. Trust this hidden detail to guide your choice. Once the yolk reserves deplete after three days, the chick must immediately seek external food and water to survive.
Where to Find a Chick’s Belly Button
You’re probably squinting at a fluffy chick right now, convinced that belly button is playing hide-and-seek because you can’t spot it anywhere. Don’t panic; you’re just looking too late or missing the exact locel location. Flip the chick gently and check the ventral abdomen, right below the breastbone. That’s where the yolk sac retracted inside around day twenty of incubation. Obviously, feathers hide this scar quickly, so timing matters immensely here. Think of this search as a specific navigation technique rather than a random guess. You won’t find it on adult hens since it fades completely as they grow. If you see a messy spot immediately post-hatch, that’s your target. It’s tricky, sure, but knowing exactly where to look makes all the difference between confusion and clarity. Go ahead and check now while the down is still sparse. This tiny scar forms where the nutrient cord detached just before hatching.
What a Healthy Chicken Navel Looks Like
So, how do you actually spot a healthy navel when it’s buried under a fluff bomb? You’ve got to gently blow that down aside because visibility is tricky. Once you find it, check the navel texture immediately. It should feel smooth and dry, never rough or crusty. Obviously, you don’t want any stringy bits hanging around either. The color must match the surrounding skin perfectly, avoiding any angry redness or dark buttons. Here’s the thing: proper Incubation temperature drives this whole healing process. If the heat was too high, you might see issues, but optimal conditions mean full yolk absorption. You won’t always find a visible mark even in perfect chicks, and that’s fine. Just ensure it’s clean, closed, and free of wetness. Trust these signs, and you’ll know your little guy started strong.
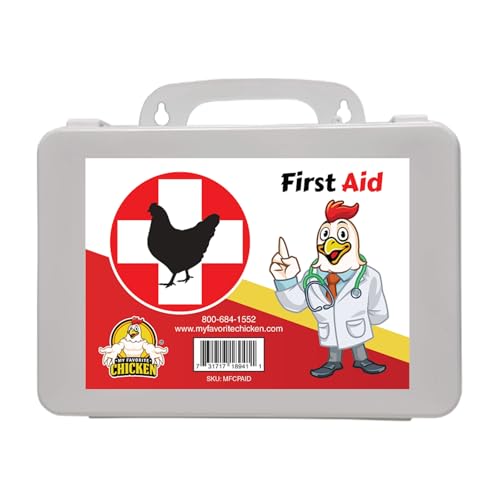
Elevate flock safety with a complete first aid kit designed specifically for backyard poultry owners, combining 15 expert-recommended tools and medical solutions in one chic,...
Signs of an Unhealed or Leaky Navel
How do you spot trouble when that fluffy belly hides a leaking mess? You lift the chick gently and look close. A healthy navel is dry, but yours might show red swelling or wet, sticky down. That’s your first warning sign of a serious navel infection. Sometimes you’ll see black, string-like tissue or even protruding guts where the yolk didn’t absorb. Smell it too; a foul, fetid odor screams trouble. If yolk‑sac leakage occurs, the belly feels mushy and distended. Your chick acts weak, refusing food while dehydration sets in fast. Poor sanitation usually causes this mess, leading to sudden death within days. You can’t fix severe cases easily, so prevention matters most. Clean your incubator thoroughly next time. Watch for these signs immediately after hatching because waiting costs lives. Spotting this early saves your flock from spreading septicemia. You’ve got this, so stay vigilant and keep those brooders clean for healthy chicks.

110V-50W HEATING LAMP:Quickly Preheat The Breeding Box In 3s, Adjust The Brightness of The Bulb Through The Stepless Knob And Control The Temperature of The Brooding Box From 0-120 ˚ F.As Warm as Sunshine in Summer(Brood Box Needs To Be Assembled,Size 15.75x11.81x11.81 in).

Value 10-Pack for Extended Use: Incubator pad is stock up for multiple hatch seasons, frequent replacements, or classroom/hobby projects—ideal for home breeders and small-scale farms. Save time and money with bulk supply

【STABLE TEMPERATURE】: The circulating airflow system driven by a strong fan provides a stable temperature condition for the eggs.
Why Navel Closure Determines Chick Survival
Since a chick’s survival often hinges on whether that belly button seals tight, you’re probably wondering why some fluffy balls of life thrive while others fade fast despite your best efforts. Here’s the thing: poor navel closure leaves that opening vulnerable to deadly infections before it even heals. You need temperature stability during those final critical days because heat spikes force chicks to pip before their yolk sacs retract fully. Conversely, cold delays absorption, leaving them weak. Obviously, incubation success relies on perfect synchrony between embryo growth and structural sealing. If your hatch window drags on, latecomers miss their chance to close up properly. Don’t let variable egg ages ruin your flock’s potential. Secure that essential seal by managing your environment strictly, ensuring every chick gets the strong start it deserves to survive and flourish out there.

360° Air Circulation Design: The air circulation allows airflow inside the egg incubator, ensuring even distribution of temperature and humidity. This promotes uniform embryo growth and increases hatching rate and quality. It reduces the risk of poor development and shortens the incubation period.

👉Enhanced Watering Trays C & D for Optimal Humidity Control: Our newly upgraded Chickcozy incubator now features additional dual watering zones (C & D), designed to provide flexible humidity adjustment tailored to your needs. Whether you're in a dry climate or require higher humidity levels, simply add water to both zones to effortlessly achieve and maintain the ideal environment for successful hatching.

QUALITY CONSTRUCTION - This incubator is made of durable, warmth-retaining styrofoam, and it includes an LCD display with LED light that shows accurate readings instantly. Made in the USA!