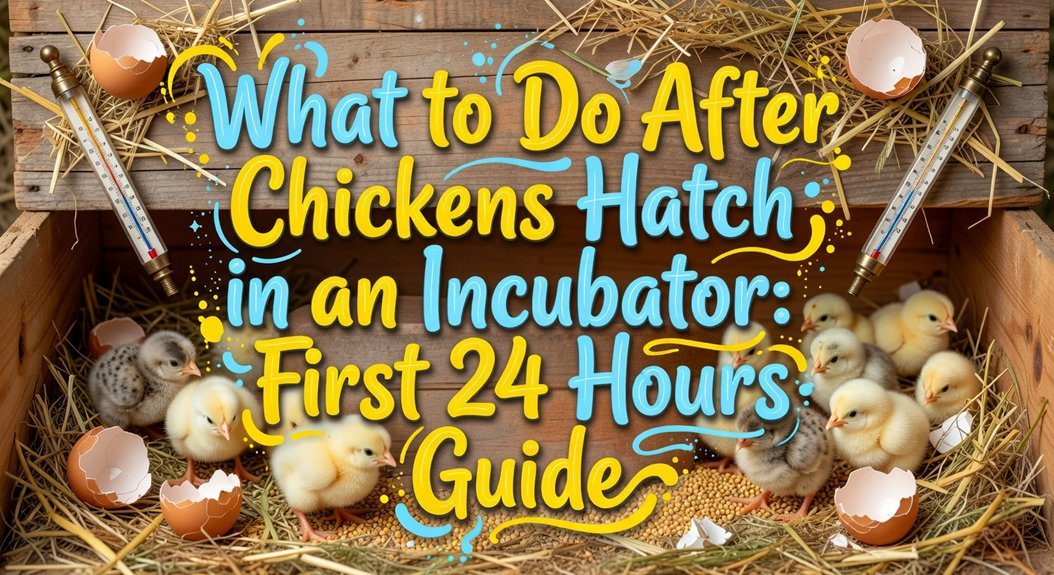
You’re fighting that urge to peek, but lifting the lid now dries membranes and kills embryos. Keep it shut for 24 hours while holding humidity at 65–75% and temperature steady at 100.5°F. Obviously, you want to check progress, yet patience here saves lives. Leave chicks inside up to 48 hours until they’re dry and fluffy before moving them to your pre-heated brooder. Stick with these steps, and you’ll see exactly why timing beats curiosity every time.
Keep Incubator Lid Closed for 24 Hours
When you’re staring at that first wet chick wobble out, your hand might twitch toward the lid, but don’t; you’ve waited weeks for this moment, and opening it now is the fastest way to sabotage the rest of the batch. Seriously, resist that urge. Lifting the lid drops humidity instantly, drying out membranes on unhatched eggs and killing their chance. Heat escapes too, complicating the whole process. Your chicks are fine; they’re living off absorbed yolk for up to seventy-two hours anyway. Proper Lid timing means waiting a full day before peeking. This strict Humidity control keeps the environment perfect for latecomers while early birds dry off naturally. Obviously, panting means trouble, but that’s rare. Trust the closed system. Just let them be. You’ve done the hard work; don’t ruin it now by getting impatient. Keep it shut, breathe deep, and let nature finish its job smoothly today.
Hold Humidity at 65–75% During Hatch
You’ve fought the urge to peek, but now you’re staring at those humidity numbers wondering if 65% is really the magic sweet spot or just another guess. It’s not a guess; it’s survival. Your chicks need that 65–75% range to stop membranes from shrink-wrapping them inside. If you skip proper humidityidity control, they’ll pip but never zip, leaving beaks stuck like bad zippers. Add water pans or sponges now, because dry air kills hatches faster than cold does. Obviously, you can’t flood the incubator either, or they’ll drown before breaking free. Watch your ventilation timing closely; too much airflow dries things out, while too little suffocates them. Trust your hygrometer, not your gut. Keep those levels steady, and you’ll hear happy peeping soon. Just hold tight, maintain that moisture, and let nature do its messy, miraculous work without your interference today. However, be aware that maintaining 75% humidity is excessively high and can kill embryos if present inside the incubator.

5-gallon reserve tank that works with all GQF cabinet incubators

3031 Humidity water reservoir for GQF cabinet incubator

High-precision Swiss-imported humidity sensor: Our humidity controller features a high accuracy sensor that can regulate and maintain humidity levels within a range of 5% to 99% RH. The digital signal chip used ensures accuracy to within ±3%RH
Monitor Temperature at 100.5°F Constantly
Since you just nailed the humidity battle, don’t let a rogue thermostat ruin the finish line by frying your fresh hatchlings with heat spikes that hit 103°F. That scorching temp kills embryos instantly, so keep your incubator steady at 100.5°F while they dry. You need absolute temperature stability because even brief rises above 101°F jeopardize chick health forever. Grab a second thermometer to verify your gauge; never trust just one. Place it level with the eggs, ensuring the bulb touches nothing. Sure, forced-air units tolerate tiny 0.5°F swings, but don’t push it. Opening the lid causes dangerous drops, so resist peeking. Obviously, consistent heat day and night saves lives here. Once every bird is fluffy and dry, you’ll drop things to 95°F, but right now, hold that line tight. Your vigilance makes the difference between a thriving flock and a tragic loss.

𝐄𝐀𝐒𝐘 𝐌𝐎𝐍𝐈𝐓𝐎𝐑𝐈𝐍𝐆 𝐖𝐈𝐓𝐇 𝐑𝐄𝐌𝐎𝐓𝐄 𝐏𝐑𝐎𝐁𝐄: The combination of digital thermometer and hygrometer with a remote sensor in a single device allows users to monitor both temperature and humidity levels simultaneously, important for the ideal conditions in egg incubation. The remote probe can be placed inside the incubator while the display remains outside for easy viewing.
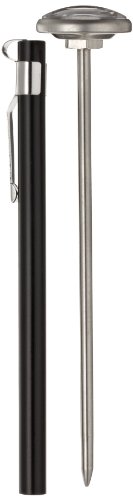
QUICK TEMPERATURE CHECKS: This pocket dial thermometer features a 1" round display and Fahrenheit markers for easy reading; The 5" stem helps access hard-to-reach areas
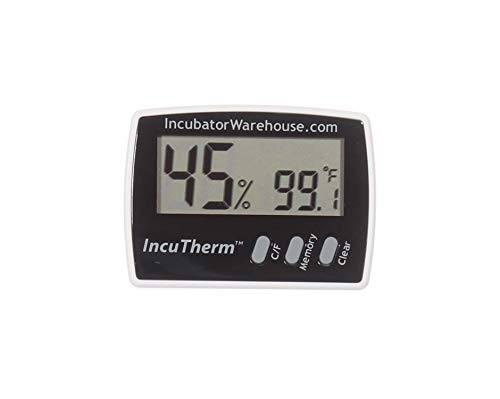
Thermometer and hygrometer measures temperature and humidity
Leave Eggs In for 48 Hours Post-Hatch
Although your heart screams to grab those fluffy miracles the second they pop out, yanking them early actually steals the nutrients they need to survive. You’ve waited months through egg incubation, so don’t blow it now. Those little guys absorb their yolk sacks for up to seventy-two hours, meaning they won’t starve while waiting for stragglers. Opening the lid prematurely drops humidity, risking “shrink wrapping” unborn chicks inside their shells. That’s a disaster nobody wants. Instead, practice strict monitoring‑care by watching through the window. Let early hatchers rest until the last chick dries, but never exceed forty-eight hours or overcrowding causes distress. Obviously, you want everyone safe. Trust the process, keep that lid shut, and let nature finish its work before you move them. Your patience right now guarantees a healthy, complete flock tomorrow.
Wait Until Chicks Are Dry and Fluffy
All right, so you’ve resisted the urge to crack that lid early, but now you’re staring at a bunch of wet, sad-looking blobs and wondering if something’s wrong. Don’t panic; those damp feathers will double in size as they dry. Premature removal risks chilling, so let the incubator do its job. You need to perform a fluff assessment before moving them. Wait until their plumage looks plump, airy, and erect. Dryness timing varies, so prioritize complete drying over speed. If they hatch late, an overnight wait is fine. Their yolk sustains them for days, so no rush exists. Obviously, stable heat and humidity prevent shrink-wrpping. Once they stand tall and look fluffy, they’re ready. Trust the process; moving wet chicks creates stress you don’t need. Just wait for that fluffy transformation, then transfer them gently. It’s that simple.

Stable Standing for Chicks: The Corrugation Hatching Mat ensures stable standing for chicks through its newly designed narrow-corrugation pattern, which creates a tight-knit, supportive surface that offers secure footing; This effectively addresses the issue of smaller chicks, such as Serama breeds, sliding in the grooves of hatchery flooring, a problem that can lead to splayed leg conditions; The design encourages a natural standing posture and steady movement from their very first steps

【STABLE TEMPERATURE】: The circulating airflow system driven by a strong fan provides a stable temperature condition for the eggs.

Anti-Slip Protection: The chicken nesting pad features a nonslip bottom pad that prevents young birds from splay leg, ensuring safety during brooding and growth
Avoid Cleaning Shells During Hatching
Now, I know you’re itching to tidy up those broken shells the second a chick pops out, but hold off on that cleaning urge until the hatch is completely finished. Opening the lid constantly drops humidity, drying out unhatched chicks inside their eggs. While jagged edges look scary, disturbing the environment risks far more than a tiny scratch. You need stable heat for those still pipping. Once every chick is out, then perform your shell removal immediately. Those broken pieces harbor nasty bacteria that thrive in warm, humid air, turning your incubator into a germ factory. Prompt cleanup boosts your disease‑control efforts considerably, keeping pathogens away from vulnerable newborns. Wait for the full hatch, then clear the debris fast. This balance protects both the hatching process and the clean start your flock deserves. It’s a simple delay that saves lives. Additionally, avoiding any abrasive cleaning methods on the shells helps preserve the protective cuticle which is essential for preventing dehydration and bacterial contamination during the critical hatching window.
Delay First Feeding and Watering
You’ve just resisted the urge to play janitor with those eggshells, so don’t let impatience trick you into rushing the next step by shoving food and water in front of those wet, wobbly newcomers. They’re still drying off and absorbing that internal yolk sac, which fuels them perfectly for up to seventy-two hours. Seriously, forcing meals now actually harms their developing digestive systems. Research shows delaying access beyond twenty-four hours risks poor gut health and stunted villus growth, messing with their long-term weight gain. You want strong birds, right? Wait until they’re fully fluffed and active before moving them to the brooder. That’s when you introduce early nutrition to kickstart their metabolism properly. Fasting too long lowers their body temperature regulation and slows disease resistance. Obviously, nobody wants sick chicks. Let nature finish its job inside the warm incubator first. Once they’re hopping around confidently, offer fresh water and starter feed immediately. This timing maximizes genetic potential without unnecessary stress. Trust the process; your future flock will thank you for waiting those essential hours before feeding time begins today. When they are ready to eat, provide starter feed in crumble form to ensure proper digestion and nutrition from the very first meal.

Watch Your Birds Flourish – Our nutritionally complete whole grain starter crumbles with 20.5% protein promotes strong development and growth in chicks and ducklings. Corn-free. Soy-free.

MEDICATED CHICK STARTER FEED: This complete chicken feed is made with added Amprolium to aid in the prevention of coccidiosis, and contains 18% protein for weight gain, our chicken food is essential for your young birds.

COMPLETE STARTER FEED FOR CHICKS: Specifically formulated for chicks from hatching to 16 weeks, this non-medicated chick starter feed delivers balanced nutrition and essential nutrients to support strong, healthy early growth and development.
Prepare Heated Brooder Before Transfer
Three critical mistakes happen when you rush chicks from the incubator to a cold box, and honestly, nobody wants to explain to their kids why the new pets didn’t make it through night one. You’ve got to fix that bro broder setup first. Baby chickens can’t regulate heat yet, so you need a lamp or plate ready. Hang lamps eighteen inches up securely; falling lights are a fire risk nobody needs. Heat plates are safer indoors, letting chicks huddle underneath just like with Mama Hen. Set your thermometer to ninety-five degrees right at chick level. Obviously, you must create a temperature gradient so they can move away if they’re too hot. This setup guarantees total chick safety while they dry off. Don’t guess with their lives; get that heat source running stable before transfer. It’s the only smart way to start. For larger batches, 125 W white bulbs are preferred over red ones because they generate less heat and significantly reduce the risk of igniting wood shavings.

1.This 125W clear infrared heat lamp use standard E26 socket. It is suitable for most standard size lamp holders. The voltage is 120v, easy to install.

PERFECT FOR HEAT LAMP FIXTURES: This 125 Watt heat lamp bulb fits bathroom heat lamp housings, food warmers, brooder lamps, reptile habitats, and any BR40 reflector fixture with a standard E26 medium base - classic 125w heat lamp bulb.

1.This 125W red infrared heat lamp use standard E26 socket.It is suitable for most standard size lamp holders.The voltage is 120v, easy to install.
Extend Wait Time for Late Hatchers
Even when you’ve done everything right, some chicks just decide to take their sweet time, and watching that clock tick past day **21 feels like waiting for paint to dry in a rainstorm. Don’t panic yet. You need a proper late hatch assessment before tossing those stubborn eggs. Sometimes incorrect temperature or poor shell quality slows things down, but other times it’s just genetics. Check your breed specific incubation windows because Silkies naturally lag behind standard breeds. You can wait cautiously until day 23, but remember risks rise sharply after day 22 as bacteria invade** dry shells. Monitor pip progress closely; if that hole stays tiny for days, the chick might be exhausted. Obviously, you don’t want to open eggs prematurely and ruin yolk absorption. Trust your instincts, verify viability via candling, and give stragglers one last chance before moving on. Since a normal hatch may take several hours with speed varying per egg, extended delays beyond this window often signal a need for closer intervention rather than simple patience.