You’ll safely clip your chicken’s wings by first sterilizing sharp scissors with isopropyl alcohol. Gently extend the wing and cut the primary flight feathers at 50–66% of their length, avoiding the quill base where blood vessels exist. Secure the bird with towels and keep cornstarch available for hemostasis. Monitor for bleeding and shock indicators immediately post-procedure. Confine your bird to a quiet recovery area for 72 hours with ground-level food and water access. Understanding feather anatomy and regrowth timelines will optimize your long-term management strategy.
Why Clip Your Chicken’s Wings: Purpose and Benefits
Wing clipping serves multiple practical functions in flock management by preventing escape and enhancing containment. You’ll reduce unwanted exploration that damages gardens and landscaping while maintaining your chickens within safe boundaries. This procedure grounds adventurous breeds like Leghorns that exhibit persistent flight behavior. Additionally, providing a balanced diet with complete poultry feed helps support their overall health as you manage wing clipping. Interestingly, chickens can also serve as sentinel animals in efforts to monitor mosquito-borne diseases. Moreover, chickens can benefit from nutritious supplements like grass clippings, which support their health while you manage their flight capabilities. Adding treats like homemade chicken snacks can also keep them happy and engaged during the process.
Wing clipping directly addresses chicken behavior by discouraging high roosting and escape attempts to hazardous zones. You’ll minimize time spent retrieving escaped birds and reduce property cleanup. The technique balances safety risks by restricting access to areas with predators or traffic hazards while keeping your flock within predator-proof enclosures. Clipping should ideally be performed when chickens are 6-12 weeks old to achieve the most effective results during their developmental stage.
You’ll experience significant management advantages through reduced wandering motivated by hunger, boredom, or curiosity. Annual re-clipping post-moult sustains effectiveness, ensuring your chickens remain reliably contained without compromising their overall flock health.
Preparing Your Tools and Supplies
You’ll need to gather specific instruments and supplies before restraining your bird, as proper preparation guarantees quick, clean cuts that minimize stress and bleeding risk.
Establish a tool organization system by assembling sharp scissors or surgical-style shears alongside heavy-duty nail clippers as backup. Maintain blade sharpness with a sharpening stone and sterilize all cutting instruments with isopropyl alcohol before use. Additionally, ensuring that your chickens consume a varied diet can promote overall health, which is beneficial during and after the clipping process. Ensuring access to fresh water at all times is also crucial, as it directly supports their health during the clipping procedure. Prepare your supply checklist to include cornstarch for hemostasis, clean gauze pads, and antiseptic solution for potential bleeding management. Clipped feathers will regrow within a few months, so maintaining sterile equipment ensures proper healing during the regrowth cycle.
Arrange restraint equipment—towels, protective gloves, and a soft non-slip surface—within arm’s reach. Position excellent lighting to identify blood feathers accurately, and keep your veterinarian’s contact information accessible. Prepare a recovery area with bedding pre-positioned for immediate post-procedure bird placement, reducing shock and hypothermia risk.

More Robust and Durable: SimCoker poultry shears are made of durable, tougher, more corrosion-resistant stainless steel that is thicker and lasts longer than regular kitchen scissors. Combined with a thicker spring and sharper blade design, the shear is easy to use

【Premium Durable Materials】 Crafted with high-quality German 420J2 high-carbon stainless steel blades, harder than ordinary kitchen shears. The corrosion-resistant coating prevents rust and stains, while the aerospace-grade aluminum handles withstand 13x more pressure than standard scissors—built for heavy-duty kitchen tasks.

Multi-Functional Kitchen Tools: This kitchen scissors for food japanese set includes two multi-functional kitchen shears. One meat shears is suitable for handling raw poultry, easily cutting raw meat such as vegetables, chicken bones, and fish bones. The other poultry shears can be used to cut cooked food, suitable for cutting cooked meats such as barbecue, pizza, and sausages. The two blades are separate for raw and cooked foods, ensuring better hygiene
Understanding Chicken Feather Anatomy
Understanding chicken feather anatomy will help you identify which feathers to clip and which to avoid. You’ll encounter two primary feather types on your chicken’s wings: flight feathers and covert feathers.
Flight feathers—primaries and secondaries—generate thrust and lift. Primaries, located on the wing’s outer edge, are the largest and strongest. Secondaries attach to the inner wing. Covert feathers overlay flight feathers, smoothing airflow and protecting their bases. Each feather has a central shaft called the rachis, with barbs extending outward that interlock to create a cohesive structure. These contour feathers not only aid in flight but also provide protection against the elements, and poor feather condition can contribute to feather loss in chickens. Furthermore, providing a balanced diet, including essential calcium sources, helps maintain feather integrity. Additionally, incorporating garlic into their diet may boost your chickens’ overall health, supporting better feather quality. Moreover, ensuring that your chickens have access to clean water can support their overall health and feather quality.
During feather growth, developing “pin feathers” contain blood vessels in their shafts. You must avoid damaging these, as they’ll bleed. Mature feathers are avascular and safe to clip.
Understanding this anatomy guarantees you clip only appropriate feathers, minimizing injury risk while effectively limiting flight capability.
Getting Your Chicken Ready for Clipping
Proper preparation determines whether you’ll complete the clipping safely and efficiently, so it is essential to establish a systematic approach before you handle your bird. Conduct a thorough pre-clip assessment by inspecting feather condition, identifying blood quills, and verifying the bird’s overall health status. Confirm your chicken is alert, maintains normal body weight, and shows no respiratory distress or wing trauma. Perform behavioral observation to gauge temperament and anticipate handling challenges. Select a prime time during cooler periods when birds are naturally calmer. Additionally, ensure your chicken has access to a secure environment that minimizes stress during the clipping process. Gather all necessary supplies—sharp shears, lighting, hemorrhage control agents, and identification markers—within reach. Make certain your workspace is clean and flat. Using sharp kitchen scissors for precise trimming ensures you can execute clean cuts without causing discomfort to your bird. These preparatory steps minimize stress responses and reduce injury risk during restraint and clipping. Remember that keeping your chicken in a comfortable setup, like a plastic nesting box, can aid in calming them before the procedure.
The Step-by-Step Clipping Process
The primary flight feathers—those long, narrow feathers at the wing tip—are what you’ll target for clipping, typically the first approximately ten feathers from the tip. Secure your chicken between your knees or have an assistant provide firm, gentle restraint. Extend one wing steadily by holding near the base, not the feathers themselves. Using sharp, clean scissors, cut the primaries straight across at 50–66% of their length, stopping approximately one inch above the quill base to prevent hemorrhage. Make single, clean cuts through each feather’s vane without tearing the shaft. Trim immediately below the primary covert line so clipped feathers sit shorter than overlying coverts. Clipping one wing typically achieves adequate wing balance disruption while minimizing handling stress and reducing injury risk. Providing proper nutrition to your chicken, including appropriate calcium sources, also supports overall health which can help during the clipping process. Ameraucana chickens can live about 7 to 8 years with proper care, which includes regular wing clipping for those who need it. Soft petting and cooing noises help soothe the chicken during the entire process, ensuring a calmer experience for both you and your bird.

Professional-Grade Durability & Corrosion Resistance: Forged with rust-proof molybdenum-vanadium steel and precision-tempered 3.5mm blades, these poultry shears cut through poultry bones effortlessly. The corrosion-resistant coating prevents stains, while industrial-grade aluminum handles withstand 10x more pressure than regular scissors.


Handle loop and bolster prevent hand from slipping forward.
Handling Bleeding and Other Complications
While most wing-clipping procedures proceed without incident, you’ll occasionally encounter bleeding complications that require prompt recognition and intervention. Understanding bleeding sources helps you identify risk: blood feathers contain visible pigmented quills with active blood supplies, whereas mature primary flight feathers have white, clear quills lacking vessels. It’s important to remember that preventing stress during this process can lead to better overall health, as prolonged stress can also compromise a chicken’s immune system.
When bleeding occurs, apply direct pressure with clean gauze for several minutes. Pack the quill tip with cornstarch or styptic powder to facilitate coagulation. Trim the protruding quill only if necessary for effective pressure application—avoid pulling intact blood feathers due to pain and re-bleed risk. If bleeding persists and you lack immediate veterinary access, cornflour can be applied as an alternative coagulant to help stop the bleeding.
Isolate the bird in a calm, warm environment to reduce stress-induced hypertension. Monitor bleeding for 10–20 minutes. Seek veterinary care if bleeding persists beyond this period, signs of systemic blood loss appear, or recurrent bleeding develops.

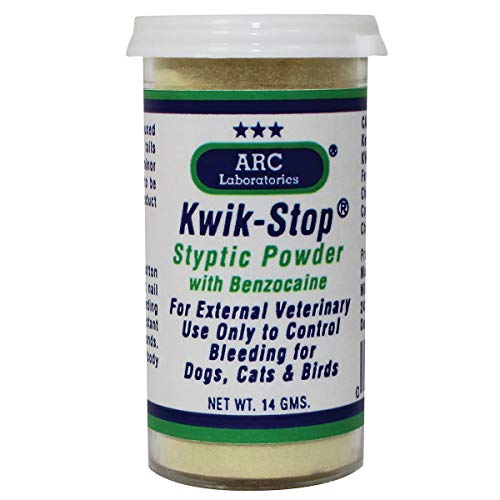
Includes one 0.5 oz tub of Miracle Care Kwik Stop Styptic Powder; the Original styptic powder with Benzocaine for Pain Relief

INSTANT BLEEDING CONTROL - Fast-acting styptic powder immediately stops bleeding from nail trimming, minor cuts, tail docking, and wing clipping in dogs, cats, and birds
Aftercare and Long-Term Monitoring
Once you’ve released your bird, you’ll need to conduct immediate post-clipping checks to guarantee the procedure hasn’t caused complications. Inspect clipped feather shafts for active bleeding and verify steady respiration within one to two minutes. Monitor for shock indicators—pale combs or lethargy—and watch for pin feather oozing within twenty-four hours.
During the first seventy-two hours, confine your bird to a quiet space and provide ground-level food and water access. Perform daily visual inspections of the clipped wing for swelling, redness, or discharge. Helper assistance is recommended to hold your chicken steady during these inspection procedures to ensure thorough examination.
For medium-term post clipping care, re-inspect wings weekly while monitoring regrowth timelines. Young birds typically regrow flight feathers within months; older birds require up to one year. Track behavioral recovery and watch for wing droop or persistent limping, which warrant veterinary consultation. Plan repeat clipping intervals aligned with molt cycles, maintaining consistent technique across your flock.