You’ll need to quarantine new birds for 30–60 days, conducting fecal testing and veterinary exams to screen for disease. Next, implement visual-contact methods using chicken wire barriers for 1–2 weeks before direct integration. Provide dedicated feeders, perches, and drinkers to minimize competition stress. Monitor curiosity levels and flock dynamics closely during the first 48–72 hours. Adjust resources to 4–6 inches of feeder space and 1 inch of drinker access per bird post-integration. Understanding the specific protocols for each integration phase will greatly improve your success rate.
Quarantine and Health Screening
Why’s quarantine the foundation of flock biosecurity? You’ll isolate new birds for 30–60 days minimum, allowing infectious diseases and parasites to manifest clinically before introduction. In low-risk situations, two weeks represents an absolute minimum; however, birds from shows or multi-source purchases require extended isolation. During this time, you can also consider adding herbs like oregano and sage to boost the overall health of your new chickens. Additionally, it’s crucial to inspect for signs of chicken mites and other external parasites during this period, as they can significantly affect the health of your flock. Providing treats and supplements with essential nutrients can further enhance their well-being during quarantine, which may include soothing Epsom salt baths to relieve stress and promote relaxation.
During quarantine duration, you’ll conduct rigorous health screening. Perform fecal testing for internal parasites and inspect for external parasites like lice and mites. Consider bloodwork or PCR testing for transmissible diseases when birds come from unknown sources. Document daily observations—appetite, droppings, behavior, respiratory signs—and obtain a veterinary physical exam before clearance. A veterinarian check for parasites and bacteria should be completed before introducing new birds to your existing flock.
Maintain separate quarantine housing downwind and at least 10 meters from your main flock. Use dedicated equipment and implement strict biosecurity procedures: separate footwear, hand-washing stations, and disinfection protocols between bird groups.

SIMPLY MIX WITH WATER: Convenient powder formula that dissolves easily for quick hydration support.

PROBIOTICS FOR POULTRY: HealthyGut Probiotics for Chicken and Poultry is a broad spectrum blend of carefully selected probiotic bacteria for chickens, ducks, and other poultry; Helps promote a healthy digestive system and offers your bird total digestive support

Use by date: This product’s use by date is determined by the Period After Opening symbol. The Period After Opening symbol is marked by a box with a numerical number (X) followed by letter M for months. The symbol denotes that the product is recommended to be used within X months of opening
Visual-Contact Methods for Gradual Acclimation
Once you’ve cleared your new birds through quarantine and confirmed their health status, you’ll begin the gradual acclimation phase using visual-contact methods. Install chicken wire barriers between groups for 1-2 weeks, establishing your integration timeline. This separation enables visual familiarity and auditory interaction while preventing physical contact that triggers aggression.
Position the barrier within your coop run, housing new arrivals with dedicated feeders, waterers, and perches. Multiple resource stations eliminate competition and reduce bullying. By day three, curiosity typically replaces tension as birds recognize each other. Introducing multiple birds together reduces individual stress and encourages social learning patterns between younger and older chickens during the acclimation phase. Additionally, providing ample space for your birds can significantly ease the stress of integration and promote better overall interaction.
After the visual acclimation period, monitor readiness indicators before removing the barrier. Watch for relaxed posturing and reduced alarm behaviors. When you shift to full mixing, anticipate 1-2 months of pecking-order establishment. Supervise initial interactions in open areas, allowing natural dominance hierarchy formation while preventing severe injuries.
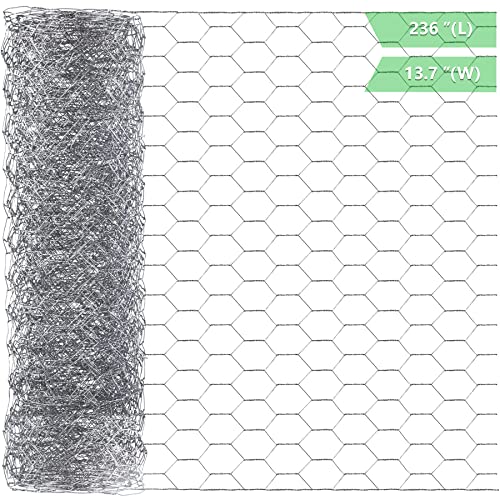
【Large Size】Each mesh is 13.7 inch (width) x 236 inch (length) / 0.35 m x 6 m, 0.8 x 1.38 inch mesh. Wire fencing is long and wide enough to enable you to cut off any shape that you need

Heavy-Duty 0.1" Pet Barrier: Our thick chicken wire mesh fence resists chewing and tearing from dogs. This durable garden fencing for dogs gives you a long-lasting barrier, protecting pets from balconies or preventing them from digging in flower beds

Durable Material: This chicken wire fencing is made of good plastic, which is wear-resistant and long-lasting; the sturdy mesh can protect your poultry for a long time
Nighttime-Roost Placement Techniques
As your flock settles into the coop after integration, you’ll need to establish proper roosting infrastructure that prioritizes comfort, safety, and hygiene. Position your lowest roosting bar 12–24 inches off the ground, with higher bars staggered at 30 centimeters to 1.2 meters elevation. This roost height prevents new chickens from roosting in nesting boxes while maintaining accessibility. Properly positioned roosts contribute to a secure environment that helps prevent stress among the hens. Additionally, ensure that your coop design incorporates adequate ventilation to promote a healthier atmosphere for your flock, while also considering the importance of durable construction materials to withstand the elements. Providing access to supplemental light can enhance the overall wellbeing of your chickens and support egg production throughout the winter months.
Maintain 12–18 inches of horizontal perch spacing between bars to prevent direct droppings overlap. Offset bars vertically to create staggered heights resembling stairs. Orient 2×4 bars flat-side up with rounded edges, ensuring 8 inches of space per standard chicken. Position roosts 6–12 inches from walls for draft prevention and 12 inches below ceiling for adequate headroom, facilitating secure, hygienic nighttime placement. Proper roosting design minimizes stress and enhances social interactions within your newly integrated flock by reducing anxiety-related behaviors.

Small Chicken Perch with Swing Sets: The chicken swing is designed for 8-10 Chick and measures 38.9"L X 39.3 W" X 27.4 H. It features 4 perches and 2 swings, providing ample space for hens to rest, exercise, and enjoy a fun. This spacious design promotes healthier behavior and physical well-being, leading to higher-quality eggs. Compatible with any metal chicken coop, it offers a harmonious.
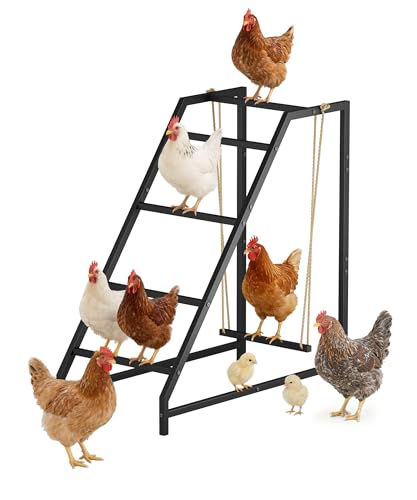
Chicken Perch with Ladder & Swing: The size of this ladder chicken perch stand is 34.6″ x 35.6″ x 17.3″ (H x L x W), offering spacious roosting and play space for 8 to 10 chickens comfortably. It features with a ladder and a swing, which can add fun and exercise opportunities to your chickens' lives. This metal chicken perches not only provides a comfortable living space but also offers entertainment and exercise opportunities. It is an ideal choice for a coop accessory.

Wooden Chick Roost:Made of Natural Wood, Stronger and More Durable Than Plywood, and Resists Warping. Safe and Non-Toxic Baby Chick Roosting Bar, it Complements Your Chicken Coop or Breeder Perfectly.
Supervised Free-Ranging and Mixing Strategies
With your roosting infrastructure established and your coop functioning as a secure nighttime refuge, you’re ready to introduce controlled outdoor exposure for your flock. Begin supervised sessions at 8–12 weeks when chicks are fully feathered, starting with 10–30 minute intervals in mid-morning or late afternoon when predator activity decreases. Position your free-range zone where you maintain clear sightlines, and establish multiple hiding spots using shrubs or portable shelters. A well-designed predator-proof aviary can enhance the safety of your free-ranging sessions. Your behavioral observation during initial mixing is critical—monitor new birds for persistent bullying within the first 48–72 hours. Implement integration tactics by introducing birds in small groups through neutral ground rather than established territories, scattering treats to reduce competition. Assign one supervisor per 8–10 birds, separating any injured individuals immediately to prevent escalated aggression. Keep the coop and run door open during free-ranging sessions to ensure accessible escape routes for chickens seeking safety.

【Heavy Duty Nylon Bird Netting】 Made of nylon multifilament net which is UV-proof, our lightweight but heavy duty bird net won't tangle and tear easily, highly durable and reusable, stronger than plastic, so you can use over and over again, season after season.

Premium HDPE Material–Exceptional Strength & Weather Resistance : This poultry netting for chicken run is made of high-strength HDPE with added UV stabilizers. It installs easily without snags or mess. This chicken netting is proven through real-world use to offer excellent impact resistance and durability under harsh conditions such as intense UV exposure, heavy rain, and extreme cold. it is a reliable and effective solution.

Advanced Series with Upgraded High-Stability: This model features a robust galvanized steel structure with 8 reinforced support bars for reliable stability. Also comes with 2 bowls. It offers a high-performance solution for daily outdoor use, providing a secure and steady habitat for your poultry in any backyard
Resource Management and Long-Term Monitoring
Your flock’s long-term health and productivity hinge on establishing robust resource management systems that you’ll maintain consistently throughout the birds’ productive lives. You’ll need to recalculate resource allocation as you integrate new birds, guaranteeing adequate feeder space—4–6 inches per bird—and drinker access of 1 inch per bird. Implement dietary adjustments by providing layer diets containing 4% calcium from limestone or oyster shell to support egg production. Additionally, ensure a well-balanced diet consisting primarily of quality layer feed to optimize overall health. You’ll monitor water quality daily, scrubbing drinkers with dilute chlorine bleach solution at 1–2 teaspoons per 20 gallons. Track individual bird performance, removing non-layers after 4–5 months of non-production. Maintain 14–16 hours of daily light using timers. Ensure your litter materials remain absorbent and regularly replace soiled litter to reduce disease risks and maintain optimal environmental conditions. These systematic approaches guarantee sustained productivity and flock welfare.

Essential Calcium Supplement: Pecking Order Oyster Shell is a rich source of calcium, crucial for the development of strong and sturdy eggshells. Adequate calcium intake helps prevent common issues like thin or brittle shells, ensuring your eggs are consistently high quality.

Superior calcium from Oolitic Aragonite: Provides high-quality calcium sourced from naturally occurring Oolitic Aragonite for optimal poultry nutrition
Superior calcium from Oolitic Aragonite