You can build a reliable DIY chicken waterer using food-grade buckets, PVC pipe, and basic fittings. Start by drilling holes near the bucket bottom for nipple or cup installation, then seal connections with thread tape and silicone. For larger flocks, construct a PVC pipe waterer with vertically-spaced cups and float valve systems for automatic refilling. Position waterers at bird head height and maintain one nipple per 2-3 birds. Clean your system every 3-7 days with hot soapy water and dilute bleach to prevent algae and pathogens. The specific setup you choose depends on your flock size and climate conditions.
Gathering Your Materials
Before you build your DIY chicken waterer, you’ll need to gather the right materials and tools—and choosing them wisely determines whether your system will function reliably for months or fail within weeks.
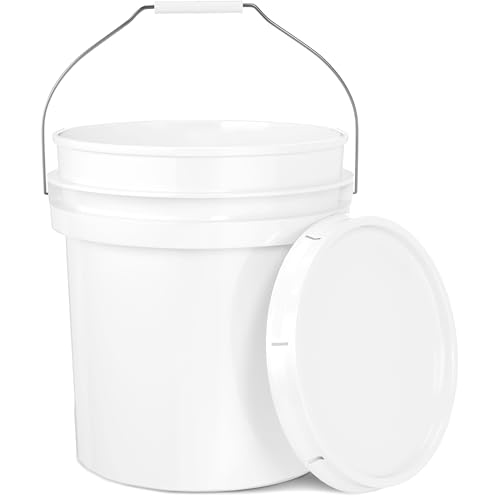
Your material selection starts with container options: 5-gallon plastic buckets, food-grade jugs, recycled milk jugs, plastic feed pans, or 55-gallon drums scaled to your flock size. Prioritize food-grade, BPA-free plastics and stainless steel fittings to prevent contamination, as durability and long-term value are crucial for outdoor use. Remember to select materials that comply with safety standards similar to those for chicken pest control, as avoiding harmful substances is essential. Consider using containers that are easy to clean, as easy cleaning is a key feature discussed in chicken coops. Additionally, selecting containers that are compatible with automatic waterers can enhance your water supply system significantly. Providing clean fresh water is vital for ensuring the overall health of your flock.
Next, acquire delivery components like poultry nipples, watering cups, or trough pans matched to chicken size. Stock PVC pipe (½”–¾”), couplers, elbows, threaded adapters, O-rings, stainless screws, silicone sealant, plumber’s tape, and PVC cement for leak-proof assembly. Vertical nipple bottles work best for chicks while horizontal nipples suit adults, accommodating different developmental stages of your flock.
Finally, gather a drill with appropriate hole saws, PVC cutter, measuring tape, and protective gear. Include spare nipples, O-rings, and replacement seals for maintenance.

【Sturdy & Solid Bucket Spigot】The spigot for 5 gallon bucket is made of food grade plastic material, sturdy and solid, durable and easy to clean, suitable for distillers and brewers.
MULTI-USE: Make storage a breeze with these multi-purpose 5-gallon buckets. Perfect for storing liquids, powders, oils, paints, fire chips, charcoal, as well as for fermenting and brining.

Food Grade Durable Plastic Bottling Spigot,PACK OF 2;
Building a Simple Bucket Waterer
Now you’ll transform your 5-gallon bucket into a functional waterer by drilling precise holes, installing delivery ports, and sealing all connections against leaks. Start by marking holes 1–4 inches above the bucket bottom to establish your desired water level while avoiding sediment. It’s important to keep in mind that proper chicken hydration is essential for their growth and overall health, as clean, fresh water contributes significantly to their metabolic functions. Additionally, a well-designed waterer can ensure continuous access to fresh water without manual refilling. A well-constructed water system can also reduce waste and deter pests, promoting a healthier environment for your flock. Drill openings sized appropriately for your chosen fittings—typically 3/8″ to 5/8″ for nipples. Install bulkhead fittings or grommets snugly, then apply thread tape or silicone to all threaded connections for watertight seals. Use a washer on each connection to prevent the fittings from pulling through the bucket material. Your bucket selection matters: food-grade plastic resists degradation and supports reliable gravity flow. Chickens can safely eat eggplant in moderation, which can be beneficial if you are sourcing natural treats for your flock. Test the assembly by filling it completely and observing for leaks before mounting. Secure your waterer at bird head height on a stable, predator-safe stand.
Constructing a PVC Pipe Waterer
A PVC pipe waterer offers superior durability and capacity compared to bucket systems, allowing you to serve multiple birds simultaneously while minimizing algae growth. You’ll construct this water supply using 3/4 inch PVC pipe cut to four feet, providing 2+ gallons capacity. The flexible PVC cap at the bottom ensures water integrity and allows for easy cleaning and maintenance. A suitable container will aid in preventing algae and ensuring healthy drinking water, just like providing homemade treats can enhance overall chicken well-being. Additionally, selecting breeds like the White Leghorn can maximize egg production while enjoying clean water systems.
Install chicken water cups vertically, spacing them two inches apart to accommodate different breed sizes. Use a countersink drill bit to create watertight seals without requiring silicone. These design features guarantee reliable operation and easy maintenance.
Mount your completed waterer securely using metal straps every 18 holes. Position lower cups for bantam breeds, higher for larger chickens. Insert copper fittings inside to prevent algae formation, then add a float indicator using fishing line and a bobber. Test thoroughly for leaks before introducing your flock.

✅Never worrying about water leakage due to improper drilling if you use these Tee Fittings on PVC Pipe.

✅This is a set of automatic water replenishment system. No leak and keep your coop dry.

【PVC material】: Compared with the three-way fittings made of PP soft plastic material, this time we use PVC high-quality hard plastic to make it. It is very strong and sturdy, and it is not easy to be damaged by chickens during use. Tee PVC: 1/2" X 1/2" X 1/8"
Installing a Nipple Waterer System
Nipple waterers offer a cleaner, more efficient alternative to open containers, reducing water waste and contamination while requiring minimal maintenance. You’ll choose between screw-in threaded nipples or push-in types with rubber grommets, depending on your container material. Additionally, BPA-free plastic containers are recommended to ensure the health and safety of your flock.
Before installation, drill holes 2 inches from the bottom at chicken eye level, spacing them 6-12 inches apart. Apply silicone sealant around each hole, then install nipples facing downward for proper valve activation. With threaded types, leave a 1/8-inch gap to avoid over-tightening.
Position one nipple per 2-3 birds, or increase to 3-4 in hot climates. Your chicken behavior will dictate success—young chicks need no training, but older birds require observation of dripping water and temporary removal of alternative sources to encourage adoption through mimicry. Aquarium-safe silicone sealant ensures a watertight seal that prevents leaks and maintains system integrity.

EASY TO SET UP - This waterer can be easily set up with its one-piece construction of jar and water ring for easy assembly.

Large 3-Gallon Capacity: Automatic chicken waterer provides a steady gravity-fed supply for chickens, ducks, turkeys, and game birds while reducing refills.

Insulated | Water stays cool in summer, helps prevent freezing in winter.
Setting Up Automatic Watering Systems
Once you’ve mastered nipple waterers, you’ll want to contemplate automatic systems that eliminate daily refilling while maintaining consistent water availability for your flock. Float valve systems provide reliable automatic refill mechanisms that maintain constant water levels in your reservoir. Install a half-inch threaded float valve connected to PVC pipes, positioning bulkhead fittings six inches from the reservoir bottom. These valves seal perfectly, preventing leaks and ensuring continuous supply. Additionally, ensuring that your flock stays hydrated is critical, especially since chickens often rely on consistent water access to maintain optimal health and behavioral differences. An effective solution to this hydration issue is creating a DIY bucket waterer, which can also complement your automatic systems. Top-rated systems are available that offer rapid filling and self-cleaning features to further simplify your setup. In colder climates, consider battery-powered solutions to prevent freezing and ensure a steady water supply for your chickens.
For overflow prevention techniques, incorporate ¾-inch diameter hoses rated up to 200 PSI connected to your float system. Quick-connect valves allow easy disconnection for cleaning without draining your entire reservoir. Position extended covers to overhang bowl edges, blocking debris entry while angled tops prevent roosting. An automatic float system maintains dirt-free water for your chickens throughout the day. This integrated approach keeps your water clean and reduces maintenance considerably.

Easy to Mount: You can place this stainless steel chicken water feeder on the ground or mount it on walls or fences. All necessary fittings are included. The float valve can be installed on either the left or right side

Package Quantity: 2 Packs water tank float valves, which aim to reduce the time spent on filling and checking the water tank, sealing effect and high pressure; Using a smaller float control device, which can withstand greater fluid pressure.

【ULTIMATE POULTRY WATERING SOLUTION】Our auto chicken waterer stands out from traditional chicken water dispenser. The automatic chicken water uses a float valve to manage water flow, opening when necessary and closing when full, preventing spills. It ensures your poultry always has clean water, saving you time and effort. Even during your long trips, your flock will never go thirsty.
Maintenance and Cleaning Best Practices
Your automatic watering system‘s reliability depends entirely on consistent maintenance and cleaning, which’ll prevent the algae growth, biofilm buildup, and pathogen accumulation that compromise your flock’s health. Establish a cleaning frequency of daily rinses and full cleanings every 3–7 days, adjusting for hot weather or contamination events. Use hot soapy water with soft brushes for routine biofilm removal, then apply dilute bleach solution (1:32 ratio) as your primary disinfecting agent, followed by thorough rinsing. Implement algae prevention by positioning waterers in shade and using opaque containers. Regular cleaning every 3-5 days also significantly reduces disease risk by keeping water fresher longer and preventing harmful bacteria from establishing colonies. Additionally, ensuring access to high-quality feed is crucial for maintaining a healthy flock, as proper nutrition supports their immune systems, while incorporating fermented feed can further enhance nutrient availability and gut health. Moreover, keep an eye on your flock for signs of mite infestations, as these pests can cause significant stress and health issues for your chickens. Furthermore, providing your chickens with scrambled eggs can also boost their protein intake during critical times, especially since water intake can increase significantly in hot weather to help manage heat stress. Create a written maintenance schedule to track inspections and parts replacement. For contamination control, immediately flush and disinfect after fecal or debris exposure. Replace worn seals and gaskets annually to maintain system integrity.
Choosing the Right Waterer for Your Flock
What waterer system you select directly impacts your flock’s hydration, health, and your management workload. Gravity fed pros include simplicity and affordability, though they require frequent refilling and invite contamination. Nipple waterer advantages dominate in winter—horizontal nipples prevent freezing and minimize bedding saturation while maintaining hygiene through fully enclosed design. A well-designed water system also supports a healthy flock by ensuring consistent access to clean water. Barred Rock chickens are excellent layers of 200 to 250 eggs annually and would benefit from a reliable waterer despite their moderate egg production. Additionally, hens require consistent calcium levels to maintain egg production and overall health, emphasizing the importance of a reliable water supply for optimal hydration. Without access to water, chickens can only survive for 12 to 48 hours depending on temperature, reminding us that hydration is crucial. Cup waterer features offer automatic refill options via float valves, eliminating overflow concerns. When comparing metal versus plastic, galvanized waterers outlast plastic alternatives but rust at welds; plastic proves inexpensive yet less durable. For winter waterer tips, nipples excel since seals remain submerged in warm water. Prioritize hygiene considerations by selecting enclosed systems. Regular maintenance tips include inspecting for rust, checking valve function, and removing debris weekly to guarantee consistent water quality. A disruption in water supply can negatively affect egg production for days, making reliable waterer selection critical for your flock’s productivity.

Automatic Water Supply: 3-gallon galvanized poultry fountain provides a steady, gravity-fed water source for chickens, ducks, turkeys, and game birds.

6.25 Gallon Poultry Waterer for Chickens & Backyard Flocks: Ideal chicken waterer for small to medium flocks, providing continuous clean water for chickens, ducks, turkeys, and game birds in coops or free-range setups

GRAVITY FED DESIGN - This waterer container provides feed flow at a constant rate using its complete top-filled, gravity-fed design with an 8 gallon capacity.