Tired of hunting eggs in the mud? You need boxes at least 12×12 inches with a 4-inch lip, mounted 18 inches up. Build a 2×4 frame with sloped PVC roofs to stop roosting, or just upcycle clean 5-gallon buckets for a quick fix. Obviously, wet bedding ruins everything, so pick dust-extracted shavings. Train hens by keeping them inside until mid-morning for two weeks. Stick with these specifics, and you’ll stop guessing where your breakfast is hiding while we cover more clever tricks next.
Determine Essential Nesting Box Dimensions
If you’ve ever watched a hen awkwardly squeeze into a box that’s clearly too small, you know that guessing on dimensions is a recipe for cracked eggs and stressed birds. You need twelve inches square for standard breeds, but bump heavy girls up to fourteen inches wide. Bantams? They’re fine with ten inches, though they’ll happily share bigger spaces. Now, consider hen ergonomics; heavier birds struggle jumping high, so keep access low. Box placement matters immensely too. Mount the lowest row eighteen inches off the floor to stop rodents, yet cap your stack at four and a half feet. Obviously, you don’t want eggs rolling out, so add a four-inch front lip. One box serves four to six hens, but always install at least two. Stop overthinking the math. Grab your tape measure, pick the size fitting your flock’s bulk, and build those cozy corners today. While floor placement is possible, raising boxes on concrete blocks prevents hens from playing in and soiling the bedding.
Build the Main 2×4 Frame Structure
Since you’ve probably wrestled with wobbly lumber that splits the second you drive a screw home, let’s get your main 2×4 frame solid from the jump so you aren’t chasing rattles later. You’ll start by cutting two 67 3/8″ pieces for the base and two 9 1/2″ ends, then drill 1 1/2″ pocket holes for those 2 1/2″ screws. Proper frame selection here means using outdoor decking screws immediately; don’t wait until siding day to think about weatherproofing. Next, build your front wall with four-foot plates and 1′ 3″ studs spaced 1′ 4″ apart, nailing them securely. The back wall uses shorter 9″ studs to create that essential angled roof line for water runoff. Clamp every corner tight before driving two screws per joint to prevent splitting. Obviously, skipping pilot holes invites disaster, so grab your drill. This suspension design eliminates individual legs, creating one sturdy unit ready for walls. Once your top bracing spans that 39-inch width, you’ve got a box that won’t shake when hens hop in. Now, grab your plywood. To ensure long-term durability against the elements, you should utilize treated lumber for the frame skeleton just as is done when constructing hardware cloth frames for wet chicken runs.

【ABOVE 1500HRS SALT SPRAY TEST】FIXLINK wood screws have passed about 1500 hours salt spray test provide exceptional protection against rust and corrosion, specifically designed to work best with either pressure-treated lumber or composite decking. These deck screws for exterior can be exposed to the sun, humidity, rain, and snow conditions for a long time

Anti-corrosion coating: four layers of high-performance coating makes the screws less prone to rust in outdoor construction, and the flat head wood screws are made of high-quality heat-treated steel.

Premium Quality: Crafted from durable steel and coated with a Brown exterior epoxy finish for superior rust resistance.
Attach Plywood Walls and Dividers
You’ve got that solid 2×4 skeleton standing there, but let’s be honest, a frame full of holes isn’t exactly hen-proof yet. Grab your 1/2-inch plywood and cut those sides angled from 15 3/8″ down to 12″. You need that hardware panel to slide snugly into the coop opening before you drive screws into the supports below. Now, for the internal partitions, don’t just guess; use a pocket‑hole joint with 1-inch Kreg screws to lock those angled dividers in place. This screw‑reinforcement keeps everything tight when your hens get rowdy. Obviously, pre-drilling prevents splitting, so grab your drill first. If you skip the glue in those pilot holes, you’re risking wobbly walls later. All right, once those dividers demarcate individual spaces, you’ve created a sturdy home. It’s time to make this box ready for eggs, not just framing. You can actually build these sections using scrap wood since precise measurements are not critical for a functional division.
Install Sloped Roofs to Prevent Roosting
Although you just finished building those sturdy dividers, don’t let your hens turn the top of the box into their new favorite perch. Nobody wants scraping poop off eggs later, right? You need a proper roof pitch to stop that daytime lounging dead in its tracks. Aim for at least a two-degree slant; anything less gives them stable footing, and we can’t have that. Now, here’s the clever bit: use translucent corrugated PVC panels. They offer excellent light diffusion, which actually helps regulate your flock’s egg production without frying them in direct sun. Sure, asphalt shingles work for big barns, but plastic sheds water better and keeps things bright inside. It’s a simple tweak that saves you hours of scrubbing. A slanted roof is essential to prevent roosting and droppings on the top surface. So, grab those screws and sealant, tilt those rafters, and keep those nests clean effortlessly. Your future self will thank you.
Create Upcycled Nests From Buckets and Crates
Why are you still staring at those pricey commercial nesting boxes when a stack of free 5-gallon buckets could solve your egg-scraping headache today? Grab those clean, food-safe containers and mount them on an old coffee table or simple wooden rack. This setup creates cozy, enclosed spaces that make your hens feel safe while adding unique recycled décor to your coop. Just cut a lip on the lid to keep bedding inside and add some straw for excellent bucket insulation. Obviously, bantams and medium breeds fit perfectly, but giant fowl might need bigger crates. Stack them side-by-side or vertically to save space, ensuring you have one nest per few ladies. Cleaning is a breeze since you can slide them right out. Be sure to retain snap-on lids rather than using screw-on varieties from deli sources to ensure the structure holds up properly. Now, stop overthinking it; those free buckets are waiting to become your chickens’ favorite spots.

Washable, heavy duty nesting box kit

Washable, heavy duty nesting box kit with Rear Access Cover
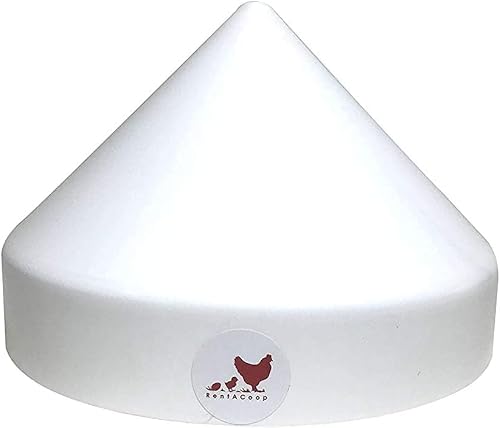
Anti-Roost Cone for Round Buckets: Helps keep your homemade set ups clean and standing! No more toppled over or dirty feeders or waterers due to your birds jumping off them
Compare DIY Builds vs Ready-Made Options
Out of pocket and out of patience, you’re staring at those shiny store-bought boxes wondering if dropping a hundred bucks is really worth it when your scrap pile is overflowing. Let’s run a quick cost analysis. DIY builds using scrap plywood cost under fifty dollars for multiple units, saving you seventy percent upfront compared to commercial sets. Sure, ready-made options install in minutes without cutting, but your material sourcing from that junk pile costs nothing. You’ll spend two hours building custom sizes that fit your specific coop height, whereas store units stick to rigid twelve-inch cubes. Obviously, plastic resists rot better, yet a little sealant makes your wood last just as long without yearly replacements. If you love tweaking designs to stop roosting, build it yourself. But if you dread wielding a saw, buy the pre-fab kit. Either way, your hens get comfortable spots today.

SUSTAINABLY SOURCED: The aspen used for our nest box pads are sourced only from forest product companies that are members of the Sustainable Forestry Initiative program.

Complete Package: our chicken nesting boxes package takes the hassle out of your shopping experiences; We have included everything you need in just one package, giving you less stress and more time to attend to your cherished hens

【Unique Design】Chicken nesting box with reverse roll out design allows you to collect fresh eggs from outside the chicken coop, metal strong construction nesting box with plastics chicken laying tray for lasting. Roll away nest boxes for chickens, keep eggs clean and Protect eggs from being pecked open. Plastic chicken laying tray won’t rust and are easy to clean, provide ample and comfortable room for hens, increase the egg production rate, perches for hens to stand and roost
Design Rollout Systems for Easy Egg Collection
You’ve got your box built or bought, but let’s be real: crawling into the coop at dawn to hunt for warm eggs while dodging angry hens isn’t anyone’s idea of a good time. That’s why you need a roll-out system. Install flooring with a slight 2-5 degree slope lined with astroturf so eggs gently slide away immediately after laying. This design stops hens from pecking or eating their own breakfast. You’ll want a collection chamber holding twice your daily volume, accessible via an exterior door secured with a simple chain. This setup guarantees clean, unbroken eggs without the morning chaos. Obviously, smooth shifts prevent cracks, so sand those edges. Whether you retrofit existing coops or build fresh, this method saves your back and sanity. Stop chasing poultry and start collecting effortlessly; your future self will thank you when gathering takes seconds, not hours. To ensure the system functions reliably even on uneven ground, the design incorporates a pitch added to box bottom that guarantees consistent egg rolling toward the collection area.

【3-Pack Value Set】Package includes 3 roll away nesting boxes and 9 coconut fiber nesting pads (3 pads per box), providing a comprehensive solution for your chicken coop, accommodating multiple hens laying simultaneously, improving egg production efficiency, an ideal choice for chicken enthusiasts

Free Gift: 4 Artificial Eggs(For induce egg-laying)

【Unique Design】 Chicken nesting box with reverse roll out design allows you to collect fresh eggs from outside the chicken coop, metal strong construction nesting box with plastics chicken laying tray for lasting. Roll away nest boxes for chickens, keep eggs clean and Protect eggs from being pecked open. Plastic chicken laying tray won’t rust and are easy to clean, provide ample and comfortable room for hens, increase the egg production rate, perches for hens to stand and roost
Choose the Best Bedding for Healthy Hens
Three main bedding options dominate the coop, and picking the wrong one turns your morning egg hunt into a respiratory hazard for your hens. You want dry eggs, not dusty lungs. Straw offers fluffy insulation but kicks up particles. Wood shavings smell great yet demand dust-extracted varieties for true dustreathing control. Hemp costs more upfront but delivers unmatched dust minimization and odor absorption. Obviously, wet bedding breeds disease, so absorbency matters most. Avoid cedar; it’s toxic. Sawdust creates too much fine powder for sensitive airways. If you live cold, straw keeps toes warm. For all climates, pine shavings balance cost and comfort. Hemp suits deep litter fans who hate frequent scooping. You’re not just filling boxes; you’re protecting health. Choose wisely now, and your flock breathes easier while you collect cleaner eggs tomorrow without second-guessing your material choice again.

4X ABSORBENCY – Old Dominion Hemp bedding absorbs up to 4x its weight, keeping your chicken coops, small animal enclosures, and keep reptile habitats fresh. Ideal for a low-maintenance and fresh-smelling environment.

Keeps Coop Fresh and Dry Roost Refresh not only freshens but also keeps your coop dry, providing a comfortable environment for your feathered friends.
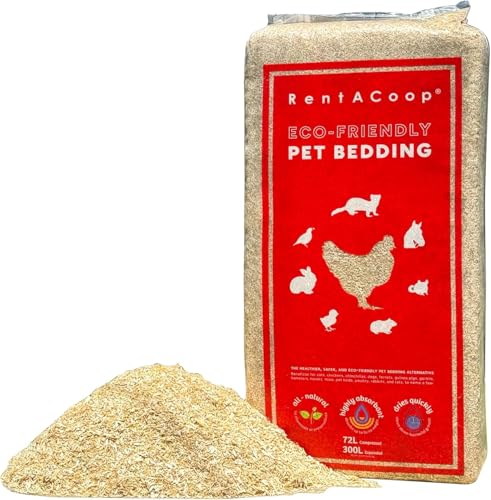
SOFT BEDDING FOR COOPS & SMALL PETS | Extra-soft rounded hemp fibers are gentle on feet, feathers, skin, and paws. Ideal for chickens, chicks, rabbits, guinea pigs, hamsters, and gerbils, whether used in chicken coops, nest boxes, brooders, hutches, cages, or small pet habitats
Train Your Flock to Use New Boxes
Why do your hens insist on treating your brand-new nesting boxes like a communal bedroom and bathroom instead of an egg factory? You’re frustrated, but fixing this requires perfect nest box timing. Close access until they’re seventeen weeks old, then open them only during daylight hours. If they sleep inside, manually move them to roosts after dark. Now, consider your egg cue placement. Drop fake golf balls or ceramic eggs into the padded boxes to signal exactly where laying happens. Confining your flock inside until mid-morning for two weeks forces them to associate the space with egg production. Obviously, you’ll need to gather eggs regularly to keep spots inviting. This method works because hens prefer company and clear visual triggers. Stop guessing where tomorrow’s breakfast will appear. Train them now, and you’ll stop chasing messy surprises around the coop floor forever. To further encourage acceptance during this training phase, you should tape the curtain wide open to ensure easy entry for your hens.