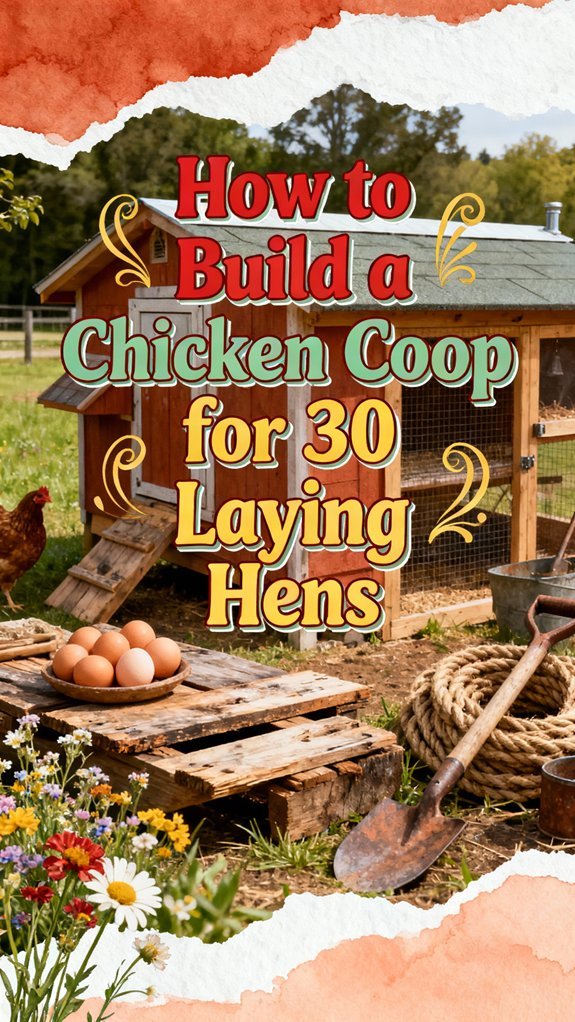
You’ll need roughly 90–120 square feet of interior space and 240–300 square feet of outdoor run area for thirty hens. Choose a shed-like or lean-to layout with secure 2×4 framing, galvanized fasteners, and predator-proof fencing buried 30 centimeters deep. Install ridge and soffit vents for proper airflow, include 6–8 nesting boxes, and plan roosts offering 8–12 inches per bird. Allocate 2–3 weeks for construction, factoring in feed storage, waterers, and manure management systems that’ll keep your flock thriving.
Space & Sizing Requirements for 30 Laying Hens
Because crowding stresses hens and reduces egg production and welfare, you’ll want to plan your coop with adequate indoor and outdoor space from the start. Aim for 3–4 ft² of floor area per hen indoors—that’s 90–120 ft² for thirty birds. Providing ample indoor space is crucial for maintaining comfort and health. Additionally, ensuring proper feed nutrition can further enhance your hens’ well-being and productivity. Provide 8–10 ft² of outdoor space per hen, totaling 240–300 ft². Your roost design should offer 8–12 inches of perch per bird, distributed across 20–30 linear feet at varied heights with 12–18 inches between tiers. Include 6–8 nesting boxes (one per 4–5 hens) mounted 18–24 inches high. Plan aisle space for maintenance access. Consider adding environmental enrichment features such as perches, dust baths, and scratching objects to support mental and physical stimulation in your flock. These dimensions prevent crowding stress, support natural behaviors, and maintain consistent egg production throughout your flock’s productive years.
Choosing the Right Layout & Structural Design
Once you’ve determined your space requirements, you’ll need to select a coop design that balances your flock’s needs with your site conditions and maintenance preferences.
You’ll find five primary layouts to evaluate. Shed-like designs offer excellent design aesthetics while providing 80 square feet of interior space, making them perfect for larger flocks. Lean-to configurations combine a 6×10 coop with a 10×14 run, maximizing efficiency. A-frame structures maximize interior space through peaked roofs and support scaling for future expansion. With their spacious interiors, these designs also facilitate comfortable perching for the hens. Additionally, coops should have secure framing to resist potential predator attacks.
For maximum usability, run-integrated layouts provide walk-in access that facilitates maintenance and coop accessibility. Mobile options let you relocate your coop seasonally without permanent foundations. The Shed-like Chicken Coop Plans from the knowledge base demonstrates that intermediate-difficulty designs can accommodate up to 30 chickens with predator-proof construction and ample nesting boxes. Additionally, many coops should feature adequate ventilation to ensure your hens remain healthy and comfortable.
Each design accommodates 30 hens effectively. Prioritize human-sized doors with steps for egg collection and cleaning. Assess your maintenance routine—models with sliding doors or full-height entry points markedly streamline daily tasks.
Essential Materials & Build Components
The foundation of your coop’s durability and functionality rests on selecting quality materials that withstand outdoor conditions and support your flock’s needs. For framing, use pressure-treated 2×6 or 2×8 joists and 2×4 studs rated for exterior use. Choose galvanized or stainless steel fasteners and connectors like joist hangers and hurricane ties to resist corrosion. Your materials selection should prioritize exterior-grade plywood sheathing paired with durable siding—cedar, T1-11, or composite options minimize maintenance while protecting against weather damage. Additionally, opting for secure construction methods ensures added protection against predators and harsh elements. A well-constructed coop should also feature adequate ventilation to maintain a healthy environment for your hens and ensure optimal air quality for thriving birds. It is crucial to consider that incorporating proper acclimation when introducing new birds can also significantly enhance overall flock health and stability. Construction techniques matter equally: proper foundation choices (concrete piers, treated skids, or slab) control moisture and anchor your structure securely. For flooring, weigh slatted, plywood, or concrete options against your cleaning and insulation priorities. Consider using treated resin flooring for superior moisture resistance, similar to materials used in professionally-manufactured coops. Furthermore, remember that providing appropriate nutrition during the chick and pullet stages lays the groundwork for healthy, productive laying hens. These foundational decisions guarantee a sturdy, long-lasting coop for thirty laying hens.

Professional-Grade Construction Support: These 2x6 joist hangers are engineered for robust joist-to-header connections in wood-framed structures, including decks, floors, ceilings, and pergolas. The pre-drilled holes and double-shear design enhance stability, making them ideal for both new construction and reinforcing existing frameworks. Perfect for withstanding heavy loads and harsh weather conditions, these brackets are a must-have for DIY enthusiasts and professional builders alike.

Made from 18 gauge galvanized steel to increase rust and corrosion resistance, creating a stronger, long-lasting joist-to-header connection

Secure Connection: Designed for wood-framed structures, the 2x6 joist hanger strengthens the connection between the joists and headers, providing higher structural stability. It ensures the building's safety and reliability, even under strong winds and heavy loads
Ventilation, Insulation & Climate Control
A well-built coop structure means nothing if you don’t manage the air your birds breathe. For 30 laying hens, you’ll want natural ventilation with ridge and soffit vents providing roughly 30 square feet of net ventilating area, adjusted for your climate. Install exhaust openings above roost level to remove warm, moist air without creating drafts.
Prioritize humidity control by maintaining relative humidity below 80%—this reduces ammonia release and respiratory disease. Use crossflow airflow patterns with inlets and exhausts positioned to force fresh air through occupied zones. Upward displacement ventilation systems can provide superior air-exchange efficiency compared to conventional methods, particularly during warmer months. Add insulation materials to regulate temperature extremes while supporting your ventilation strategy.
Monitor air quality continuously. Good litter management combined with consistent airflow dramatically improves bird welfare and egg performance while preventing ammonia buildup that compromises health. Your hens maintain optimal body temperature between 105° F to 107° F, making temperature regulation critical for sustained egg production and reduced stress-related mortality.

*Cool & Fresh Air: The solar powered fans can provide higher wind speeds to effectively cool and fresh the air , remove dust and odors and allow fresh air to enter. It’s an excellent ventilation solution for small greenhouse, chicken coop, shed, pet house, attic, camping, window fan, Outside & Inside. Suitable for a space of 9 square meters (6ft. x 6ft)or smaller, large space can buy more fans.

Warm Notes: This solar fan not built inside battery backup. The fan only work well during sunny days, the performance will be dramatically reduced if the day is cloudy or any shade at the panel, stop working during rainy day or at night

🔋 【New Upgrade (Built-in Battery)】: To solve the pain points of most users, our newly upgraded solar fan for chicken coop comes with a 2500mAh battery that effectively converts solar energy into stored electricity. This allows your solar exhaust fan to keep working at night or on rainy days, meeting your daily needs.
Predator Control & Biosecurity Measures
Because predators pose one of the greatest threats to laying hen survival and productivity, you’ll need to implement layered defenses that address physical barriers, perimeter security, nighttime protocols, and sanitation simultaneously. Install predator proof fencing with small-mesh wire at ground level and bury it 30 cm deep to stop diggers. Additionally, strong fencing should be used to prevent foxes from easily accessing your hens. Adding motion-activated lights can further startle and deter foxes and other nocturnal predators. It’s essential to cover the coop roof with heavy-gauge hardware cloth to prevent raptor attacks while also ensuring your flap doors are secure. Furthermore, many predators such as dogs, coyotes, and foxes can kill multiple chickens, emphasizing the need for secure coop design. Consider creating natural cover with trees and bushes to provide chickens with safe hiding places from aerial predators. Add electrified strands to deter foxes and coyotes. Use heavy-gauge hardware cloth on all coop openings and roof the run to prevent raptor attacks. Confine hens indoors at dusk and use automatic coop doors with failsafe latches. Implement secure feeding with lockable bins and treadle feeders to eliminate attractants. Remove spilled feed, carcasses, and dying birds immediately. Position the coop near your house and in visible areas to leverage human presence as a deterrent against opportunistic predators. Lock all doors nightly using written checklists to guarantee consistent closure.

[Heav DutyTure 19 Gauge Construaction] – Thicker and stronger than standard 19 gauge hardware cloth that bends easily and fails under pressure, our mesh is built with true 19 gauge galvanized steel wire. This extra thickness provides superior strength and rigidity, making it ideal for applications that demand real durability—such as predator-proofing chicken coops, rabbit hutches, and animal enclosures. It resists bending, stretching, and chewing far better than lightweight alternatives.

Material and size: The size of the black hardware cloth is 48 inch×100 ft square and 1/2 inch×1/2 inch thickness, black vinyl coated.

Heavy-Duty 19 Gauge Hardware Cloth Construction: This hardware cloth is made from thick 19 gauge welded steel wire, creating a rigid and stable structure that holds its shape during installation. It is designed for outdoor and DIY applications where strength and durability are important.
Feed, Water & Equipment Capacity
Once you’ve secured your flock against predators, you’ll shift focus to sustaining them daily through proper feed, water, and equipment management. Your 30 hens consume 7.5–15 lb of layer feed daily, requiring airtight, pest-proof feed storage containers holding 100–200 lb for convenient bulk purchasing. Position storage in an elevated, dry location to prevent moisture damage and rodent access. Aim to use feed within 1-2 months to ensure optimal nutrient retention for your flock. It’s essential to choose premium, complete feeds that meet their nutritional needs for the best health outcomes. Hens that receive adequate light exposure during the day are more likely to maintain regular egg production. In order to maintain their health and productivity, it is advisable to consider the monthly expense of feeding your chickens and budget accordingly. For water access, provide multiple drinkers delivering 15–30 pints daily across your coop and run. Install hanging tube or trough feeders with 15–20 feet of linear space to minimize competition and waste. Distribute feeders strategically throughout your setup, ensuring all hens reach food and water during peak feeding times without crowding or dominance issues.

Keeps Food Fresh and Flavorful: our GAMMA SEAL TECHNOLOGY, featuring a threaded locking system and double gaskets, create a controlled moisture balance making it the ideal airtight bird seed food storage container (suitable for dog and food, too)

1.The pets food storage bin will help you keep an organised and tidy home,Perfect for dry dog food, cat food, or bird seeds

AIRTIGHT SEAL, LOCKED TIGHT: Clamp the lid shut and a silicone gasket forms an airtight seal — keeping pet food fresh and curious paws out.
Egg Collection & Storage Systems
With your infrastructure in place and feed management established, you’re ready to focus on the final critical component: efficiently collecting and preserving your hens’ eggs.
Collect eggs twice daily, prioritizing morning retrieval before 10:00 a.m. when most laying occurs. Use plastic-coated wire baskets lined with soft towels to prevent cracking, stacking no more than five layers deep. Proper care can help ensure a longer lifespan for your hens, as Rhode Island Reds can live up to 10 years or more under excellent conditions. Providing adequate indoor space is crucial for your hens’ overall health and egg production, and external nesting boxes can facilitate easier egg collection. Ensure to have one nesting box for every 4-5 hens to reduce competition and stress during the egg-laying process. Additionally, a consistent supply of complete layer feed will support optimal egg production and hen health.
For your 30-hen flock, provide 6-8 nesting boxes filled with fresh straw. Install roll-away mechanisms to discourage broodiness and egg damage. Approach hens after feeding time for easier access to nesting boxes when collection is necessary.
Your storage methods depend on egg condition. Keep unwashed clean eggs unrefrigerated if the bloom remains intact. Refrigerate washed eggs immediately in dated cartons at proper temperatures. Discard cracked or soiled eggs promptly. Frequent collection maintains interior quality and prevents contamination, ensuring superior eggs consistently.

Portable: the convenient built-in side handles allow you to take this bag off the shelf, out of the closet, or from wherever you store it, you can carry it easily. Use multiple bins together to create a custom organization system that works for you. Keep your items organized.

Versatile – Ideal for storing and organizing snacks, produce, toys and other household essentials

Durable white resin coated metal basket
Manure Management & Sanitation
Efficient manure handling transforms a potential nuisance into a valuable resource while protecting flock health and your surrounding environment. For 30 laying hens, you’ll want to implement multiple manure collection methods to reduce labor and contamination. Install roost droppings trays beneath perches to capture concentrated manure daily, minimizing bedding fouling. Combine this with deep litter management using 8–12 inches of carbon bedding like pine shavings, maintaining proper carbon-to-nitrogen balance as droppings accumulate. Stir the litter periodically to prevent ammonia buildup and crusting. The decomposing litter generates heat during the breakdown process, helping to maintain warmth in your coop during colder months. Incorporating homemade chicken treats into your hens’ diet can further enhance their health and well-being. Store collected manure in covered areas to preserve nutrients and prevent runoff. Compost finished manure for several months before applying it to your garden, ensuring pathogen reduction and safe nutrient recycling.
Build Timeline & Difficulty Level
Because you’re planning a substantial structure for 30 laying hens, you’ll want to allocate 2–3 weeks for the complete project, though the actual hands-on construction typically spans 7–10 full days depending on your crew size, experience level, and site conditions. Including a well-designed chicken run will significantly enhance your hens’ living environment and safety, ensuring they have enough outdoor movement to stay healthy and happy. Additionally, incorporating nutritional benefits like okra into their diet can promote their overall well-being. During this time, it’s crucial to remember that your young hens will be in the pullet stage, where they undergo important physical and hormonal changes to prepare for future egg-laying.
Break your project phases into distinct segments: site preparation (1–2 days), structural build including framing and roofing (4–6 days), and interior fit-out (2–3 days). Your time estimation should account for permit approvals, which may extend your timeline by days or weeks. You may need to check with your local city regarding backyard chicken raising permits before beginning construction. Ensuring that you have adequate space requirements for your hens will also be crucial to their health and well-being, as overcrowding can lead to health problems. Adding a 10–25% contingency buffer accommodates unexpected challenges and custom features.
Difficulty remains moderate for experienced DIYers with carpentry skills. Electrical work requires licensed professionals, potentially extending your schedule. Proper planning and realistic time estimation guarantee quality construction without rushed corners.