You’ll need to start by checking local zoning laws and establishing clear breeding goals before selecting beginner-friendly breeds like Silkies or Speckled Sussex. Begin with 4–6 chicks to manage your budget and time effectively. Focus on choosing healthy stock with bright eyes and full combs, then learn proper egg collection, storage, and incubation techniques—maintaining 99.5°F temperature and 40–55% humidity for ideal results. Once you’ve mastered these fundamentals, you’re ready to explore advanced breeding strategies and genetic record-keeping systems.
Planning Your Flock Goals and Legal Requirements
Before you bring home your first flock, you’ll need to establish clear goals and understand the legal framework governing chicken keeping in your area. Start by checking your community ordinances, which dictate flock size, gender ratios, and housing standards. These legal considerations vary considerably by location, so verify zoning restrictions and permit requirements before purchasing birds. Additionally, knowing about coprophagy in chickens can be beneficial for understanding the health behaviors of your chicks during their early development stages. Understanding the importance of local ordinances will also help ensure that you comply with regulations specific to your municipality.
For flock compatibility, plan 3–6 hens as companions; they’re social animals requiring peers. Skip roosters if you’re prioritizing egg production. If you include one, maintain a one-rooster-per-ten-hens ratio to prevent over-mating and stress.
Begin with 4–6 chicks to manage time, housing, and budgeting effectively. Order early spring chicks to reach laying age at 4–6 months. Seek chicks from credible U.S. hatcheries to ensure disease-free birds with proper certifications. Prioritizing legal compliance and thoughtful flock composition sets you up for sustainable success.
Choosing the Right Breeds for Your Purpose
Once you’ve determined your flock size and legal constraints, selecting the right breeds becomes your next priority. Your choice hinges on understanding breed characteristics and your specific goals.
For egg production, consider Rhode Island Reds, which yield over 300 large brown eggs annually, or ISA Browns, known for consistent winter laying. If you want dual-purpose birds providing both eggs and meat, Plymouth Rocks and Wyandottes excel in cold climates.
Assess your climate conditions carefully. Buff Orpingtons and Dominiques tolerate cold well, while Black Australorps thrive in various environments. For beginners managing confined spaces, Silkies and Speckled Sussex adapt readily without flying away. Sussex breeds are particularly noted for their friendly and curious temperament, making them excellent choices for those new to poultry raising.
Match breed characteristics to your situation—egg production capacity, climate resilience, temperament, and confinement suitability—ensuring your flock meets your long-term objectives.

You Will Receive: our chick starter kit includes 1 x chicken coop heater, 1 x 0.8-gallon chick water drinker, 2 x 12-hole feeders, 2 x perches, 1 x 2.9-pound round feeder;...
Selecting Healthy Breeding Stock
Selecting Healthy Breeding Stock
Choosing quality breeding stock fundamentally determines your flock’s productivity and genetic health. You’ll want to evaluate several key indicators when selecting your birds.
Assess physical characteristics first. Look for bright, prominent eyes, full red combs and wattles, and wide pelvic bones spaced about three fingers apart—these signal vigor and laying potential. In yellow-skinned breeds, flat, well-bleached shanks indicate strong production rates. Verify feet are disease-free and bodies possess good size with adequate abdominal capacity. Regular health monitoring throughout the bird’s life ensures breeding stock remains free from disqualifying conditions that would compromise flock genetics. Additionally, birds with moderate egg production capabilities can be advantageous for maintaining a steady supply of eggs. Providing enriched diets that include safe treats such as ripe tomatoes can further benefit your chickens’ overall health. Additionally, having good guard dog breeds can help protect your breeding stock from potential predators. Incorporating homemade chicken treats can also provide essential nutrients and improve their overall well-being.
Next, observe behavioral traits. Select birds that forage actively, eat well, and mature early. You’ll want hens showing strong production persistence through late summer and short winter pauses, plus roosters exhibiting mating interest and early rising.
Source NPIP-certified birds from reputable hatcheries, selecting only the top 10% of flocks for breeding purposes.

32 fl oz organic chicken stock

Understanding Breeding Methods and Mating Systems
Now that you’ve selected quality birds for breeding, you’ll need to decide how to pair them together. Your choice of mating strategies depends on your goals, available space, and record-keeping capacity.
Flock mating works well for small backyard operations—you’ll simply let one rooster run freely with hens. For greater control, single mating pairs one male with one female, ideal if you’re fixing specific traits. Clan systems rotate males among family groups, preserving genetic diversity while reducing inbreeding depression. It’s also important to ensure that your chickens are free from parasites, such as fleas and other pests, to maintain a healthy breeding environment. Providing a balanced diet with homemade laying mash can also enhance the overall health and productivity of your breeding hens. Additionally, incorporating high-energy treats like corn on the cob can support chickens during colder months. A well-balanced diet rich in nutritional formulations is essential for maximizing breeding outcomes. Ensuring your breeding hens have an adequate supply of calcium sources is crucial for optimal eggshell quality.
Pen mating isolates your best birds in controlled groups, typically one rooster with three to ten hens. This approach minimizes disease spread and manages parentage effectively. Spiral Mating is a recommended breeding program that allows breeding father-to-daughter while avoiding sibling breeding to maintain genetic quality.
Each system offers trade-offs between labor intensity, genetic control, and productivity. Your selection depends on whether you prioritize simplicity or precise breeding outcomes.
Collecting and Storing Fertilized Eggs
You’ll want to wait at least 10 days after introducing your rooster before collecting eggs for incubation, as this allows time for consistent fertilization to occur. Collect eggs daily, prioritizing egg cleanliness by selecting only clean, normal-sized specimens while avoiding extremes. Typically, hens lay between 5 to 6 eggs per week, which can significantly affect your incubation plans.
Store your collected eggs at room temperature in marked cartons, turning them daily. For ideal hatch rates, maintain a storage temperature of 10°C (50°F) and use eggs within 7 days of collection. Never wash eggs, as water destroys the protective cuticle and allows bacterial entry. Bacteria such as salmonella, E. coli, and staphylococci can contaminate eggs and transmit disease to developing chicks if proper sanitation is not maintained. Keep storage areas dark to maintain embryo dormancy until incubation begins. These practices prevent unwanted development and contamination, dramatically improving your hatching success.

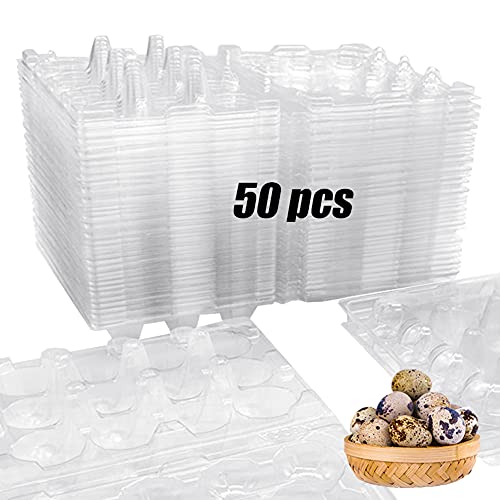
14 Slots - The trays are sized 13.5 x 4.2 inches and 3 inches deep with 14 vacant spaces. Each space holds the eggs firmly to avoid any kind of bruise or damage

High-Quality Material: Made of high-quality PE plastic, this plastic egg tray is strong and reliable, can be used over and over again, and is the best choice for those who need to display and sell different eggs on a regular basis
Package Includes:50 pack of quail egg cartons,each holds 12 quail eggs(3×4 grids).
Incubation Techniques and Monitoring
Once your eggs are properly stored and ready, the success of your hatch depends entirely on what happens inside the incubator. Your incubator setup requires running a 24-hour test with calibrated thermometers before loading eggs to confirm stable temperature distribution.
Maintain precise temperature monitoring at egg level: 99.5°F for forced-air or 101.5–102°F for still-air incubators, keeping variance within ±0.5–1.0°F to prevent developmental issues. A well-built coop is essential for keeping your flock safe and healthy, ultimately contributing to the success of your breeding efforts. Ensuring that your hens have access to clean, fresh water during the incubation period is crucial for their health and egg production, as chickens can only survive a short time without water, typically around 12 to 48 hours depending on temperature. During incubation, chicken eggs typically take about 21 days to hatch, with some variation depending on conditions. Incorporating different types of eggs, such as duck eggs, can enhance the nutritional profile of your flock.
Humidity control demands tracking air-cell growth through candling, maintaining 40–55% RH during days 1–18, then increasing to 65–75% RH at lockdown. Using a hydrometer helps you accurately measure and adjust humidity levels throughout the incubation period.
Egg turning prevents embryo adhesion—rotate eggs at least 12–24 times daily during incubation, using automatic turners when possible. Mark eggs manually if hand-turning to guarantee odd daily rotations. Stop turning at day 18 for lockdown, allowing embryos to reposition for hatching.

【2m Waterproof probe】Digital temperature controller 110V can be used in moisture and water environment, you can use it in home brewing, fridge, pet breeding, reptile, tank, incubation, fermentation, seedling heat mat, accelerating germination, ect.

✓ EFFORTLESS SET UP: Easily program your desired temperature or switch between Fahrenheit and Celsius using just 3 buttons on this temperature controller. Please note: The BN-LINK reptile thermostat controller is intended for heating devices only, such as reptile heating pads, seedling heat mats, and heat lamps.

[Powerful Performance & Safety] Equipped with a 15A high-power output, this plug in thermostat supports up to 1800W heating capacity; and ensures stable operation of high-power heaters even under extreme conditions, effectively preventing overload and protecting your equipment from damage
Preparing Brooders and Raising Chicks
The change from incubator to brooder marks a critical juncture in chick development, where environmental control shifts from embryonic support to direct heat management and biosecurity. You’ll need a draft-free brooder container with sturdy 18-36 inch walls and predator-proof covers. Select 1-2 inches of pine shavings for your bedding materials, ensuring non-slip surfaces that absorb moisture effectively.
For heat sources, brooder plates outperform heat lamps in safety, though 250W infrared lamps work adequately. Start temperatures at 90-95°F, decreasing 5°F weekly while monitoring chick behavior closely. Space requirements begin at 6 inches per chick initially, expanding as they grow.
Establish daily maintenance routines: clean bedding, check for stress indicators, and monitor ventilation strategies without creating drafts. Position feeders and waterers away from heat zones to prevent contamination and optimize your cleaning routines. Completely change bedding once or twice weekly based on crowding and cleanliness levels to maintain a healthy brooder environment.
Nutrition and Housing Throughout Growth Stages
As your chicks develop beyond the brooder stage, their nutritional demands and spatial requirements shift dramatically to match their rapid growth trajectory. You’ll shift from starter feed (18–24% protein) to grower rations (15–18% protein) around eight weeks, adjusting feed formulation based on breed and laying onset. Maintain low calcium throughout—under 1.25%—until production begins, then increase to 3–4% for layer birds. Adding apple cider vinegar to their water can also enhance nutrient absorption and support overall health during this critical growth phase.
Your housing systems must evolve accordingly. Provide 1–2 square feet per pullet in rearing pens with absorbent litter and non-slip flooring to prevent leg injuries during rapid skeletal development. Guarantee adequate ventilation with temperature gradation, and monitor body condition closely. Grit should be provided to aid in digestion and nutrient absorption throughout the growth period. Supply continuous fresh water and balanced micronutrients—vitamins A, D3, E, plus trace minerals—supporting bone, feather, and immune development throughout each growth stage.

MEDICATED CHICK STARTER FEED: This complete chicken feed is made with added Amprolium to aid in the prevention of coccidiosis, and contains 18% protein for weight gain, our chicken food is essential for your young birds.

COMPLETE STARTER FEED FOR CHICKS: Specifically formulated for chicks from hatching to 16 weeks, this non-medicated chick starter feed delivers balanced nutrition and essential nutrients to support strong, healthy early growth and development.

Prebiotics and Probiotics - Supports immune and digestive health
Health Management and Genetic Record Keeping
While your pullets progress through their growth stages, establishing robust health management protocols and thorough genetic records becomes essential to maintaining flock productivity and breeding success. You’ll implement rigorous biosecurity protocols—including visitor sanitization, equipment isolation, and strict quarantine procedures—to prevent pathogen introduction. Conduct regular health assessments to identify disease issues early, culling affected birds immediately to protect your flock’s integrity. Additionally, providing clean water is crucial for maintaining overall health and preventing illness, as it plays a key role in preventing coccidiosis outbreaks among chickens.
Simultaneously, you’ll maintain thorough genetic records tracking vaccination history, health outcomes, and breeding results. Document mortality rates and disease incidence patterns to inform selective breeding decisions. By recording pedigrees and monitoring genetic traits like disease resistance and climate adaptation, you’ll strengthen future generations. Implementing balanced nutrition programs ensures that breeding birds receive the proper proteins, carbohydrates, and fats necessary for reproductive success and offspring viability. This dual approach—combining disease prevention with strategic genetic selection—creates a sustainable breeding program that maximizes both bird welfare and productivity.