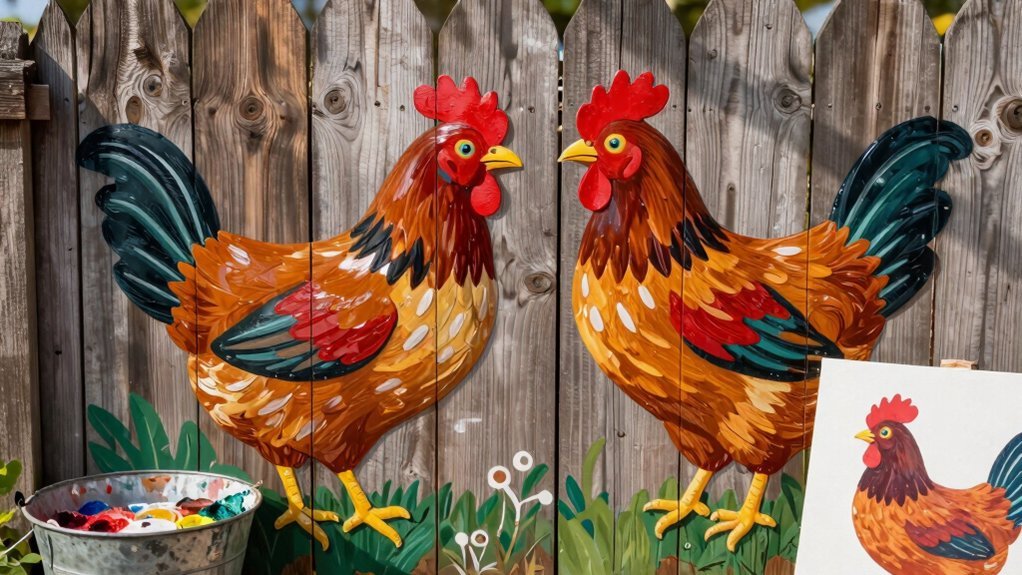
You’re probably wondering how to turn a simple chicken sketch into a weather‑proof piece for a patio wall or kitchen. Start with a low‑VOC, water‑based acrylic or natural milk paint; sketch an oval body and circle head, keep the head‑to‑body ratio about 1:3, and block in earthy reds, yellows, and cool neutrals with loose strokes. Add dry‑brush feather texture, then highlight eyes, beak, and comb, and finish with a semi‑gloss sealant that cures 48 hours before rain—next you’ll uncover style choices that match your décor.
Gather Materials and Choose Your Paint Medium
Why does the paint medium matter? You’re wondering which paint keeps your chickens safe while looking great. Obviously, low‑VOC or zero‑VOC options protect their sensitive lungs, so water‑based acrylics and natural milk paint are top picks. Milk paint brands give a rustic finish on wood and pair well with oil or wax sealers for durability, while ECOS Paints offers a zero‑VOC, animal‑friendly acrylic line. For those inspired by commercial designs, you might aim to replicate the look of black enameled bodies often seen on whimsical metal yard art sculptures. Just as cedar shavings release toxic compounds that damage respiratory systems, harsh paint fumes can similarly endanger your flock’s health. Research indicates that pine dust may be carcinogenic and harm liver function, reinforcing the need for non-toxic materials in any chicken-related project. Now, gather your supplies. Pick a set of acrylic brushes—flat for large areas, fine‑tip for combs and beaks. Add painter’s tape, drop cloths, a sandpaper block, and non‑toxic primer. Keep a water cup and lint‑free cloth handy for clean mixing. All right, you have the basics: safe paint, proper brushes, and prep tools. The takeaway? Choose a low‑VOC medium, stock the right brushes, and prep the surface before you start. Ready to prep the wood?
Sketch the Chicken’s Pose and Proportions
If you’re stuck on where to start, you’re not alone—many artists wonder how to lock down a chicken’s pose before adding feathers. First, grab an oval for the body and a circle for the head; overlapping them gives you a quick read on proportion. Use curved lines for the neck, then check anatomical diagrams to keep joint placement accurate.
Now, decide the gesture. A pecking pose stretches the neck forward, a running pose angles the body and lifts a foot. Sketch these gesture lines lightly; they guide later artistic exaggerations without breaking the silhouette.
Here’s the thing: place the beak, comb, and eyes with simple triangles and a center line on the head, keeping in mind that certain breeds feature prominent head crests that alter the standard circular outline. Legs follow next—two straight lines for stance, then basic foot shapes before toes appear.
All right, do a quick proportion check: head‑to‑body ratio should stay around 1:3, and the tail should balance the front. Erase and reshape as needed; a clean pose reads better than early detail. Keep in mind that breeds like the Polish or Sultan possess large feather crests which significantly change the head’s silhouette compared to standard varieties. When sketching these unique birds, remember that varieties like the white-crested black showcase how specific color patterns interact with the crest’s volume.
Takeaway: solid construction shapes and gesture lines give you a sturdy foundation for any chicken pose. Ready to block in base colors next? (Use light, sketchy lines for initial shapes.)
Block in Base Colors and Set a Cohesive Background
You’re probably wondering how to jump from a sketch to a painted chicken without drowning in detail. The trick is to set color relationships early, using a thin wash that defines light, mid‑tone, and dark zones. Choose a limited palette—earthy reds, yellows, a dark neutral, and a cool background hue—so the chicken and backdrop stay unified.
Now, block in the base colors with loose strokes: body, wings, comb, and legs each get a solid mass. Keep edges soft in the background, but stronger where the face meets the body. This value grouping creates a clear silhouette and guides where feather detail will later sit. The background layer must be dry before painting the chicken. While artistic interpretation allows for creativity, understanding that melanin and carotenoids are the primary pigments responsible for natural feather hues can help you select more authentic base tones. You can also reference specific shapes like the V-Shaped Combs found in Houdans to ensure your subject’s anatomy is accurate before applying texture. Remember that roosters typically develop larger combs faster than hens, a distinction that can add realism to your portrayal of gender differences.
All right, the takeaway: a simple underpainting, a cohesive palette, and smart value grouping give you a solid foundation before you add texture. Next, you’ll explore how to add shadows and highlights for feather depth.
Add Shadows and Highlights for Feather Depth
When you’re stuck wondering where to put the dark and light on a chicken, the trick is to think of the bird as a three‑dimensional form wrapped in layers of feathers. You’ll notice the deepest darks hug feather separations, wing folds, and overlap zones—those are your value control exercises. Start with a thin underpainting of cool shadows under the neck and wings; let them fade softly, not hard‑edged, unless you want a crisp contour.
Now, add highlights where light hits directly. Use tonal study drills to mix sky‑colored whites for glossy tips, sparingly placed on upper planes and curved edges. Remember, highlights should follow the feather flow, not blanket the whole plumage. Since chickens perceive a broader spectrum including ultraviolet light, consider how their unique vision might influence your choice of pigments to create a more biologically accurate representation.
All right, build depth with layered progressions. Light strokes gradually darken from tip to base, creating smooth value shifts. This layered approach keeps texture alive and avoids muddy color. Keep in mind that each contour feather grows from a follicle and can be actively raised or lowered by muscle action, so your painted lines should reflect this dynamic structure. While rendering these details, remember that most chickens have four toes with three pointing forward and one backward for gripping, which affects how the bird stands and casts shadows on the ground.
Takeaway: control shadows and highlights with value exercises and tonal drills, and you’ll give your chicken convincing depth. Next, try a quick dry‑brush pass to suggest texture.
Dry‑Brush and Texture Feathers for Realism
How do I make chicken feathers look real with dry‑brush? You’re probably wondering why a few light strokes can mimic plumage. Here’s the thing: dry‑brush picks up only the raised ridges, so you get natural lighting effects without flattening the texture.
Which brush gives the best feather texture?
Use a stiff, short‑bristled fan or dome brush. Load it with a tiny amount of paint, wipe excess, then glide at a shallow angle. Light pressure creates broken, streaky marks that follow the feather’s growth pattern, and a steeper angle adds a bit more pigment for highlights. Just as the Frizzle gene mutation alters keratin structures to create physical curls in real birds, your brushwork must manipulate paint to simulate those same structural deviations. Unlike standard poultry, Silkie chickens possess feathers lacking barbicels that create a unique silk-like texture which requires a softer, more layered dry-brush approach to capture their fluffy, pom-pom appearance. Other breeds like the Faverolle feature distinct beard-like facial feathers that demand careful brushwork to render their soft, fluffy look accurately.
How do I layer colors for depth?
Start with a dark wash or underpainting to settle into recesses. Then apply multiple dry‑brush passes, each a shade brighter—warm browns to creams to pale ochres. Color theory tells you that gradual hue shifts separate feather clusters and enhance depth. Keep strokes directional, arcing on curved feathers, and let each layer dry fully.
What’s the final tip for realism?
Mix soft and crisp edges, vary pressure, and avoid overworking. A few accent strokes suggest many feathers without outlining each one. Obviously, restraint preserves the broken texture.
Takeaway: Master brush choice, layer hues, and respect drying time to achieve lifelike feather texture. Next, ask yourself how you’ll add the final details that bring the chicken to life. The technique is especially effective for realistic feather texture when painting a majestic eagle.
Paint Final Details: Eyes, Beak, Comb, and Feet
If you’re stuck on how to make a chicken’s face pop, you’re asking the right question.
How do I place the eyes for maximum impact?
Eye placement matters. Put the eyes on either side of the head, just above the beak line, so the face stays readable. Large, round cartoon eyes give a friendly vibe; smaller ovals look more realistic. Add a tiny white highlight in each eye for a lively sparkle.
What tricks make the beak look three‑dimensional?
Shape the beak as a small triangle or upside‑down diamond, angle it slightly downward, and use yellow or orange. Paint a bright beak highlight near the tip; it instantly adds depth. While painting, remember that this hard structure is actually made of keratinous material which forms the crucial upper and lower mandibles.
How can I finish the comb and feet without overcomplicating?
Draw a simple red comb on top of the head, using layered tones for texture, keeping in mind that real roosters sport darker combs than hens. For feet, sketch three forward toes and a back toe with stick‑leg basics, then add small claws. Just as the tail relies on the pygostyle vertebrae for support, ensuring your painted chicken has a solid underlying structure will make the final details appear more grounded and realistic.
Takeaway: Spotting eye placement, adding beak highlights, and keeping comb and feet simple give your chicken a vivid, polished look. Next, consider how to protect your outdoor masterpiece.
Using a size zero pointed brush helps render fine details like the eye highlights and beak shadows.
Seal Your Outdoor Chicken Painting for Longevity
You’ve nailed the eyes, beak, comb, and feet, and now you’re wondering how to keep that bright chicken looking fresh outdoors. Obviously you need a waterproof sealing technique that locks in color and repels rain. First, sand any rough spots, wipe clean, then apply a semi‑gloss exterior‑grade paint. Once it’s dry, spread a thin coat of tung oil for natural water resistance, or use Pond Shield if you prefer a synthetic barrier—just don’t paint over Pond Shield, or it will peel. Now, set up an annual maintenance schedule. Every spring, inspect cracks, caulk corners, and re‑apply a fresh sealant coat. A 48‑hour cure before heavy rain guarantees durability. The takeaway: seal, cure, and repeat yearly for a chicken that stays vivid season after season. Ready to choose your finish? Unlike wooden structures that rot, properly sealed art can mimic the 20-year durability often seen in plastic chicken coops designed for long-term outdoor use. Just as a well-built coop requires balancing size and ventilation to keep a flock healthy, your painted decoration needs proper sealing to withstand the elements.
Select a Farmhouse, Vintage, or Whimsical Style for Display
You’re probably wondering which vibe fits your space, and that’s a smart place to start. For style selection, think about the room’s existing palette: a farmhouse kitchen loves cream, sage, and weathered wood, while a vintage nook thrives on faded reds and sepia, and a whimsical corner craves bright yellow and turquoise.
Here’s the thing: your display mood drives the approach. A cozy, nostalgic feel pairs well with reclaimed wood cutouts and distressed metal signs, whereas a playful, storybook vibe shines on canvas or painted stool tops with bold outlines.
All right, match surface choices to weather and traffic. Indoor shelves handle delicate enamel signs, but outdoor fences need sturdy reclaimed wood or tin trays.
Takeaway: pick the style that matches your color scheme, choose surfaces that suit the location, and let the mood guide your display approach. What’s your favorite palette for the next chicken piece? The wood pieces are pre‑cut from pine or 3/4‑inch plywood before painting.