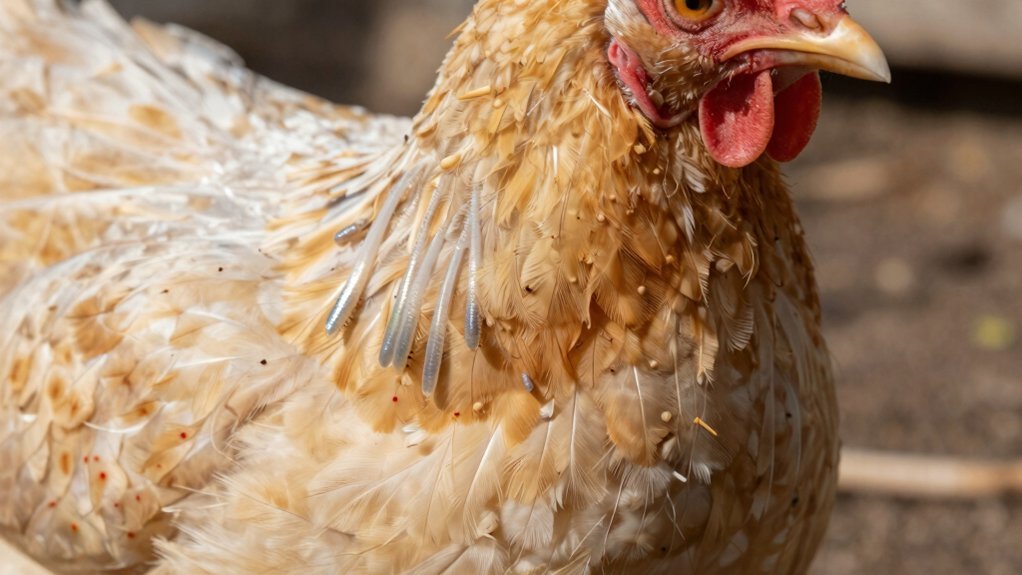
You’re right to worry—restless hens, pale combs, and tiny specks on feathers are the first red flags of mites. Look for ragged feathers around the vent, scabs on skin, and dark dust like ash in nesting boxes; these clues appear before anemia or egg loss. Check birds at night with a flashlight; active mites dart out from under wings or in roost cracks, confirming an early infestation. Spotting these signs now lets you act before the problem spirals.
Identify Early Mite Signs Before Damage
How can you spot the first signs of mites before your chickens look sick? You’re probably wondering why they seem restless, and that’s a great question. Behavior changes act as early indicators—more preening, frequent scratching, and rubbing against perches signal irritation.
What makes them avoid the coop? Suddenly, hens skip the roost, perch elsewhere, or shun nesting boxes because they feel the mites moving under their skin.
How does it affect their health? Pale combs, listlessness, and a dip in egg production appear before anemia or weight loss. These parasites spread rapidly through direct contact among birds or via contaminated equipment, making early detection vital to prevent severe infestations. Conducting a nighttime examination with a flashlight helps detect mites that hide in crevices and are most active after dark.
Takeaway: Watch for heightened preening, coop avoidance, and dullness. If you catch these signs early, you can intervene before damage spreads. Next, check the vent area for tiny dark specks. You may also find broken feathers especially around the vent, wings, and back, which indicates physical damage from the infestation.
Spot Feather and Skin Changes That Hide Mites
You’re probably wondering why your hens look fine yet you see ragged feathers and occasional scabs. You notice unexplained restlessness and a spike in coop aggression, but the signs hide in plain sight. Here’s the thing: mites gnaw at feather bases, so you’ll spot patchy loss on the neck, back, thighs and vent, often looking like off‑season molting. Crusted skin at those bases, red inflamed spots, and scabs betray the hidden feeders.
Why do legs look different? Scaly leg mites lift scales, leaving tiny white dots, rough bumps, and crusty patches. Thickened, bumpy shanks signal deeper infestation.
Takeaway: look for irregular feather loss, crusty skin, and scaly legs. If you see them, you’ve caught the mites before they spread. Next, consider how to inspect birds and coop for a full picture. Additionally, you should check for pale combs which indicate anemia caused by mites feeding on your flock’s blood at night. Consistency in treatment is key, as repeat applications are often necessary to break the mites’ life cycle. Since permethrin kills adult mites but not eggs, you must plan a second treatment seven days later to eliminate newly hatched parasites.
Inspect Birds and Coop for Poultry Mites
You’ve spotted ragged feathers and scabs, but you’re still wondering where the mites hide. Obviously, they love darkness, so you’ll do nighttime inspections with a torch. Hold the light close to roosts, perches, and nest‑box seams; the moving specks glow like tiny fireflies, and you’ll see surface evidence—grey ash‑like residue or black pepper‑like trails—right where they crawl.
Now, check high‑risk spots. Run your torch under the underside of roosts, into cracks, and along joints in wood, plastic, or metal. A quick swipe of double‑sided tape can trap a few for a closer look, confirming the infestation. While inspecting, remember to also examine the base of feathers closely for mites or their eggs, as this is a primary hiding spot distinct from the coop environment. It is crucial to distinguish these parasites from chicken lice, which are fast-moving beige insects typically found near the vent rather in the coop structure. Unlike mites, these species-specific parasites cannot survive on humans and will die quickly if they crawl onto people or clothing.
All right, what’s the takeaway? Nighttime torch work reveals both live mites and their surface evidence, letting you target the exact hiding places before the problem spreads. Your next move? Treat those spots and monitor bird behavior for improvement.
Differentiate Symptoms of Common Poultry Mites
One thing you’re probably wondering is how each mite type makes its own “signature” on your flock.
How do you tell Northern fowl mites from the red ones?
They gather around the vent, leaving black debris and intense itching. You’ll see pale combs and weight loss when anemia sets in, a sign of systemic anemia.
What makes scaly leg mites stand out?
They crust the legs, creating flaky scales that thicken into crusty lumps. Lameness and toe loss follow, but internal irritation stays local to the feet.
Why does a depluming mite look different?
It burrows at feather bases, pulling feathers and forming skin lesions. The irritation is internal, and severe cases can trigger systemic anemia.
What clues do chiggers and cyst‑mites give?
Chiggers cluster on the vent, causing droopiness and refusal to eat. Cyst mites form white nodules under the skin—internal irritation without obvious external debris.
Takeaway: Spot the body part, debris type, and anemia signs to pinpoint the mite.
Now, ask yourself where each species hides. While these pests primarily target poultry, they can temporarily bite humans and cause skin irritation if you are in close contact with infected birds. To fully eliminate these parasites, you must also treat the coop environment with natural desiccant dusts to kill any hiding in crevices. Effective management requires an integrated approach that combines treating the birds with thorough coop cleaning to break the mite life cycle and prevent reinfestation.
Locate Where Each Mite Species Hides
Where do the different mites hide? You’re probably wondering where each pest nests, and you asked the right question. The red poultry mite spends daylight in coop cracks, under roost bars, and in nest‑box litter, while it crawls onto birds at night, especially around the hock joint where scales stop. The northern fowl mite lives on the chicken continuously, clustering at the vent, under wings, and on the breast. Broody hens become hotspots because nest‑box corners and seams shelter colonies. Coop woodwork, undersides of roosts, floor edges, and baseboard gaps act as hidden reservoirs. Obviously, locating these spots speeds up Veterinary diagnostics and protects poultry lifespan. Transmission can also occur through contaminated objects such as transport cages or egg flats that introduce mites from outside sources. To prevent reinfestation, you must maintain strict biosecurity by excluding wild birds and rodents that often carry these pests into the coop. For effective control, apply food-grade DE thoroughly into these hiding spots to shred and dry out the pests without harming your flock.
Takeaway: Inspect cracks, roost undersides, and bird vents daily; then treat any hotspots you find.
How to Tell a Mite Problem Is Worsening?
How do you know the mite problem is getting worse? You’ll spot nighttime restlessness as birds hop, cluck, and preen far more than usual, especially when the coop darkens. Their plumage starts deteriorating—feathers thin beyond the vent, spreading to the breast, underwings, and back, and you see more pale combs and wattles indicating blood loss. Unlike the natural head-to-body pattern of molting where new feathers emerge, a worsening mite infestation causes persistent feather loss without healthy regrowth.
What else should you watch? Birds begin changing perch spots, avoid roosts, and skip nest boxes. Weight drops, feed intake slumps, and you notice dark scabs or crusting near vents. Mite debris and tiny eggs become visible on feathers, and you can actually see mites around the vent and under wings. To stop this escalation, you must implement accurate dosing based on bird weight and solution concentration to safely eliminate the parasites without risking overdose. Be aware that while these pests target chickens, dogs can temporarily carry the mites if they contact infested coops, potentially bringing the nuisance into your home.
Takeaway: If you notice these signs, the infestation is escalating, and you need to act before anemia and egg loss worsen. What’s your next move?
Take Quick Steps to Confirm and Control Mites
It’s frustrating when you can’t tell if the mites are just a nuisance or a serious threat, but you’re on the right track by looking for concrete signs.
How do I confirm the infestation quickly?
Now, part a few feathers at the vent and run a white cloth under the bird; falling specks reveal hidden mites. Use a flashlight at night on roosts and nesting boxes—red mites dart out, and gray dust signals waste. Compare several birds; if many scratch or avoid the coop, the problem is spreading.
What immediate actions stop the spread?
Here’s the thing: isolate the most affected birds in a separate pen—safe isolation prevents further contact. Then, remove all bedding and scrub every crack, perch, and box—aggressive cleaning kills eggs and larvae. Treat both birds and the coop with a proven dust or spray, or consider using fresh rosemary as a natural deterrent to help protect flock health.
What’s the next step after treatment?
Obviously, re‑inspect daily for a week; missed mites can rebound fast. Once you see fewer specks and calmer hens, you’ve turned the tide. Ready to set up a regular check‑up routine? Remember that repeated treatment cycles are essential to effectively eliminate mite eggs and larvae.